Do you have a question about the Behringer iNuke NU3000 and is the answer not in the manual?
Check and replace Schottky diodes D5, D12 (SS0540, SOD123, SMD, ROHS).
Check and replace resistors R9, R25, specified as 10k Ohm.
Check and replace resistors R10, R21, specified as 10 Ohm.
Check and replace resistors R11, R17, specified as 1k Ohm.
Check and replace transistors T2, T3 (MMBT4403, SOT23, ROHS).
Identify the FETs at positions T1 and T5 on the PCB.
Detach FETs and their associated heatsinks, noting the correct order of removal.
Remove residual solder from the PCB after component removal.
Place solder paste on the PCB and the rear of the new IGBT FET.
Position the new FET on the PCB and solder its feet securely.
Apply pressure with soldering iron to heat solder paste, ensuring FET is firm.
Place heatsinks back on the PCB with solder paste and solder into place.
Perform functional tests and reassemble the unit.
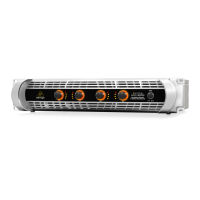
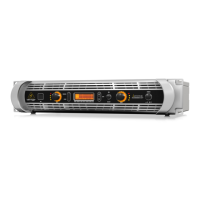
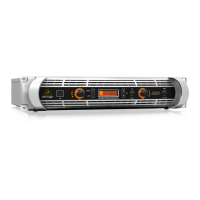
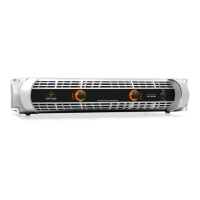
This document outlines a rework procedure for a specific electronic device, identified as Project POAHN, Model NU3000. The procedure involves replacing certain components to ensure proper functionality and is intended to be performed by a qualified technician. Adherence to all safety procedures is paramount to prevent injury or death.
The primary function of this rework is to replace existing MOSFETs (T1 and T5) with new IGBTs (T-IRGB-20B60PD1). This change likely improves the device's performance, efficiency, or reliability, as IGBTs often offer advantages over MOSFETs in certain power applications, such as higher voltage and current handling capabilities, lower conduction losses, and improved switching characteristics. The document also suggests checking and replacing several other associated components, including diodes (D5, D12), resistors (R9, R10, R11, R17, R21, R25), and transistors (T2, T3), to ensure the entire circuit operates optimally with the new IGBTs. This comprehensive approach ensures that the surrounding components are compatible and can withstand any changes in operating parameters introduced by the new IGBTs, thereby preventing premature failure or degraded performance.
The usage features of the device, post-rework, are expected to be enhanced due to the component upgrade. While the document doesn't explicitly detail the device's end-use, the nature of the components (power transistors) suggests it is part of a power conversion or control system. The replacement of MOSFETs with IGBTs typically results in a more robust and efficient power stage. This could translate to better power delivery, reduced heat generation, or improved stability under various load conditions. For example, if the device is an audio amplifier, the upgrade might lead to cleaner power delivery, resulting in improved sound quality and reliability. If it's a power supply, it could mean better regulation and efficiency. The document's emphasis on ensuring a flat surface for the components and proper soldering indicates that thermal management and electrical contact are critical for the device's long-term performance and reliability.
Maintenance features are primarily focused on the rework process itself, which can be considered a form of corrective or upgrade maintenance. The detailed, step-by-step instructions provided in the document serve as a guide for technicians to perform this specific maintenance task accurately. The process begins with locating the existing FETs (T1 & T5) on the PCB. The next critical step involves carefully removing these FETs, followed by the heatsinks. The document specifically advises removing the legs first, then the FET, and finally the heatsink, which is a crucial detail for preventing damage to the PCB or other components during removal. After removal, the PCB must be thoroughly cleaned to remove any residual solder and flux, ensuring a clean surface for the new components. This cleaning step is vital for good solder joints and preventing electrical shorts or corrosion.
The installation of the new IGBTs involves several precise steps. First, solder paste is applied to the small square on the PCB and also to the rear of the new IGBT FET. This ensures proper thermal and electrical contact. The new FET is then placed on the PCB, and its feet are soldered into position to secure it. A key instruction here is to apply pressure with a soldering iron to the FET, allowing the solder paste to heat up and melt. The document emphasizes confirming that solder has melted around the inner circle and edges, recommending a large tip iron and medium temperature for no longer than 10 seconds. This technique ensures a strong, reliable solder joint and proper thermal transfer. The same process is repeated for the second FET.
Once both FETs are firmly in place, with a flat surface on the PCB, the heatsinks are reinstalled. Solder paste is applied between the heatsink and the PCB before soldering the heatsinks into place. The document includes a helpful tip: "Easy to work here with heatsink bent upwards," suggesting a technique to facilitate the soldering process. This attention to detail in the instructions helps ensure that the heatsinks are properly attached, which is crucial for dissipating heat generated by the IGBTs and maintaining their operating temperature within safe limits. Proper thermal management is essential for the longevity and reliability of power electronic components.
Finally, after all components are installed and secured, the document instructs to "Test all functions and assemble." This final step is critical to verify that the rework has been successful and that the device operates as intended. Testing ensures that the new components are correctly integrated and that the device's overall performance meets the required standards. The assembly step then involves putting the device back together, ready for its intended use.
In summary, this document provides a detailed maintenance procedure for upgrading power components in an electronic device. It highlights the importance of precise execution, proper component handling, and thorough cleaning, all of which contribute to the device's enhanced functionality, reliability, and extended lifespan. The instructions are tailored for a qualified technician, underscoring the complexity and critical nature of the rework.
| Number of Channels | 2 |
|---|---|
| Class | D |
| Total Harmonic Distortion (THD) | < 0.5% |
| Signal-to-Noise Ratio | > 100 dB |
| Damping Factor | > 200 |
| Input Connectors | XLR, 1/4" TRS |
| Output Connectors | Binding Posts, Speakon |
| Power Output (2 Ohms) | 1500 W per channel |
| Power Output (4 Ohms Bridged) | 3000 W |
| Frequency Response | 20 Hz - 20 kHz |
| Input Sensitivity | 0.775V |
| Input Impedance | 20 kOhms balanced |
| Controls | Level |
| Indicators | Power, Signal, Clip |
| Cooling | Fan-cooled |
| Protection | Short circuit, thermal |