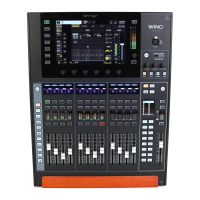
28 WING COMPACT Quick Start Guide
Quick Start Guide 29
8. Shortcuts
PURPOSE ENTER MODE EFFECT EXIT
Deactivate Main Display
touch control
Hold SETUP, ALT (unlabeled
button) and CLR SOLO,
until a small X is shown in the
status bar of main display
No touch events will have any eect, while the small X is shown.
The console will keep operating as usual otherwise.
Leaving this mode will calibrate the touch interface and render it
operational again.
Hold ALT and CLR SOLO until
the X disappears
Hold ALT (unlabeled
button) and CLR SOLO
for > 1.5s
Resets the touch panel (might help to temporarily x ghost touch
issues for some time)
Touch UI >
Ghost Click Test
Hold METERS and HOME for 5s
while powering the console up
OS-Drive > mount USB
Hold ALT (unlabeled button)
while powering the console up
(screen stays dark)
Console appears as two drives on your computer (WING OS for the
console operating system, and WING DATA for snapshots, etc.).
Eject the drives on your
computer
Shutdown and Restart
Hold EFFECTS and press HOME
after initiating Shutdown from
Setup screen
Console will shut down safely and restart automatically
Surface >Test Mode
Hold ALT (unlabeled button)
while powering the console up
Same as OS-Drive mode. Surface is in test mode until console
boots up.
Surface Lock
Hold the HOME button down
for~1.5s
Locks the console surface, while audio and remote control keep
working unaected.
Any combination of buttons (only those around the touch screen)
that was held down while engaging the lock will be stored
as “pass code” for unlocking. You will need to press the same
combination of buttons when disengaging the Lock.
Hold HOME button for ~1.5s
again together with the “pass
code” of buttons that were
pressed while locking,
OR
power-cycle the console
Initialize console (only
temp storage, no
snapshots etc. will be
erased)
Hold CLR SOLO while powering
the console up
Same as using INITIALIZE (from the SETUP page) but before the
console loads any saved state (in case the last loaded snapshot
somehow crashes the console leading to a boot loop)
Take screenshot Hold CLR SOLO then press UTILITY
Stores a bmp of the current screen on your USB drive. A folder
called ‘screens’ needs to be created in the root of the USB
driverst.
Bypass automatic load of
startup les
Hold LIBRARY while powering the
console up
Does not load STARTUP*.snap, STARTUP*.snip and STARTUP*.show
les in the STARTUP directory during boot
Conguring optional
hardware, i.e. internal
AoIP modules for Dante
or WSG
Hold UTILITY for 5s while
powering on
Conguration dialog allows to specify the hardware option
7. Firmware updates
The WING console rmware can be easily updated via USB. Download the rmware le from the product page on behringer.com and follow these steps:
1. Open the SETUP/GENERAL page and click on WING OS.
2. Connect a USB cable to the rear panel port and to your computer.
3. A virtual drive will appear on your computer, similar to connecting a ash drive or external hard drive. Double click the drive to open.
4. Drag the new rmware le into the drive. Although WING always boots using the most recent rmware in that drive, it is recommended to delete older rmware
les or move them to a subfolder.
If the console does not boot up normally, you can still update the rmware using this procedure:
1. With console powered o, connect a USB cable to the rear panel port and to your computer.
2. Press and hold the button below the main meter to the right of the Main Display, then power the console on.
3. An OS and DATA drive will appear on your computer, similar to connecting a ash drive or external hard drive. Double click a drive to open.
4. Drag the new rmware le into the OS drive.
Note, WING will always boot using the most recent rmware in that drive.
5. After the le has transferred, eject the virtual drive. The console should reboot automatically with the new rmware installed. If it doesn’t, power cycle the
console manually.
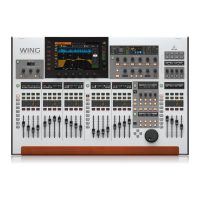
WING COMPACT Overview