13/36EN
Refrigerator / User Guide
4 Installation
4.1 Right place for installation
Contact the Authorized Service for the
product's installation. To ready the product
for installation, see the information in the
user guide and make sure the electric and
water utilities are as required. If not, call
an electrician and plumber to arrange the
utilities as necessary.
B
WARNING: The manufacturer
assumes no responsibility for
any damage caused by the work
carried out by unauthorized
persons.
B
WARNING:
The product’s power cable must
be unplugged during installation.
Failure to do so may result in death
or serious injuries!
A
WARNING: If the door span is
too narrow for the product to
pass, remove the door and turn
the product sideways; if this does
not work, contact the authorized
service.
• Place the product on a flat surface to
avod vbraton.
• Place the product at least 30 cm
away from the heater, stove and
smlar sources of heat and at least 5
cm away from electrc ovens.
• Do not expose the product to
drect sunlght or keep n damp
envronments.
• The product requres adequate ar
crculaton to functon effcently.
• If the product wll be placed n an
alcove, remember to leave at least
5 cm dstance between the product
and the celng and the walls.
• Do not nstall the product n
envronments wth temperatures
below -5°C.
• Your product requres adequate ar
crculaton to functon effcently.
If the product wll be placed n an
alcove, remember to leave at least 5
cm clearance between the product
and the celng, rear wall and the
sde walls.
• If the product wll be placed n an
alcove, remember to leave at least 5
cm clearance between the product
and the celng, rear wall and the
sde walls. Check f the rear wall
clearance protecton component s
present at ts locaton (f provded
wth the product). If the component
s not avalable, or f t s lost or
fallen, poston the product so
that at least 5 cm clearance shall
be left between the rear surface
of the product and the wall of the
room. The clearance at the rear s
mportant for effcent operaton of
the product.
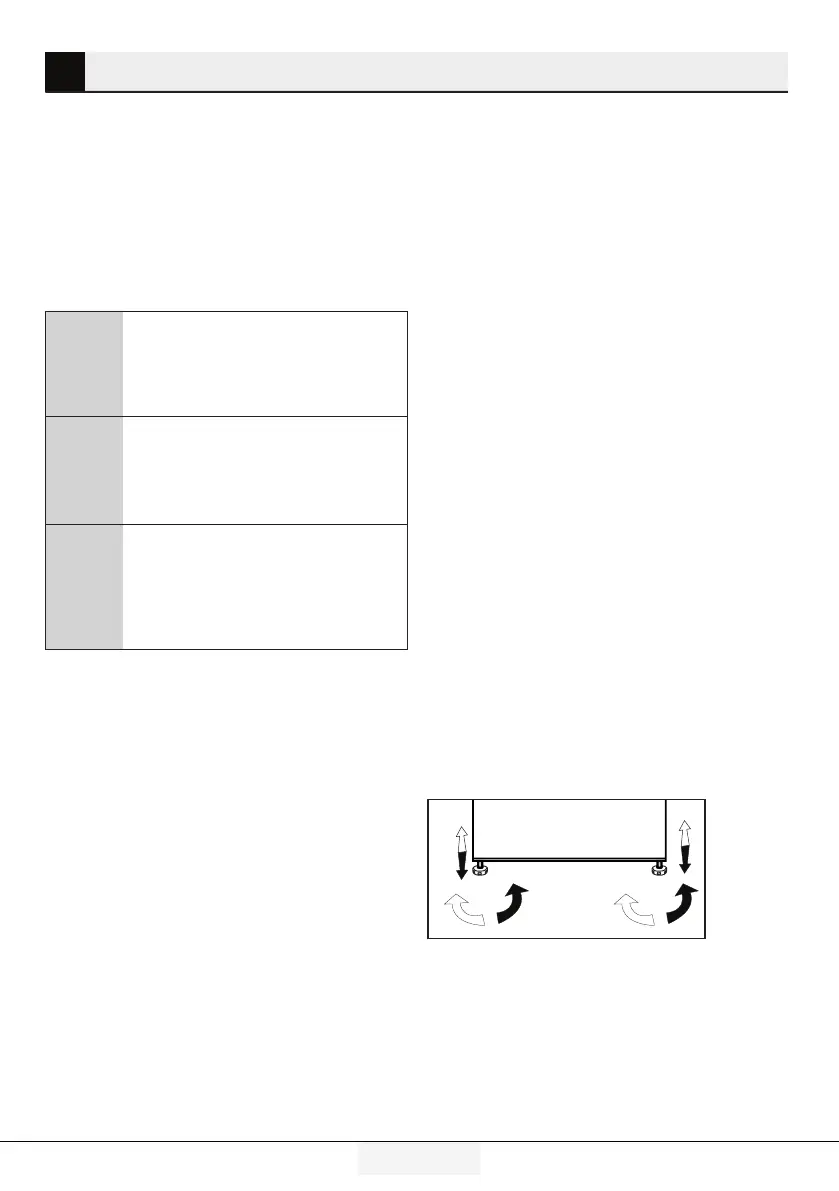
4.2 Adjusting the stands
If the product is not in balanced position,
adjust the front adjustable stands by
rotating right or left.
A
Read the “Safety Instructions” section first!