EasyManua.ls Logo

Bell'O PP-59 User Manual

Bell'O PP-59
12 pages
To Next Page IconTo Next Page
Page #1 background imageLoading...
Page #1 background image
PP-59 Optional Flat Panel TV Mounting System
ASSEMBLY INSTRUCTIONS
ITALIAN DESIGNED
A
P
RODUCT
OF
CHINA PA
TENT
PENDING
Bell’O International Corp. will not be responsible for failure to assemble as directed or for the improper assembly, use or handling of this stand. © 2006 BELL’O INTERNATIONAL CORP.
Question and Answer IconNeed help?

Do you have a question about the Bell'O PP-59 and is the answer not in the manual?

Bell'O PP-59 Specifications

General IconGeneral
BrandBell'O
ModelPP-59
CategoryTV Mount
LanguageEnglish

Summary

PP-59 Flat Panel TV Mounting System Assembly Instructions

Product Welcome and Compatibility

Customer thank you and list of compatible furniture cabinet models.

Parts List Overview

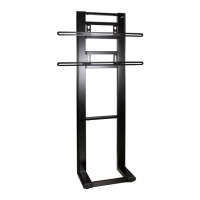
Identifies all physical components included with the mounting system.

Hardware and Safety Guidelines

Lists all fasteners, tools, and critical safety precautions for assembly and use.

Assembly Step 1: Right Upright Frame

Attaches cross bars to the right upright frame using smaller screws.

Assembly Step 2: Left Upright Frame

Repeats the assembly process for the left upright frame.

Assembly Step 3: Install Leveling Feet

Attaches four leveling feet to the bottom of both upright frames.

Assembly Step 4: Position TV and Top Bracket

Positions TV to determine height and attaches the top mounting bracket.

Assembly Step 5: Measure for Bottom Bracket

Measures distance between mounting bars to determine bottom bracket location.

Assembly Step 6: Attach Bottom Mounting Bracket

Attaches the bottom mounting bracket to the upright frames.

Assembly Step 7: Secure System to Cabinet

Mounts the assembled system to the rear of the furniture cabinet.

Assembly Step 8: Mount Bars to TV Rear

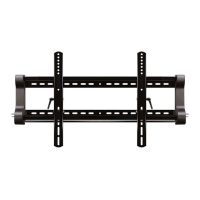
Attaches mounting bars to the back of the flat panel TV.

Assembly Step 9: Mount TV onto System

Lifts and secures the TV onto the mounted brackets.

Cable Management System Features

Explains the use of CMS holes for hiding wires and cables.

Product Warranty Information

Details the one-year limited warranty terms and conditions for the product.

Related product manuals