4
Installation
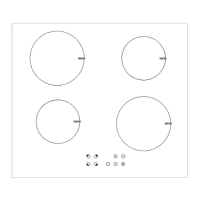
Installing the ceramic hob
The kitchen area should be dry and aired and equipped with efficient ventilation.
When installing the ceramic, easy access to all control elements should be
ensured.
This is a Y-type design built-in ceramic, which means that its back wall and
one side wall can be placed next to a high piece of furniture or a wall .Coating
or veneer used on fitted furniture must be applied with a heat-resistant
adhesive (95°C).This prevents surface deformation or detachment the
coating.Hoods should be installed according to the manufacturer’s instructions.
Assembly of ceramic hob :
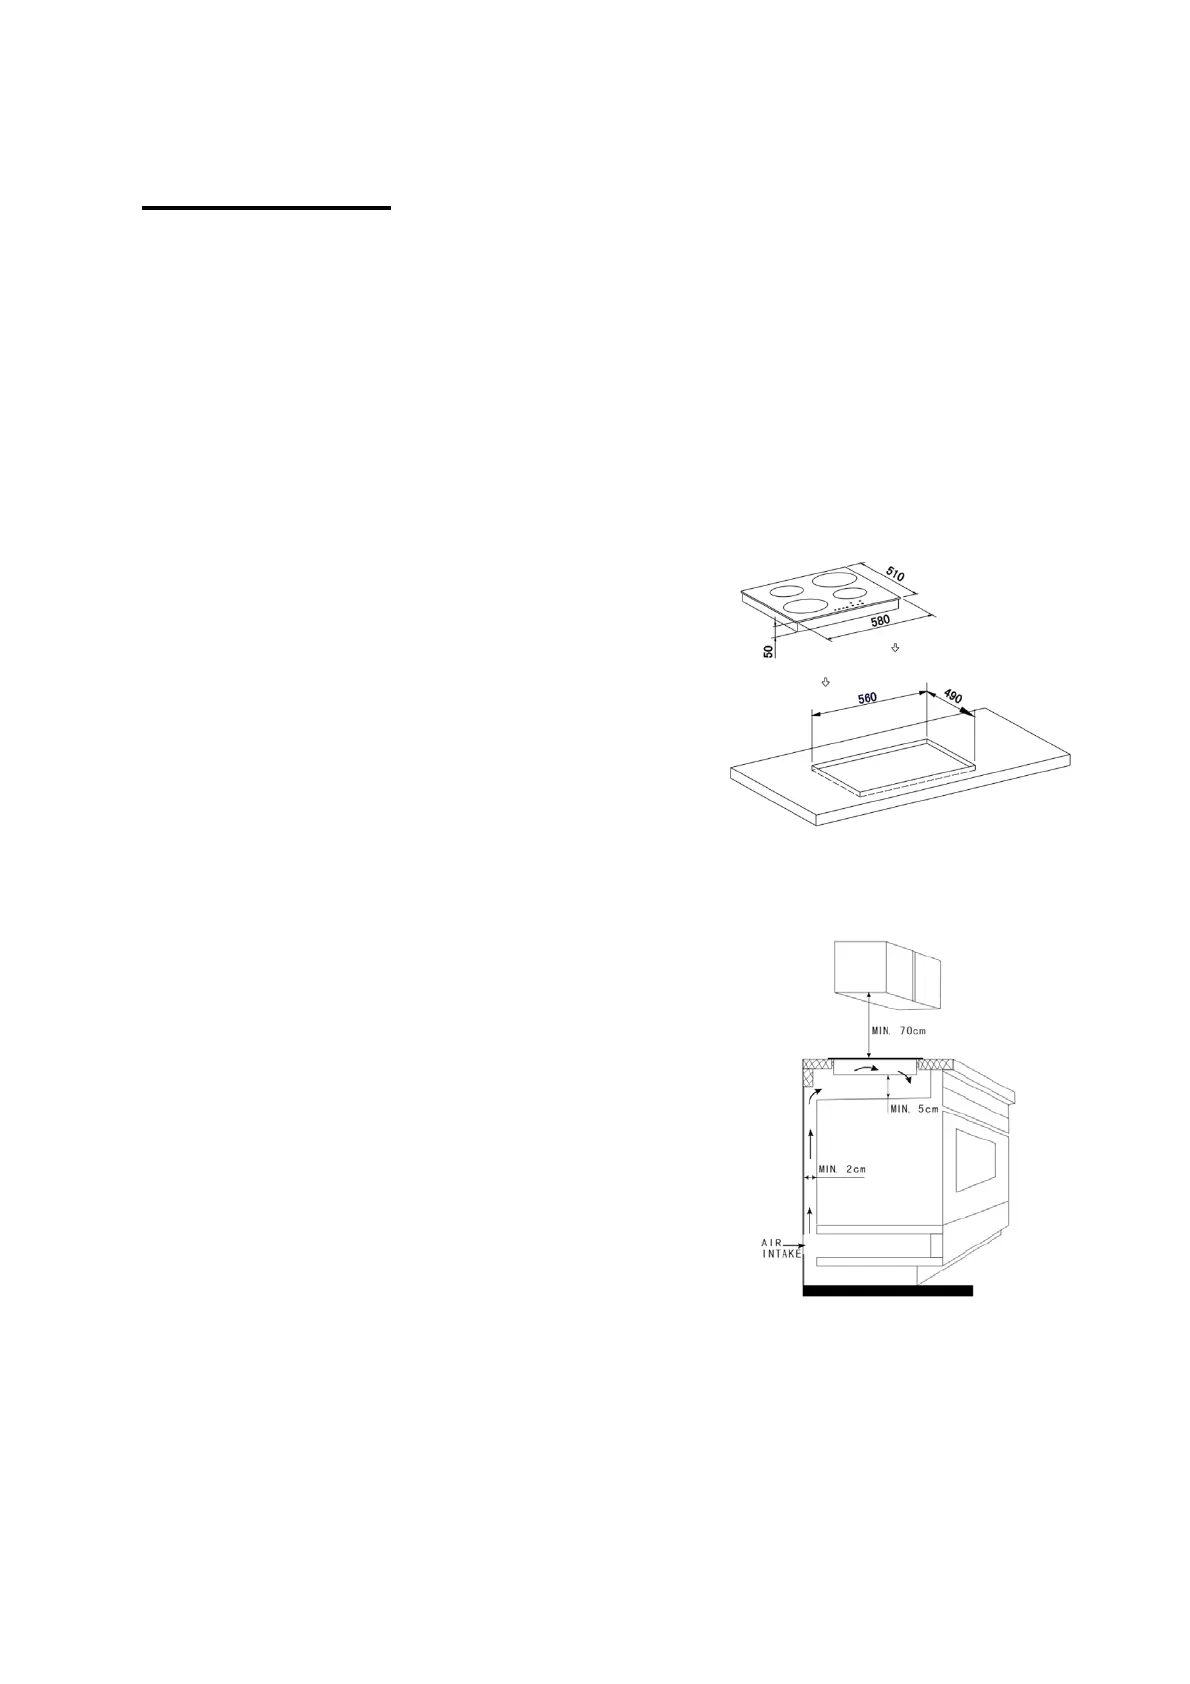
Make an opening with the dimensions given in
the diagram for the hob to be mounted on the
worktop.
Check seal for perfect fit and overall cover.
Lower the ceramic hob into place and align
correctly.
Using a standard screwdriver, tighten the
tension clamps evenly starting at the centre and
moving diagonal, until the built-in rim is tight on
the worktop.
Cut a hole in the worktop that corresponds with the drawing shown above.
IMPORTANT: You must observe the ventilation
requirements shown in the drawing opposite.
IMPORTANT: There are ventilation holes around
the outside of the hob. YOU MUST ensure that
these holes are not blocked by the work top, when
you put the hob into position (see drawing opposite).
IMPORTANT: Do not use a silicon sealant to seal
the appliance against the aperture. This will make it
difficult to remove the hob from the aperture in
future, particularly if it needs to be serviced.
Carefully turn the hob back over and then gently lower it into the aperture hole that
you have cut out.
There are holes on the base or the sides of the hob that you can fix the four
brackets to. There are three holes in each one of the brackets.
You should place the bracket on the underneath of the hob, in a position that is
appropriate for the aperture that you have cut out. Using the screws provided, fix