27
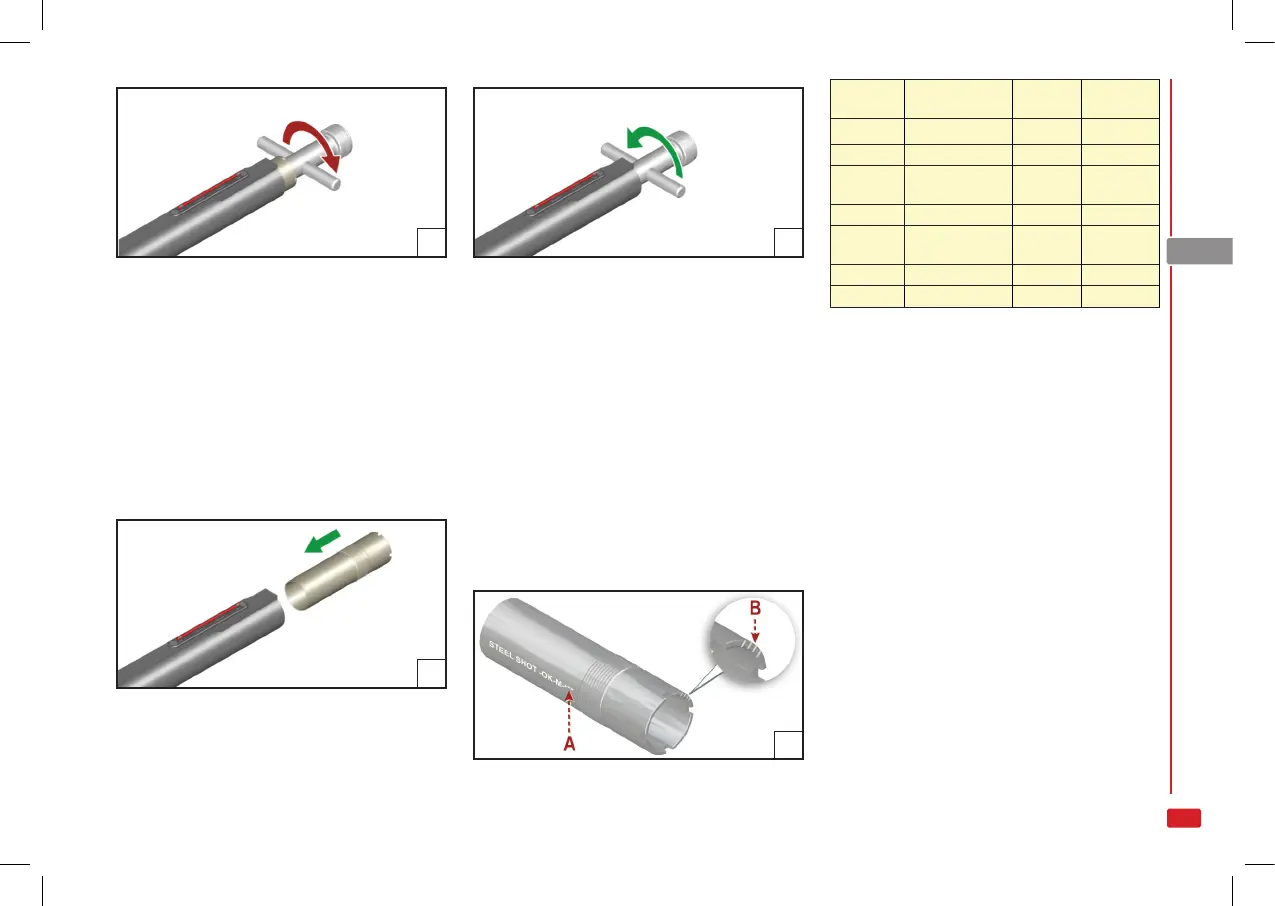
2. If the threaded seat of the choke on the
barrel is dirty, clean it.
3. Lubricate the threads of the choke tube,
to be installed in the barrel, with a good
quality lubricant.
4. Fit the required type of choke in its
place in the barrel, being careful to in-
sert the threadless end of the choke in-
side the barrel (g. 9) before screwing it
onto the thread of the barrel.
5. Finish tting the choke by rmly screw-
ing it in place with the special wrench
(g. 10).
Important: a correctly tted INTERNAL
choke should not extend past the bar-
rel muzzle.
Important: before using the shotgun
again, make sure that the choke
wrench has been removed from the
barrel muzzle.
Benelli chokes are marked for easy
identication (g. 11 - A).
Where present, the notches on the
front of each choke tube (g. 11 - B)
make it easier to recognize the choke,
even when it is tted.
Notches
Choke/
marking
Symbol Steel shot
LONG SHOT NO
I Full X NO
I I
Improved
Modied
XX NO
I I I Modied XXX OK
I I I I
Improved
Cylinder
XXXX OK
I I I I I Cylinder XXXXX OK
AMPLIATOR NO
Warning: if using an “AMPLIATOR”
choke, we recommend carried out
maintenance operations (unscrew the
AMPLIATOR from the barrel and clean
it) every day after use, to prevent any
clogging caused by red rounds.