Do you have a question about the BenQ EW2480 and is the answer not in the manual?
Details requirements according to ANNEX VII of DIRECTIVE 2012/19/EU on waste electrical and electronic equipment.
Lists potential hazardous substances like Pb and BFRs in LCDs and their disposal requirements.
Place the monitor face down and release the screw located at the bottom of the base.
Release screws on the back cover and slide the stand downwards to remove it.
Release screws, use a tool to open latches from the top sides, and disconnect cables.
Tear out tapes, release top frame screws, disconnect cables, and remove hinge bracket screws.
Turn over main frame, remove mylar, and release screws to separate the board.
Carefully pull down the bezel to separate the panel from it.
Take out the cover, release screws on the sensor boards, and disconnect cables.
Press the key button to take the key board out of the bezel.
Extract the speakers directly from the back cover.
Prepare the main board and the main frame for the assembly process.
Place the board onto the main frame and fasten it by tightening screws.
Attach the sensor board to the bottom center of the bezel following reverse steps.
Attach the key board to the bezel following the reverse steps.
Place the assembled bezel onto the monitor panel.
Fix the hinge bracket to the panel by tightening the screws.
Connect the assembled main frame to the panel, attaching all cables and tapes.
Install the speakers onto the back cover.
Return the back cover to the panel and tighten all screws.
Place the sensor cover into its correct position.
Slide the stand onto the monitor until it clicks into place.
Assemble the base to the stand by tightening the thumbscrew to secure it.
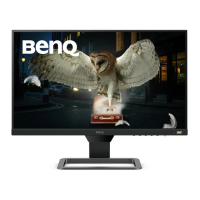
| Color | black/metallic gray, gray |
|---|---|
| Screen Type | led |
| Tiltable | yes |
| Wall Mount | 100mm x 100mm |
| Webcam | no |
| OS Compatibility | windows, apple ios |
| Screen Size | 24 inches |
| Panel Type | ips |
| Aspect Ratio | 16:9 |
| Resolution | 1920 x 1080 |
| Native Resolution | 1920 x 1080 |
| Refresh Rate | 75hz |
| Horizontal Viewing Angle | 178 degrees |
| Vertical Viewing Angle | 178 degrees |
| Response Time | 5 milliseconds |
| Brightness | 400 candela per square meter |
| Contrast Ratio | 1000:1 |
| Pixel Pitch | 93 pixels per inch |
| Synchronization | freesync (amd adaptive sync) |
| HDR | yes |
| Built-In Speakers | yes |
| HDMI Ports | 3 |
| Headphones Output | yes |
| Height with Stand | 16.4 inches |
| Width with Stand | 16.41 inches |
| Depth without Stand | 7.3 inches |
| Height without Stand | 13.5 inches |
| Net Weight without Stand | 11.23 pounds |