39 Menu operation
Display
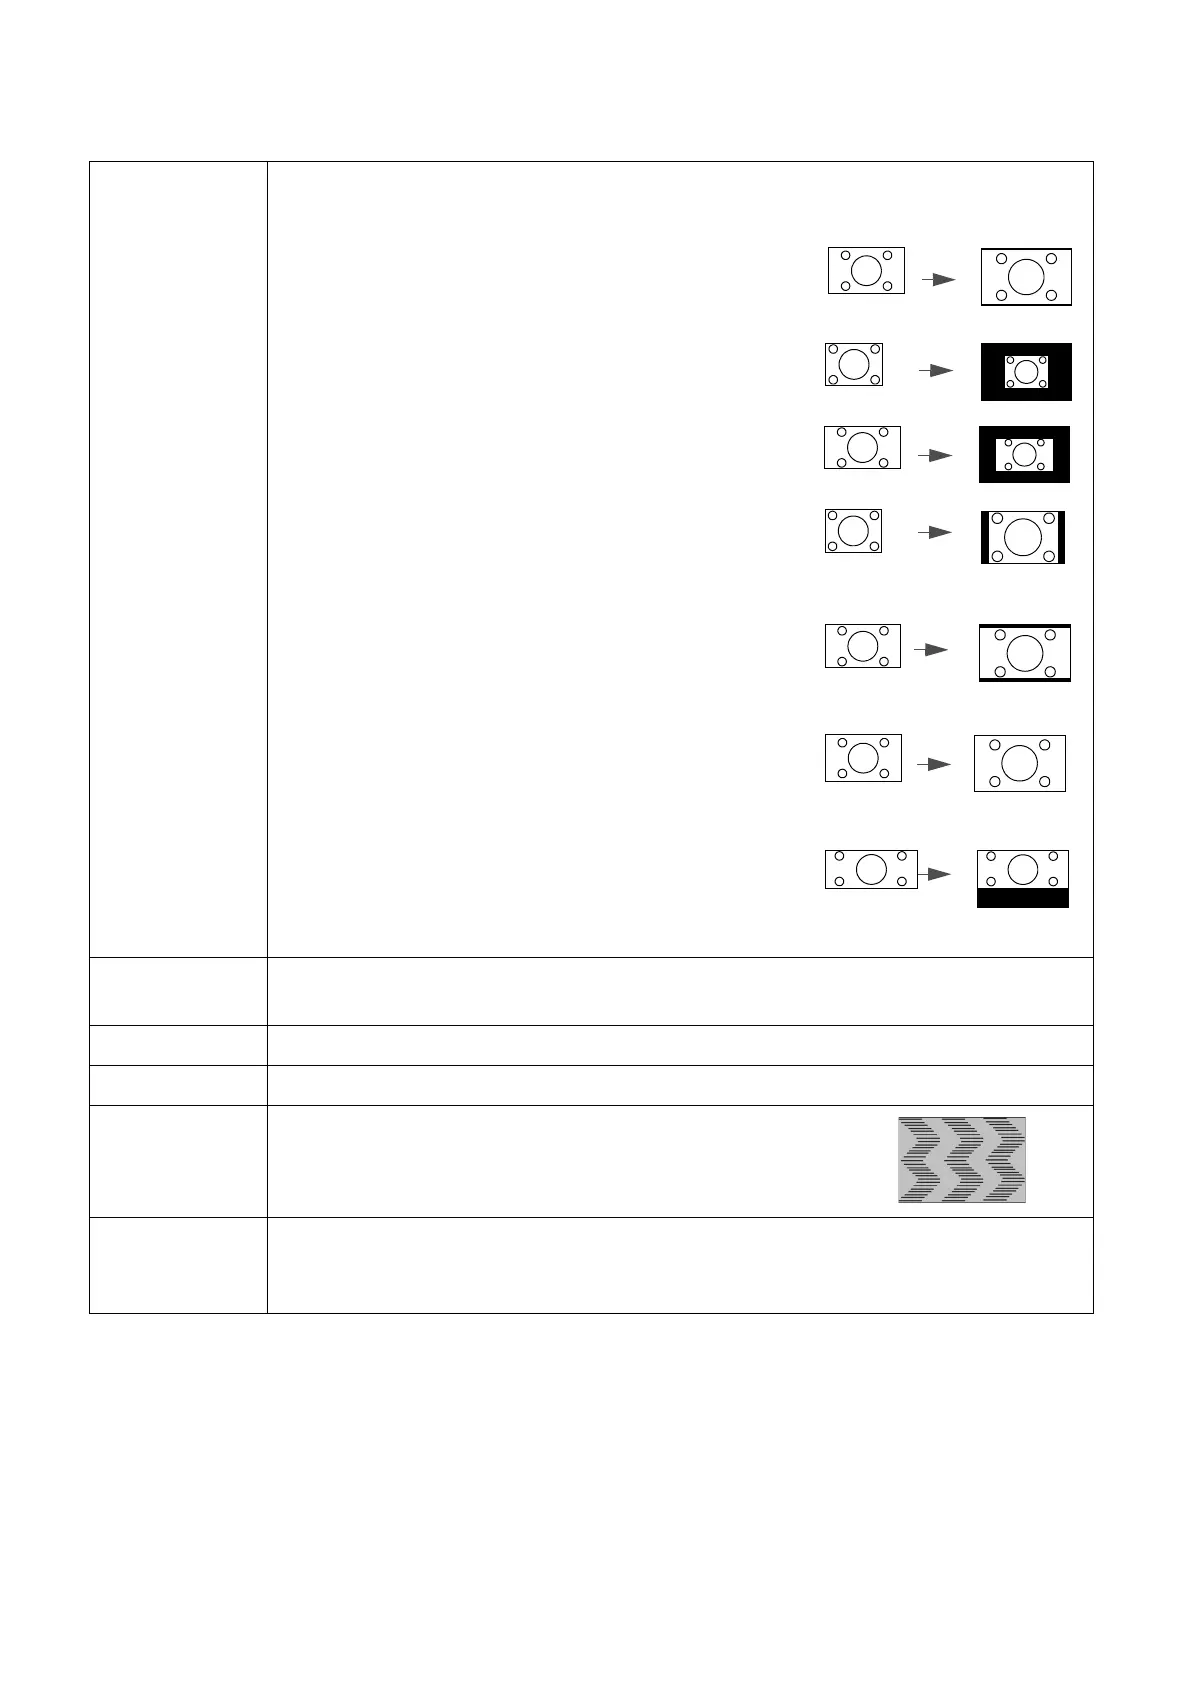
Aspect Ratio
There are several options to set the image's aspect ratio depending on your input
signal source.
• Auto: Scales an image proportionally to fit the
projector's native resolution in its horizontal or
vertical width.
• Real: Projects an image as its original resolution and
resizes it to fit within the display area. For input signals
with lower resolutions, the projected image will be
displayed in its original size.
• 4:3: Scales an image so that it is displayed in the center
of the screen with a 4:3 aspect ratio.
• 16:9: Scales an image so that it is displayed in the
center of the screen with a 16:9 aspect ratio.
• 16:10: Scales an image so that it is displayed in the
center of the screen with a 16:10 aspect ratio.
• 2.4:1: Scales an image so that it is displayed aligned
with the upper edge of the display region with a 2.4:1
aspect ratio.
2D Keystone
This function provides manual 2D keystone adjustment and auto vertical keystone
adjustment. See Correcting keystone on page 17.
Corner Fit See Adjusting Corner Fit on page 18.
Test Pattern Built-in images for checking if the projected image is free from distortion.
PC &
Component
YPbPr Tuning
• Phase: Adjusts the clock phase to reduce image
distortion.
• H. Size: Adjusts the horizontal width of the image.
Position
Displays the position adjustment page. To move the projected image, use the
directional arrow keys. This function is only available when a PC signal (analog RGB)
is selected.