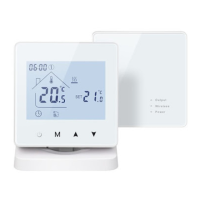
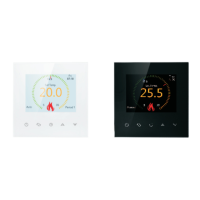
The BOT-R6X Wireless Gas Boiler Thermostat is an intelligent digital thermostat designed for floor heating systems. It controls the working state of electric valves by comparing the ambient temperature with a set temperature, aiming to achieve comfort and energy savings.
Function Description:
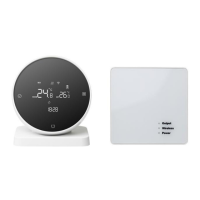
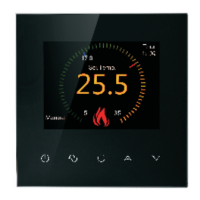
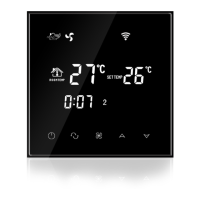
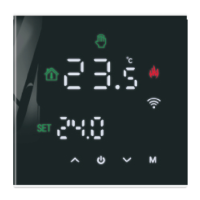
The thermostat operates by sensing the ambient temperature and adjusting the heating system to maintain a desired set temperature. It features both manual and automatic operating modes. The device includes a launch panel and a receiving panel that communicate wirelessly. The receiving panel has a code matching key, an output indicator lamp, a code matching indicator, and a power indicator. The launch panel features ON/OFF, Mode switch (M), and Regulation (A/V) keys.
Important Technical Specifications:
- Temperature Sensor: NTC
- Temperature Accuracy: ±1°C
- Self-Consumed Power: <170uW
- Voltage: Three 1.5V batteries
- Load Current: 3A (Resistive)
- Protection Grade: IP20
The wiring diagram for the receiving panel shows connections for Zero, Fire, Pump, K1, and K2. K1 and K2 are passive linkages for wall-hung furnaces, with "Normally Open" indicating the motorized valve remains open and "Normally Close" indicating the motorized valve remains closed. The manual notes that some circuits involve strong electricity and should be installed by professionals.
Usage Features:
- ON/OFF Key: Press once to turn on or off. Press again while shutting down to close all valves.
- Mode Switch (M) Key: In power-on state, press M to switch between manual mode (indicated by LCD) and automatic mode (indicated by display).
- Regulation (A/V) Key: In power-on state, press A/V to adjust the set temperature and other parameters.
- Clock Adjustment: In power-on state, press and hold M for 5 seconds. Then, press A/V after the icon flashes to adjust. Press M to switch between time and week, and then press the ON/OFF key to save and exit.
- Lock Key Function: In boot state, press and hold A and V on the panel for 5 seconds to enter the lock key state. A lock icon appears on the display's right side, confirming successful locking.
- Low Temperature Protection Function: When enabled in advanced options (third option ON), if the indoor temperature drops below 5°C while the thermostat is off, it automatically turns on heating. Heating stops automatically when the temperature rises back to 5°C.
- Code Matching Process:
- Power on the receiving panel; the power indicator will be continuously on. Press and hold the code matching button until the code matching indicator flashes.
- Install three No. 5 batteries in the launch panel. Press and hold the ON/OFF key after booting. Code matching is successful when the code matching indicator on the receiving panel becomes continuously on.
- Programming Mode Operation: In boot state, press and hold M and V keys for 5 seconds to enter programming mode. Press M to switch parameters. For the first period, adjust the hour, then press M to adjust the minute, and then press M to adjust the temperature. Subsequent periods follow the same adjustment method. Press ON/OFF to exit.
- Parameter Setting: In shutdown state, press M and V simultaneously for 5 seconds to enter the parameter setting interface. Press M to cycle through parameters and use A/V to adjust them. Press ON/OFF to exit. Parameters include:
- Temperature compensation (-9.9 to 9.9°C, default 0)
- Switch deviation setting (0.5 to 9.5°C, default 1)
- Antifreeze function (OFF/ON, default OFF)
- Rest day selection (0: No rest, 1: Single day weekend, 2: Double day off, default 2)
- Upper temperature limit (35 to 95°C, default 60°C)
- Restore factory settings (long press A for 3 seconds to restore)
Maintenance Features:
- Installation Method:
- Install an expansion screw sleeve with a 59mm spacing on the wall.
- Separate the upper and lower covers using a screwdriver. Route the wire through the back cover to the wiring duct, leaving about 20cm of wire.
- Fix the bottom shell to the wall, secure the wire, and then cover with the front shell.
- Inspection Steps: Install the thermostat in a location where the screen is easily viewable and temperature can be adjusted. Ensure the thermostat represents the overall ambient temperature of the room. Avoid installing near hot/cold sources (vents, heaters, outdoors).
- Common Faults Handling:
- Doesn't start up: Check if batteries are installed correctly or if the boot key is functional.
- LCD displays messy code: Check if the rear shell installation is deformed; it might need loosening and reinstallation.
- Display is normal, but no output: Check the connection between the main control board and power board, and verify output wiring.
- Temperature displays error: Calibrate the panel temperature display via the first item of advanced options.