6
ASSEMBLY
STEP 1
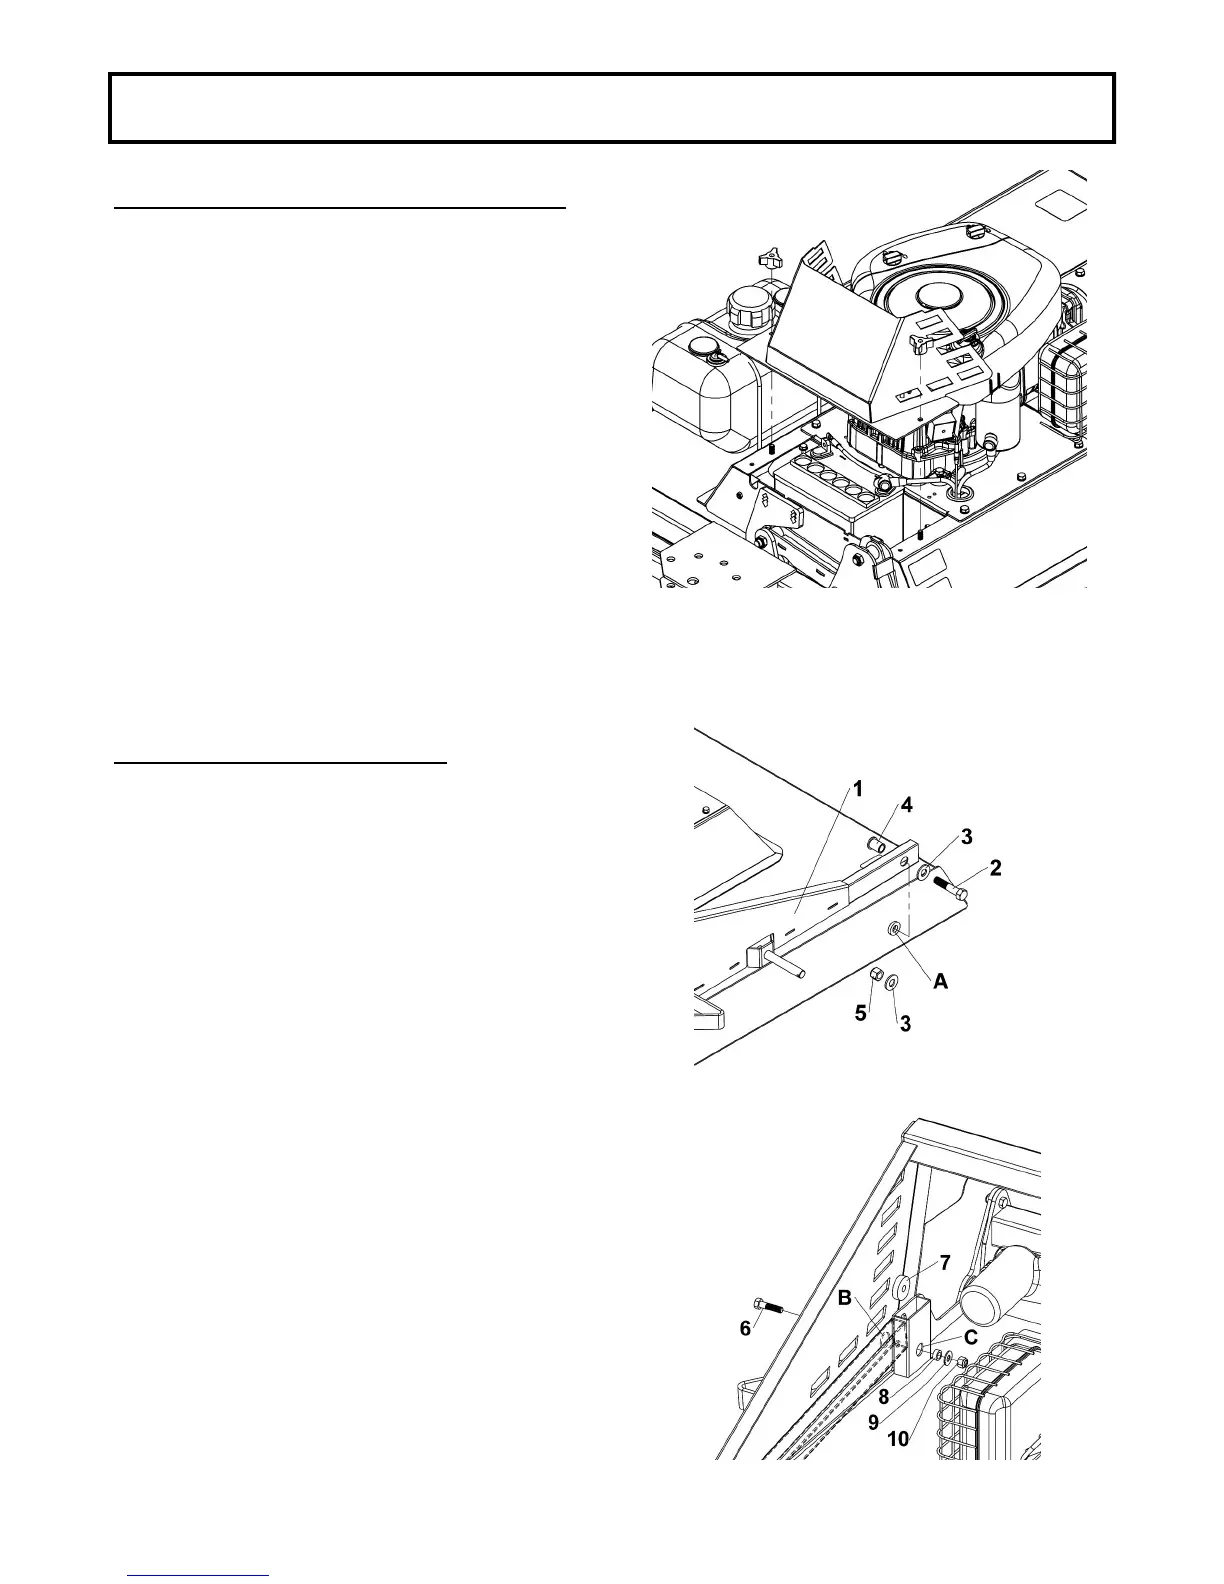
ENGINE AND BATTERY PREPARATION
Disengage spark plug wire and place it where it
cannot make a connection.
Add oil in the engine. Verify oil level and add if
necessary before starting engine. (See engine
owner’s manual).
U1 battery must be purchased locally:
Check the battery. If the battery is put into service
after the “month and year” of the date on the battery,
it may need to be charged with a 12 volt battery
charger. Follow the manufacturer's instructions for the
battery or for the battery charger.
Attach battery cables to the battery, making sure to
attach the red wire to the positive terminal first and
the black wire to the negative terminal second.
STEP 2
ROUGH CUTTER ASSEMBLY
AXLE SUPPORT INSTALLATION
Remove the assembled rough cutter from the
shipping crate so that you have access to hole ‘’A’’
over the rough cutter. If necessary, lift the rough
cutter with a jack and secure with axle stands. Make
sure the rough cutter is stable and secure at all times
to prevent injuries.
Install the axle support (item 1) as shown using a bolt
5/8 x 3’’ (item 2), two flat washers 11/16 (item 3), a
bushing (item 4) and a nylon insert lock nut 5/8’’ (item
5). Do the same on the other side.
Then proceed with the installation of the lift guides.
Align the hole ‘’B’’ with the hole ‘’C’’. Hold the axle
support in place with wooden blocs or another
element. The parts must be safely supported,
because if the axle support moves while the fingers
are in the A or B holes, there will be a risk of injury.
Install as shown with a bolt 3/8 x 1-1/2’’ (item 6),
nylon spacer UHMW (item 7), a sleeve (item 8),
washer 3/8’’ (item 9) and a nylon insert lock nut
3/8’’ (item 10).
Note : make sure that the nylon spacer (item 7) is
between the axle support (item1) and the rough cutter
frame
NOTE: It is very important to put the safety cap
on the battery’s red post. Failure to do so can
cause injuries or damage.