9
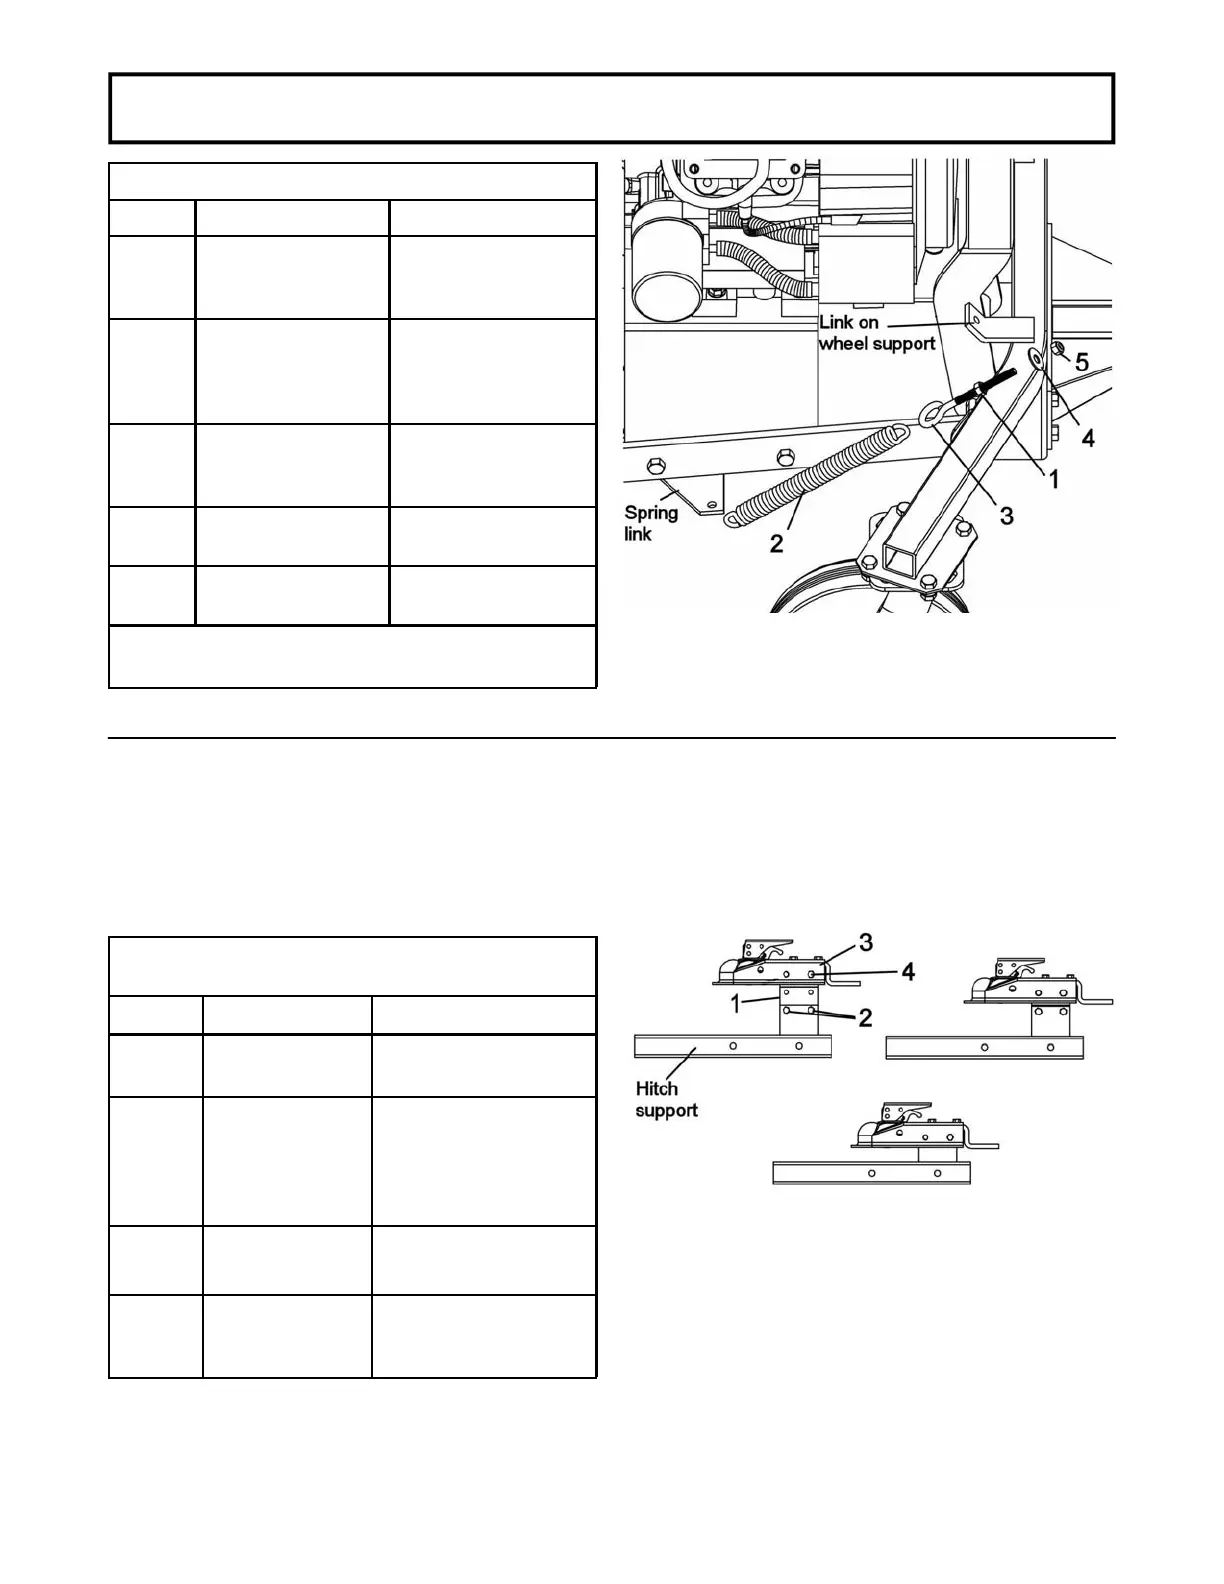
Install the springs (item 2) on each side.
# Item Description Action
1 Hex nut 5/16"
(qty 2)
Insert on each eye
bolt (item 3). Tighten
about half way down.
2 Spring (qty 2) Insert the spring into
the spring link and
hook the other end
into the eye bolt.
3 Eye bolt
(qty 2)
Insert into the hole in
the link of the wheel
support.
4 Flat washer
3/8" (qty 2)
Insert on eye bolt as
shown.
5 Nylon insert lock nut
5/16" (qty 2)
Tighten firmly.
Tighten the nut to apply tension on the spring. Do the
same procedure for both springs.
Install the springs.
ASSEMBLY
Assemble the hitch support
Assemble the hitch supports (item 1) and the hitch
(item 3).
# Item Description Action
1 Hitch support
(qty 2)
Install the supports on
the hitch support.
2 Hex bolt
3/8’’ x 3/4’’
(qty 4)
Insert in chosen holes
(two on each side) and
secure with the flange
nuts 3/8’’.
Tighten firmly.
3 Hitch Insert on the two hitch
supports (if applicable).
4 Hex bolt
3/8’’ x 3’’
Insert in hole as shown
and secure with nylon
insert lock nut 3/8’’.
Choose between the three positions (see figure), the
height of the hitch support.
There must be a maximum of ground clearance
according to your vehicle.
Figure A does not have the hitch support (item 1).