Balance 49
Balance
All stitches are checked and fully
adjusted before the machine leaves
the factory.
Different fabrics, threads, stabilizers,
and interfacings can affect
programmed stitches so that
sometimes they might not close or
they might overlap, i.e. the stitches
that make up the pattern are too
close together or too far apart.
These effects can be corrected with
the electronic balance so that the
stitch formation can be adjusted
where necessary to suit the fabric.
There are 50 vertical steps and 20
horizontal steps.
b
Open Balance
• touch function b
• if the function is not visible on
screen, touch the arrow in the
function toolbar to scroll through
all the available functions
Balance for practical and decorative stitches
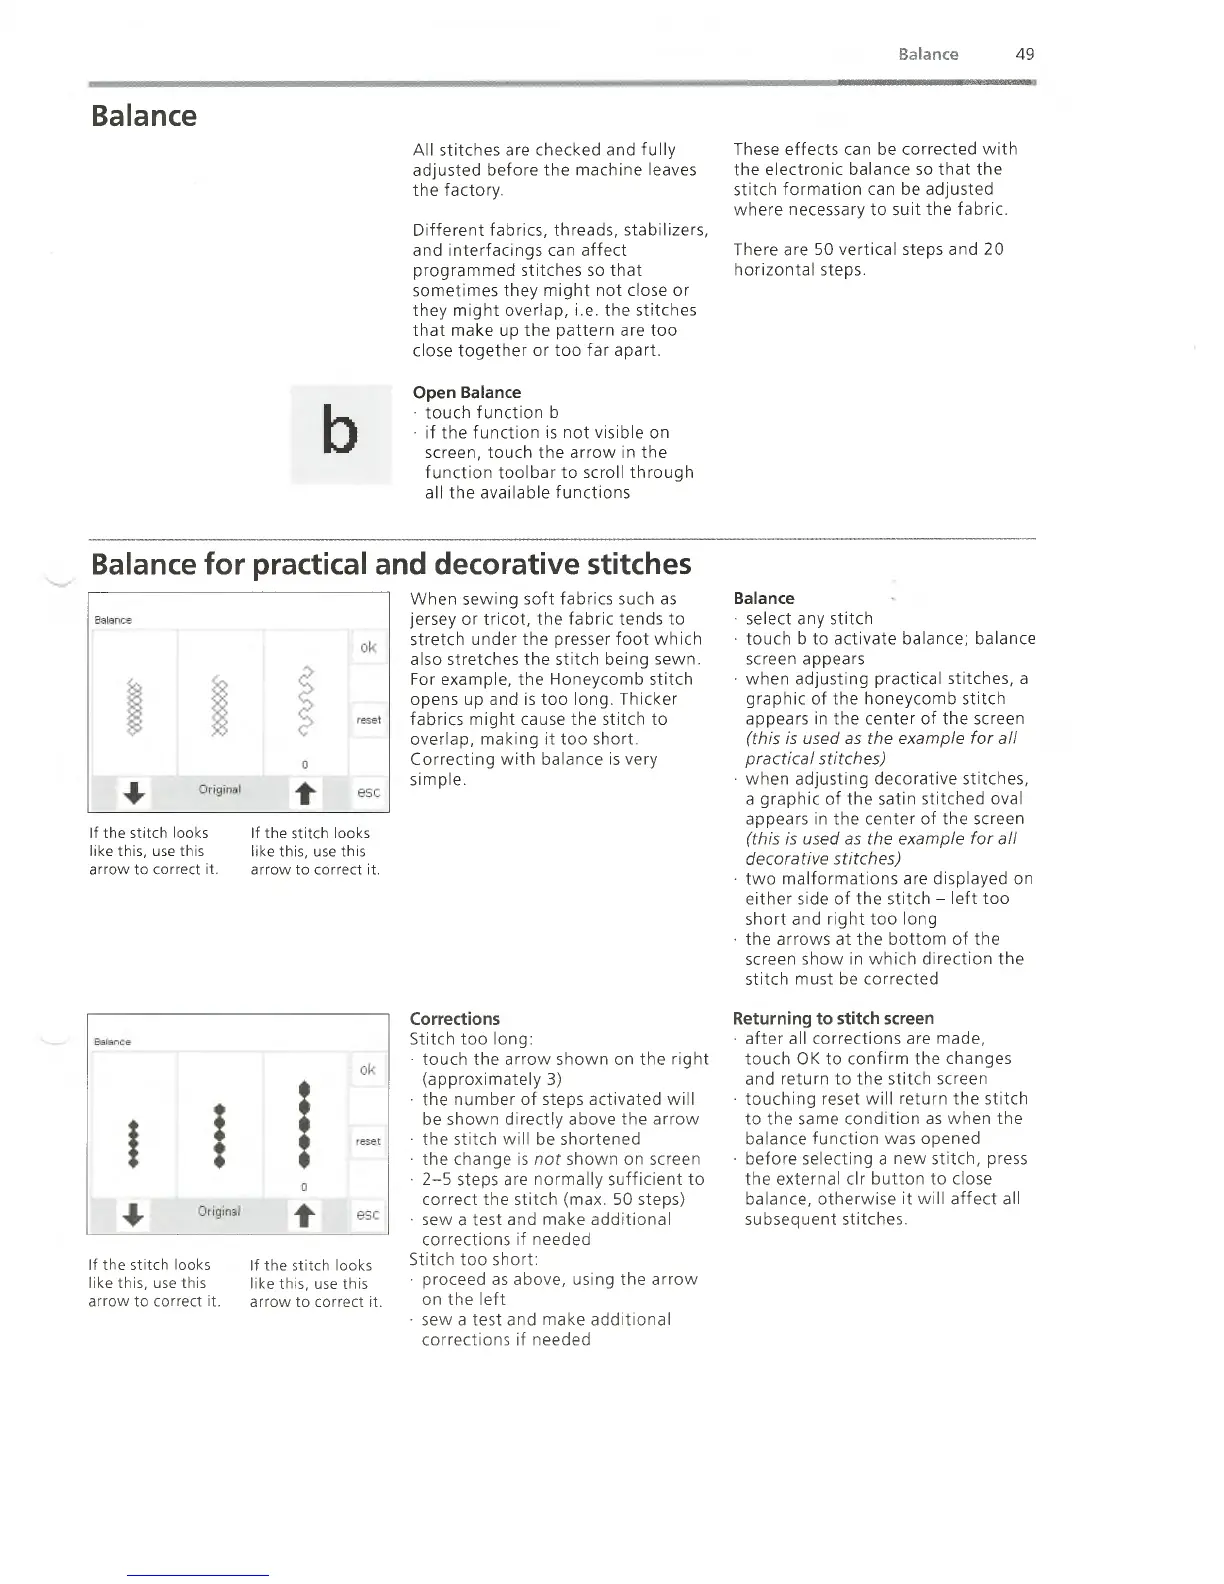
If the stitch looks
like this, use this
arrow to correct it.
If the stitch looks
like this, use this
arrow to correct it.
When sewing soft fabrics such as
jersey or tricot, the fabric tends to
stretch under the presser foot which
also stretches the stitch being sewn.
For example, the Honeycomb stitch
opens up and is too long. Thicker
fabrics might cause the stitch to
overlap, making it too short.
Correcting with balance is very
simple.
Balance
• select any stitch
• touch b to activate balance; balance
screen appears
• when adjusting practical stitches, a
graphic of the honeycomb stitch
appears in the center of the screen
( t h i s is u s e d a s t h e e x a m p l e f o r a l l
p r a c t i c a l s t i t c h e s )
• when adjusting decorative stitches,
a graphic of the satin stitched oval
appears in the center of the screen
( t h i s i s u s e d a s t h e e x a m p l e f o r a l l
d e c o r a t i v e s t i t c h e s )
• two malformations are displayed on
either side of the stitch - left too
short and right too long
• the arrows at the bottom of the
screen show in which direction the
stitch must be corrected
If the stitch looks
like this, use this
arrow to correct it.
If the stitch looks
like this, use this
arrow to correct it.
Corrections
Stitch too long:
• touch the arrow shown on the right
(approximately 3)
• the number of steps activated will
be shown directly above the arrow
• the stitch will be shortened
• the change is not shown on screen
• 2-5 steps are normally sufficient to
correct the stitch (max. 50 steps)
• sew a test and make additional
corrections if needed
Stitch too short:
• proceed as above, using the arrow
on the left
• sew a test and make additional
corrections if needed
Returning to stitch screen
• after all corrections are made,
touch OK to confirm the changes
and return to the stitch screen
• touching reset will return the stitch
to the same condition as when the
balance function was opened
• before selecting a new stitch, press
the external clr button to close
balance, otherwise it will affect all
subsequent stitches.
 Loading...