Servicemanual_aurora_435_450_english_V3_032530.50.04_Korrektur.doc 7
No. Part number Description No. Part number Description
1
398 083 030 Circlip mounting tool
12
031 563.50.00 Eccentric key head frame
2
398 112 030 Spring mounting tool
13
007 993.50.00 Angular key Torx 8
3
398 097 030
Rectifying tool bobbin case
spring
14
030 883.50.00
Distance gauge for auto
threader
4
001 361.70.00 Eccentric key
15
Commercially
available
Digital Multimeter
5
006 038.50.00 Spring balance gauge
16
Commercially
available
IC-Extraction tool (EEPROM)
6
006 543.70.01 Lower thread tension RH
17
031 939.70.00 Bobbin winder gauge
7
398 080 040 Upper thread tension
18
398 031 133 Presser foot height
8
032 051.70.00
Centering gauge
Parallel setting gauge (Set)
19
398 024 030 Feed-dog height
9
030 349.70.00 Pinning tool short (Set)
20
398 022 030
398 111 030
Feeler gauge 0,3 mm
Feeler gauge 0,15 mm
9
030 430.51.00 Pinning tool short
21
031 134.50.01 Servicekabel 50mm 30 pol.
10
001 356.50.00 Angular pinning tool
22
732 702.70.00
Pinning tool
for Stitch length crank
11
007 937.50.00 Pinning tool base shaft
23
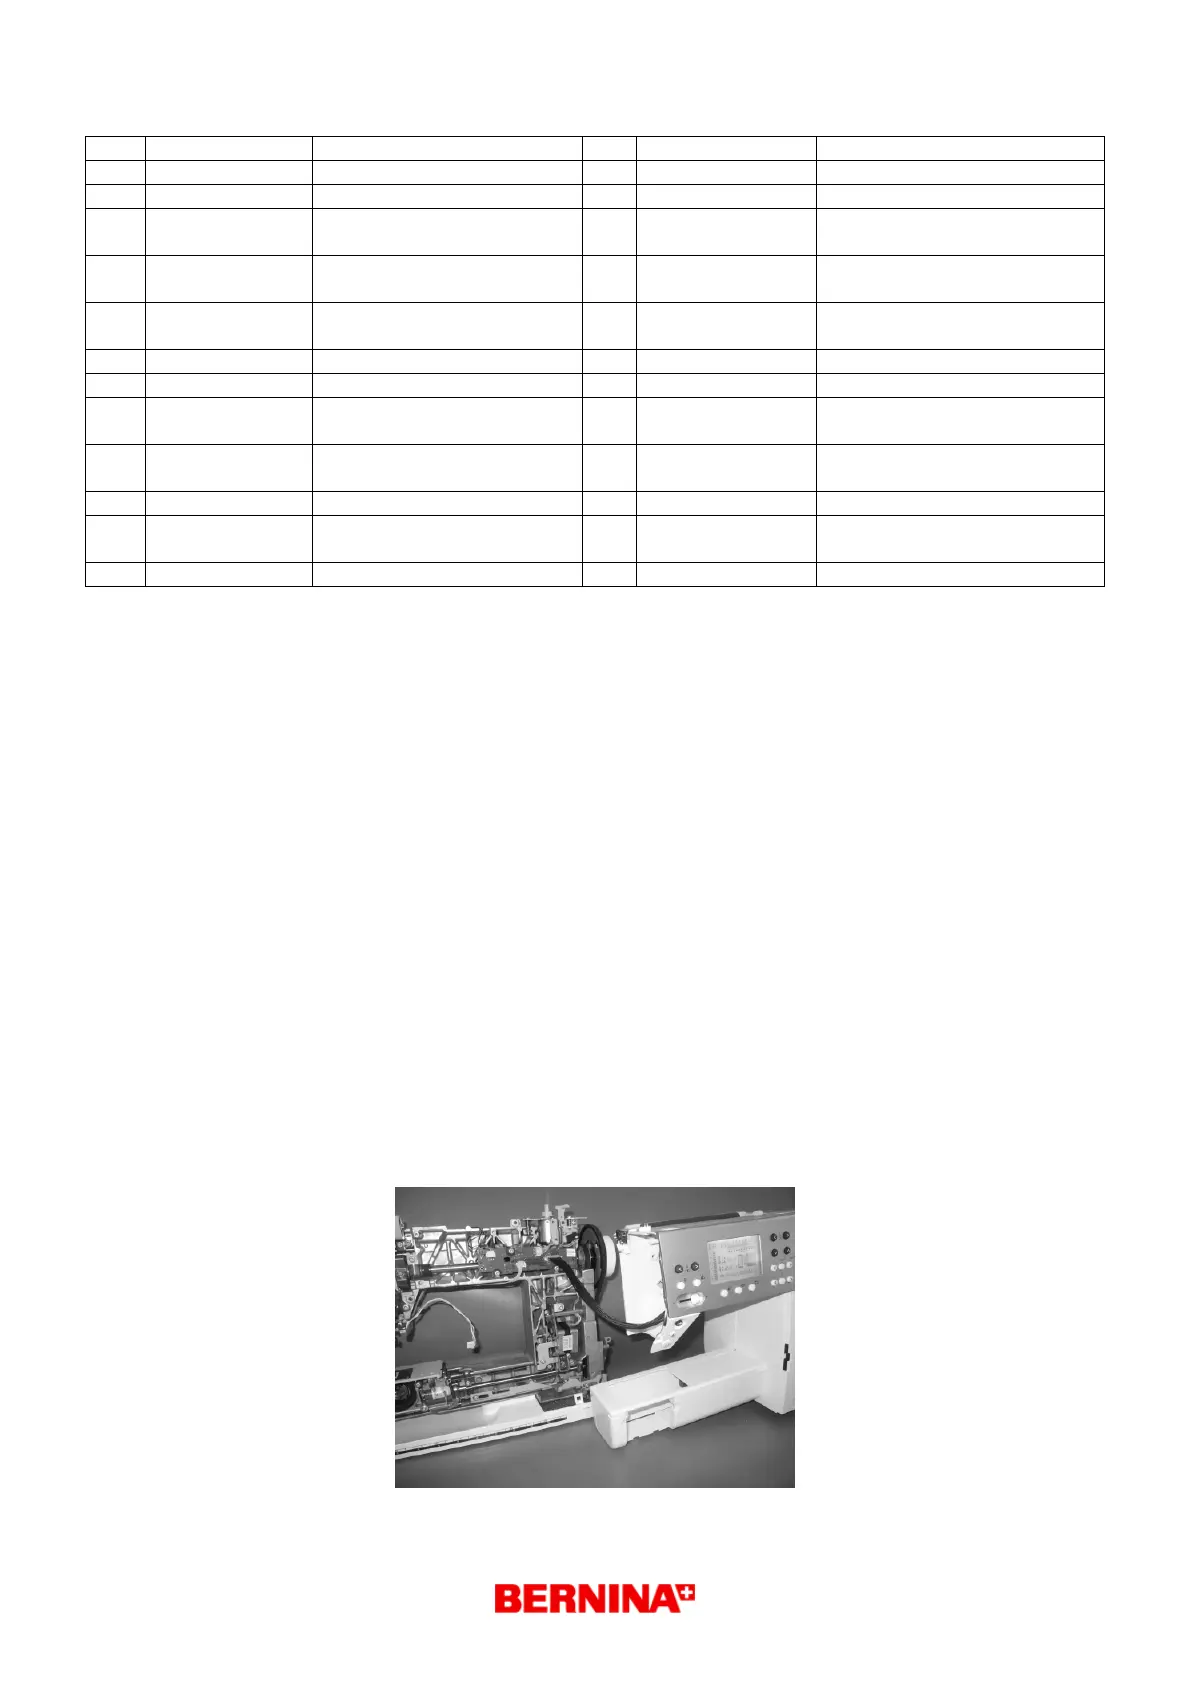
1.6 Where and how to use the service cables # 22
Where to use:
• In order to have the aurora 435 / 450 machine under power whilst the covers have been taken
off, it is necessary to use the service cables 031 134.50.01 (50mm 30 pole).
How to use:
1. Observe ESD regulations (page 5).
2. Remove the power cord
3. Remove the covers. The removed covers must be placed on the ESD mat.
4. Attach the service cables very carefully (straight) to the S-Print and P-Print.
5. Attach an external CFL sewing light to the S-Print.
Note: Without the CFL sewing attached, the screen will not have any background lighting!
6. Fit the connection cable L-Print / S-Print.
7. Place both the back and front covers together and using the snapper clips, clip together.
8. When necessary the motor cable can also be connected.
9. Connect the power cable and switch the machine on. In order to get into the service program
one has to press the reverse button whilst switching on the machine.
Attention: Make sure that no cable is pinched, trapped or otherwise damaged.