Table of Contents
2
Table of Contents
IMPORTANT SAFETY INSTRUCTIONS ................. 3
1 My BERNINA ........................................................ 5
1.1 Further information ................................................ 5
1.2 Content of these instructions ................................. 5
Explanation of symbols ........................................... 5
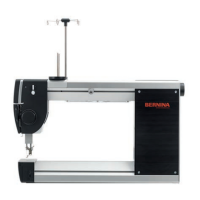
1.3 Overview of the quilting frame ............................... 6
1.4 Overview of delivery ............................................... 7
1.5 Overview of large parts .......................................... 7
1.6 Overview of small parts .......................................... 8
2 Quilting frame assembly .................................... 12
2.1 Unpacking and checking the delivery ..................... 12
2.2 Recurring steps ...................................................... 12
Fitting the slot nuts ..................................................... 12
Tightening the socket screws ...................................... 13
2.3 Sequence of assembly steps ................................... 13
2.4 Working height adjustment .................................... 13
2.5 Base frame assembly .............................................. 15
Overview components ................................................ 15
Attachting adjustable levelling feet ............................. 16
Attaching the lower cross bar ..................................... 16
Attaching the back bar ............................................... 18
Attaching the front bar ............................................... 21
2.6 Rail support assembly ............................................. 23
Attaching rail supports ................................................ 23
Adapting the rail support for BERNINAQ20 ............... 24
2.7 Tabletop positioning .............................................. 25
Attaching tabletop brackets ........................................ 25
Positioning tabletops .................................................. 25
2.8 Quilting frame levelling .......................................... 26
2.9 Track assembly ....................................................... 27
Attaching the rear track .............................................. 27
Attaching the front track ............................................ 29
2.10 Top and backing rail assembly ................................ 31
Assembling the top rail ............................................... 32
Assembling the backing rail ........................................ 33
2.11 Carriage and park position magnet alignment ........ 35
2.12 Machine preparation ............................................... 38
Overview ...................................................................... 38
Getting the machine ready ........................................... 41
Attaching the V-wheel units ......................................... 41
Attaching the front stand profile .................................. 42
Attaching the rear stand profile .................................... 44
Positioning the machine on the carriage ....................... 46
Attaching safety brackets ............................................. 47
Fitting rail covers .......................................................... 49
2.13 Take-up rail and dead bar attachment ..................... 50
Attaching the Take-up rail ............................................ 50
Attaching the handwheel to the take-up rail ................ 52
Attaching the dead bar ................................................ 53
2.14 Leader, side clamp, and storage tray attachment ..... 55
General notes on attaching the leaders ........................ 55
Attaching the Back leader ............................................ 55
Attaching the Take-up leader ....................................... 56
Attaching the Top leader .............................................. 57
Attaching the side clamps ............................................ 58
Attaching the storage trays .......................................... 59
2.15 Front handle attachment ......................................... 60
Attaching the front handle unit .................................... 60
Adjusting the width of the handles .............................. 60
Adjusting the handles .................................................. 61
3 Disposal ................................................................ 62
3.1 Quilting frame disposal ........................................... 62
4 Specifications ....................................................... 63
5 Appendix .............................................................. 64
5.1 Differing information for the "Large" quilting frame
................................................................................
64
5.2 Differing information for the "Small" quilting frame
................................................................................
64
Index ..................................................................... 66
 Loading...