Do you have a question about the Bernina 215 and is the answer not in the manual?
Highlights immediate hazards and risks of electrical shock, emphasizing proper usage and caution.
Details potential risks of burns, fire, electric shock, or injury, covering user supervision and operational guidelines.
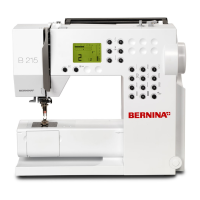
Diagram illustrating the front panel and components of the BERNINA sewing computer.
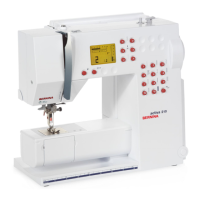
Diagram showing the right side of the BERNINA sewing computer and its external features.
Details of included accessories such as bobbins, needles, seam ripper, lint brush, and oiler.
Explanation of how to use the foot control to regulate sewing speed and needle movement.
Instructions for connecting the power cable to the sewing computer and the wall outlet.
Details the presser foot shaft and provides an overview of the standard snap-on soles.
Instructions for attaching, removing, and using the sewing table with its seam guide.
Recommendation for using the BERNINA Lens Set for improved sewing comfort.
Explanation of how the foot control adjusts sewing speed and needle position.
Details on using the Start-Stop Unit (SSU) for controlling stitching and speed.
Information about the LED sewing light and its servicing by authorized technicians.
Step-by-step guide on how to wind a bobbin, including thread path and automatic stop.
Instructions for using the thread cutter to cut excess thread after winding the bobbin.
Detailed instructions for removing and inserting the bobbin case correctly.
Explains how the bobbin thread cutter works when inserting the bobbin case.
Guide on correctly inserting the bobbin and ensuring the thread runs clockwise.
Step-by-step process for removing and inserting a sewing machine needle safely.
Instructions for detaching and attaching presser foot soles to the sewing machine.
Details the collapsible vertical spool pin and its use for multiple threads.
Comprehensive guide on threading the upper thread through guides and tension discs.
Instructions on using the built-in needle threader to pass thread through the needle eye.
Description of the thread cutter located on the head frame for neat thread trimming.
Explanation of the stitch plate markings for guiding fabric and measuring stitches.
Details on the feed-dog's function and how it affects fabric feed and stitch length.
Guide to setting and adjusting thread tension for perfect stitch formation.
Explains how fabric, threads, and stabilizers affect stitch balance and how to adjust.
Describes applications for balance adjustment, like honeycomb stitch and buttonholes.
Details the information displayed on the LCD screen, including stitch settings and selected stitches.
Explains the functions of various buttons for stitch selection, width, position, and length.
Covers quick and continuous reverse sewing, including applications like securing seams.
Details how to use the 1/2 motor speed function to halve the sewing speed.
Explains needle stop function (up/down) and the clear/delete button for resetting settings.
Covers straight, zig-zag, and running stitches for general sewing and mending.
Details triple stitches, blind stitch, and double overlock stitch for seams and edges.
Explains stretch overlock, super stretch, and honeycomb stitches for knits and decorative seams.
Covers darning program and buttonhole stitch for repairs and garment construction.
Guide for using the straight stitch for outer edges and hem edges.
Details zig-zag stitch uses for neatening edges, decorative work, and oversewing.
Instructions for using the running stitch for sewing elastic on sportswear and lingerie.
Details the triple straight stitch for durable open seams and decorative topstitching.
Guide for creating invisible hems using the blind stitch on medium to heavy fabrics.
Instructions for using the double overlock stitch for closed seams in knit fabrics.
Details on sewing stretch overlock seams along fabric edges for knits and wovens.
Covers the super stretch stitch for very elastic seams on knit fabrics.
Instructions for the honeycomb stitch on ribbing with visible seam and balance adjustments.
Guide for basting and sewing zippers using the straight stitch and appropriate sole.
Details the darning program for repairing damaged areas on fabrics.
Instructions for selecting and sewing buttonholes, including test sewing and length marking.
Step-by-step process for sewing manual standard buttonholes, including corrections and balance.
Guidance on selecting the correct needle size for different types of threads and fabrics.
Emphasizes the importance of needle condition and correct insertion for optimal sewing.
Detailed instructions for cleaning the sewing computer after use, including the hook race.
Guidance on lubricating the hook race with oil to ensure smooth operation.
Basic checks to perform for common faults, including threading, cleaning, and needle insertion.
Addresses causes and solutions for lower and upper thread breaks, including tension and quality.
Solutions for skipped stitches, needle breaks, faulty stitching, and needle selection.
Troubleshooting steps for when the sewing computer fails to run or runs slowly.
| Sewing Speed | 900 stitches per minute |
|---|---|
| Type | Mechanical |
| Stitch Width | 5.5 mm |
| Stitch Length | 4 mm |
| Free Arm | Yes |
| Buttonhole | Automatic, 1-step |
| Presser Feet | 5 |
| Weight | 17.6 lbs (8 kg) |