21 Operating instructions
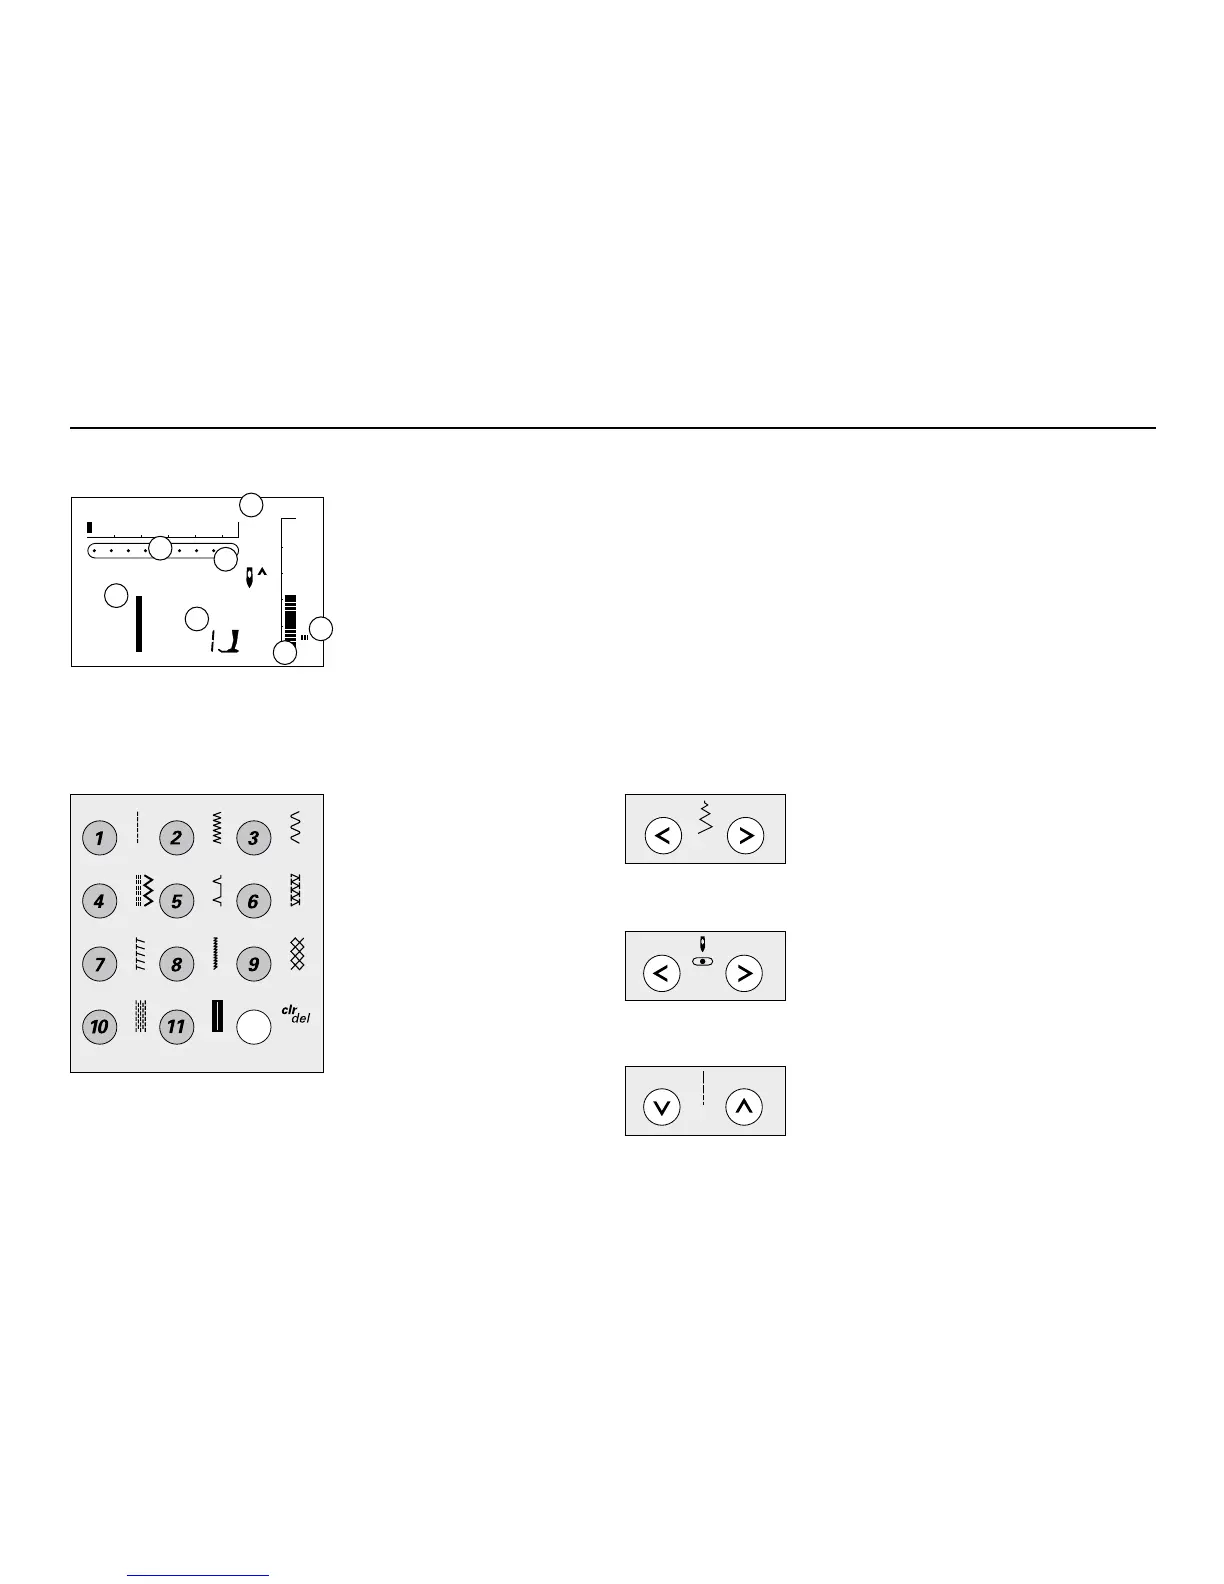
Stitch width
•
left button = narrow the stitch width
•
right button = widen the stitch width
•
the basic settings of the chosen stitch
blink constantly
Needle position
•
left button = needle to the left
•
right button = needle to the right
Stitch length
•
left button = shorten the stitch length
•
right button = increase the stitch length
Stitch selection
•
stitches 1–11:
touch the number of your
choice; stitch number and
basic width and length set-
tings appear on the LCD dis-
play
0
23451
5.5
1
2
3
4
5
0
1
2
3
4
5
6
The LCD display shows
1 stitch width, basic setting blinks constantly
2 stitch length, basic setting blinks constantly
3 needle position (9 positions)
4 needle stop up/down
5 stitch number
6 recommended foot for selected stitch
7 satin stitch; dense, short zig-zag stitch
7
Altered Stitch Memory
•
any stitch length or width alterations will
be saved automatically
For example:
•
sew altered stitch, e.g. zig-zag
•
select another stitch, e.g. straight stitch
•
return to zig-zag, your alterations are
still active
LCD Display
Buttons