Assembly
11
2 Assembly
2.1 Preparing legs
Required parts:
• 1 cross bar [N]
• 1 control unit [O]
• 2 legs [P]
• 2 rail supports [Q]
• 4 fillister head screws [U]
• 8 fillister head screws [V]
Required tools:
• Allen key [Y]
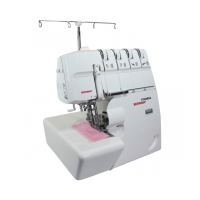
> Remove the control unit [O] from the frame end [N2].
> Dismantle the cross bar [N].
– Frame end [N1]
– Frame end [N2]
– Connecting rails [N3]
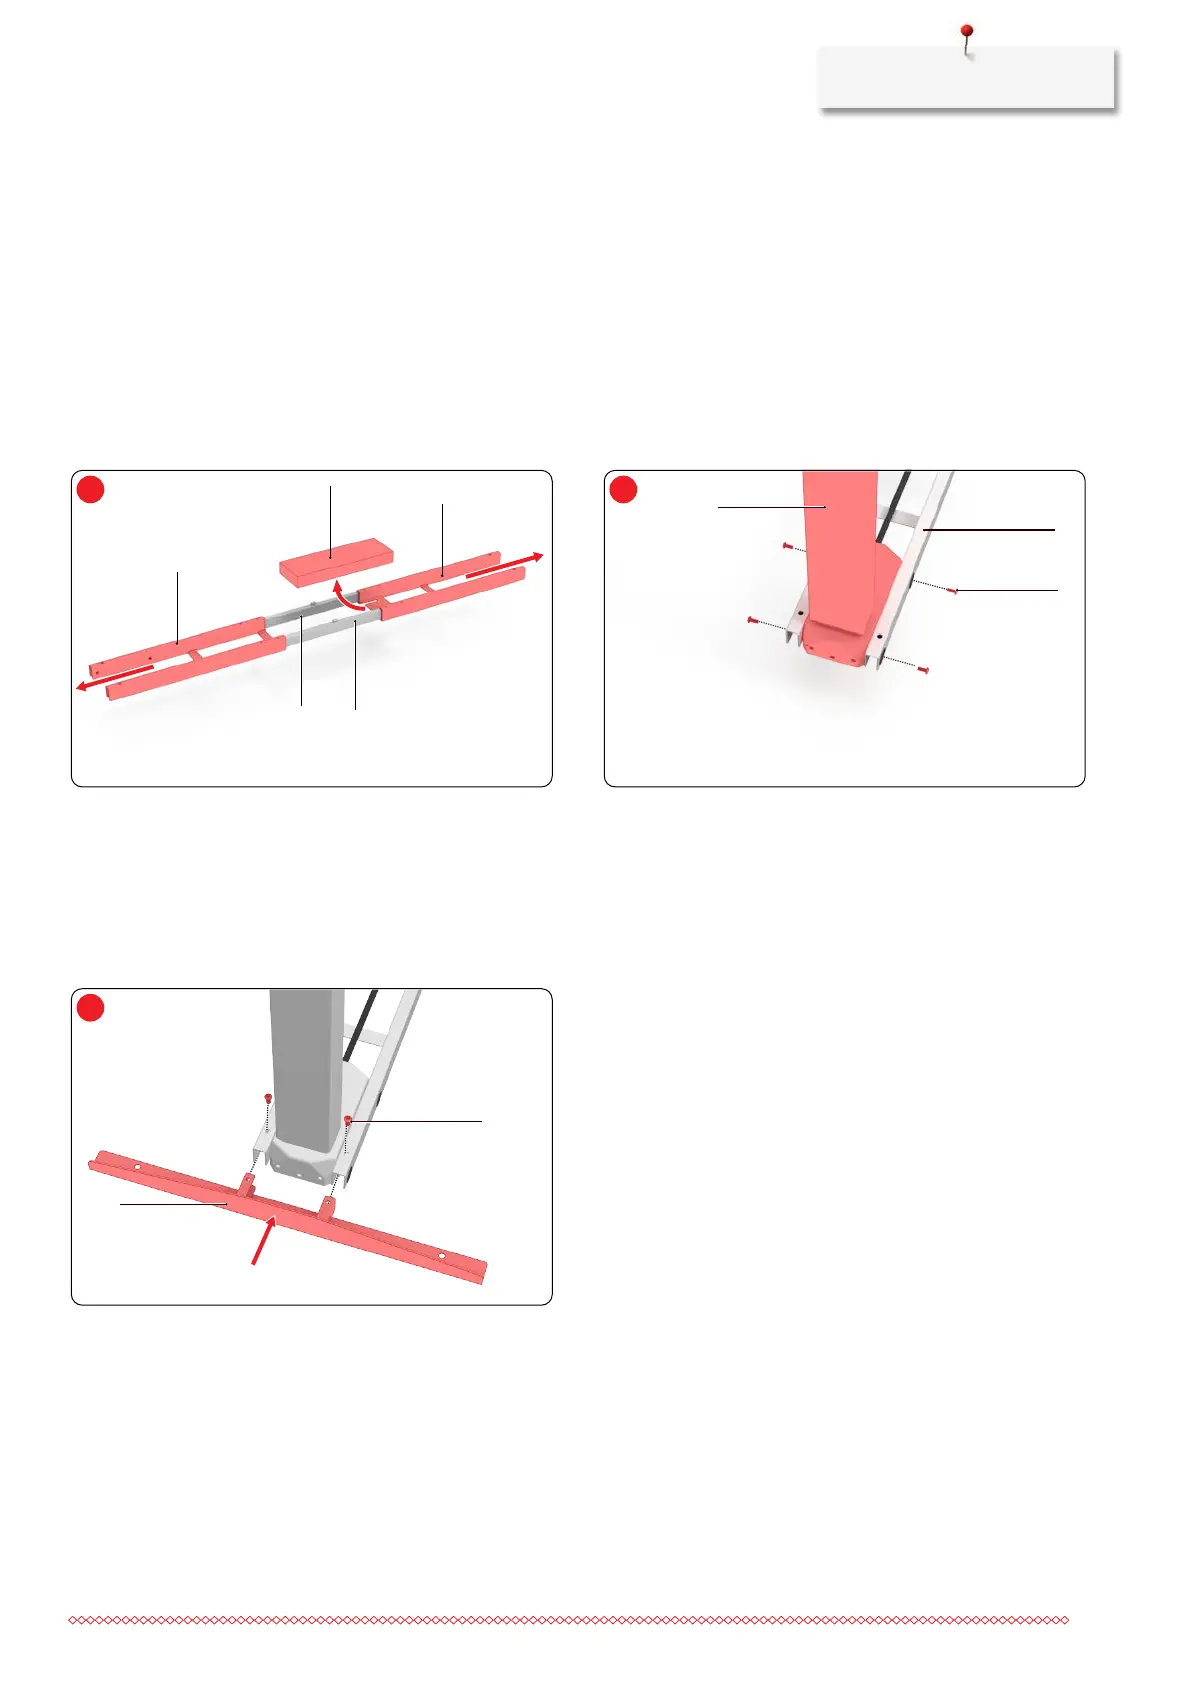
> Put together both legs as follows: Align the drill holes in
the leg [P] with the drill holes in the frame end [N1/N2].
> Insert four fillister head screws [V] into each leg through
the drill holes in each frame end, and screw in each screw
with just a few turns.
> As soon as all screws have been inserted, tighten the
screws.
> Push one rail support [Q] into each frame end [N1/N2].
> Insert two fillister head screws [U] and screw in each with
just a few turns.
> As soon as both screws have been inserted, tighten the
screws.

 Loading...