Assembly
12
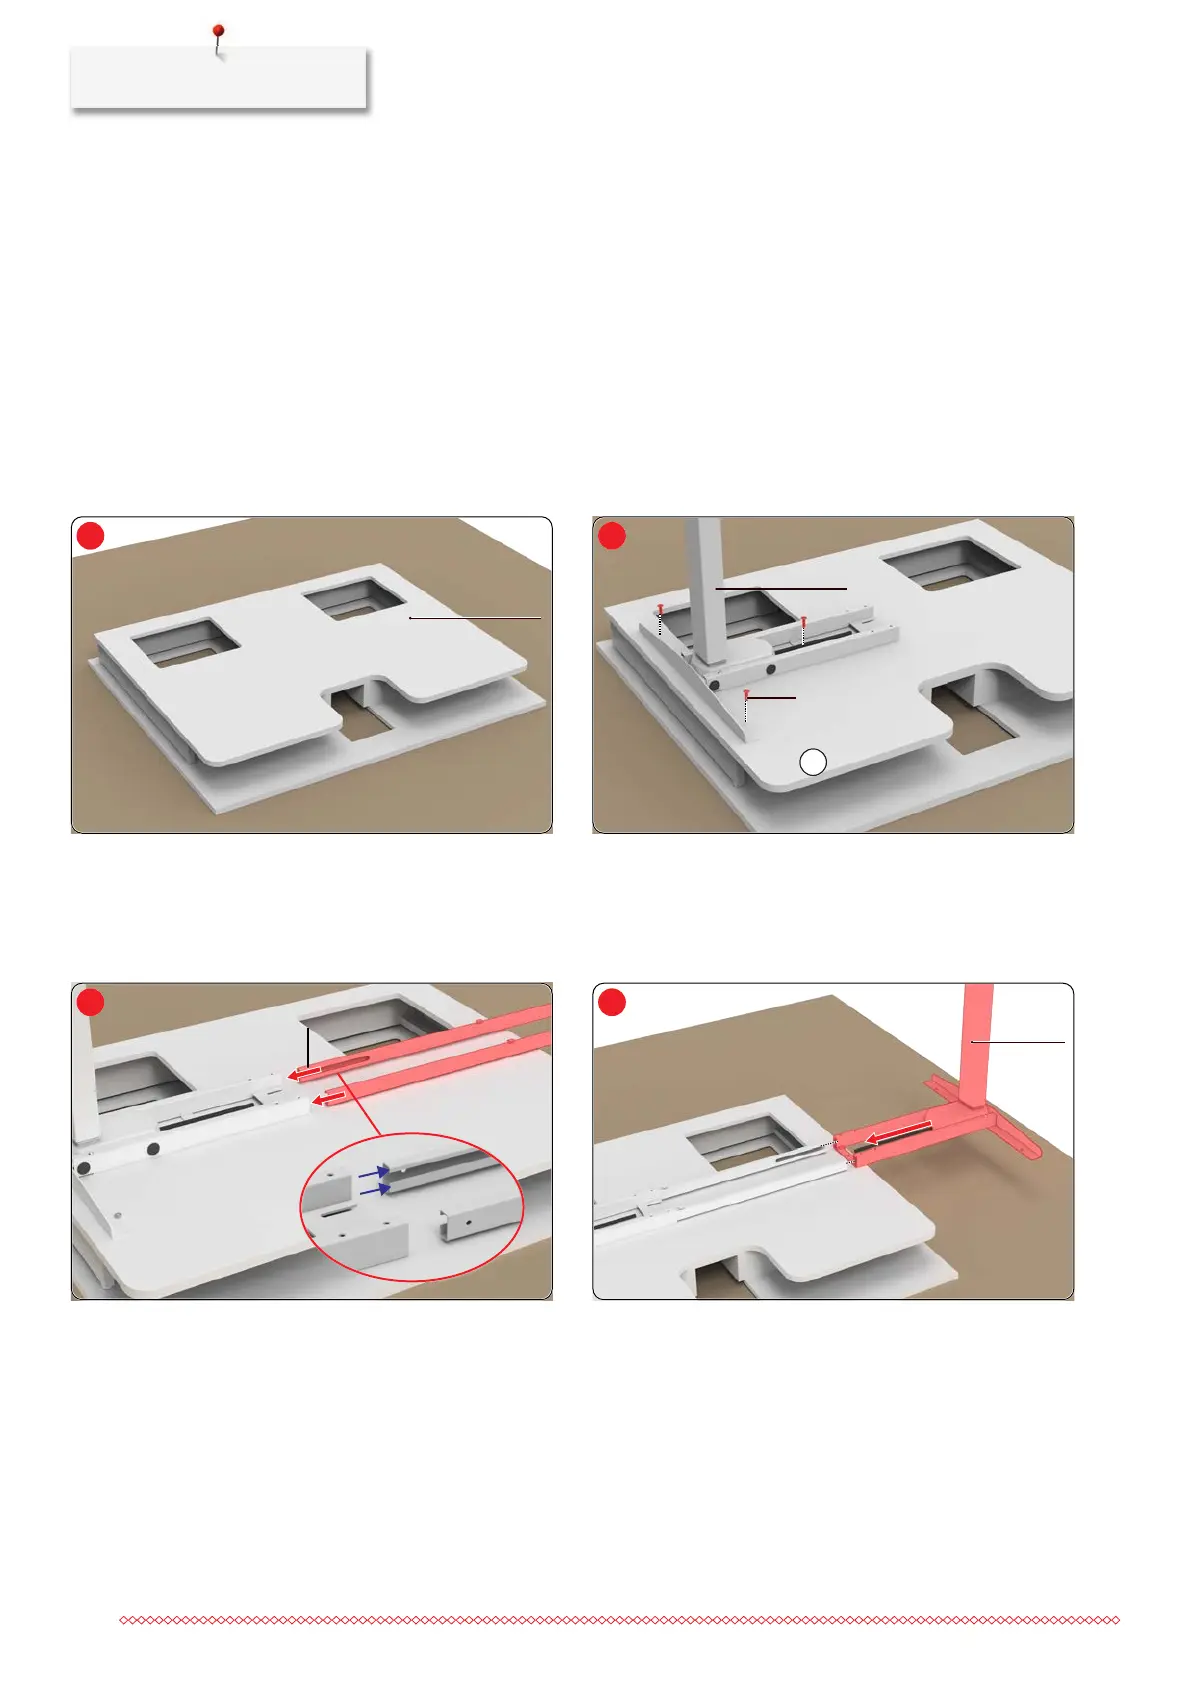
2.2 Installing a substructure
Required parts:
• 1 tabletop [A]
• 1 leg [P-N1] preinstalled
• 1 leg [P-N2] preinstalled
• 2 connecting rails [N3]
• 4 wood screws [I]
• 6 fillister head screws [L]
• 8 fillister head screws [V]
• 2 cable clamps [H]
• Control unit [O]
• Operating unit [W]
Required tools:
• Phillips screwdriver (not included in the scope of delivery)
• Allen key [Y]
> Place the tabletop [A] on a blanket or a large box.
> Decide which side of the table the operating unit should
be installed on. In the example, on the right side of the
standing table (x).
> Install the leg [P-N2] on the side with the operating unit
with three fillister head screws [L].
> Push in the connecting rails [N3], ensuring that they are
correctly aligned: Long slots toward the inside and wider
edge toward the tabletop.
> Push the leg [P-N1] over the connecting rails.

 Loading...