pump. The life of this battery will depend on
the amount of time that power is lost during
the lifetime of the pump and the average
ambient temperature. Because of the
extremely low power demands of the DR-
2000 it may never be necessary to change
this battery. If this battery does go dead, the
clock will revert to the default time of 12:00
AM of Day 1 and all programmed events will
be erased after a power loss. A replacement
battery can be purchased commercially. See
the Periodic Maintenance section for more
information.
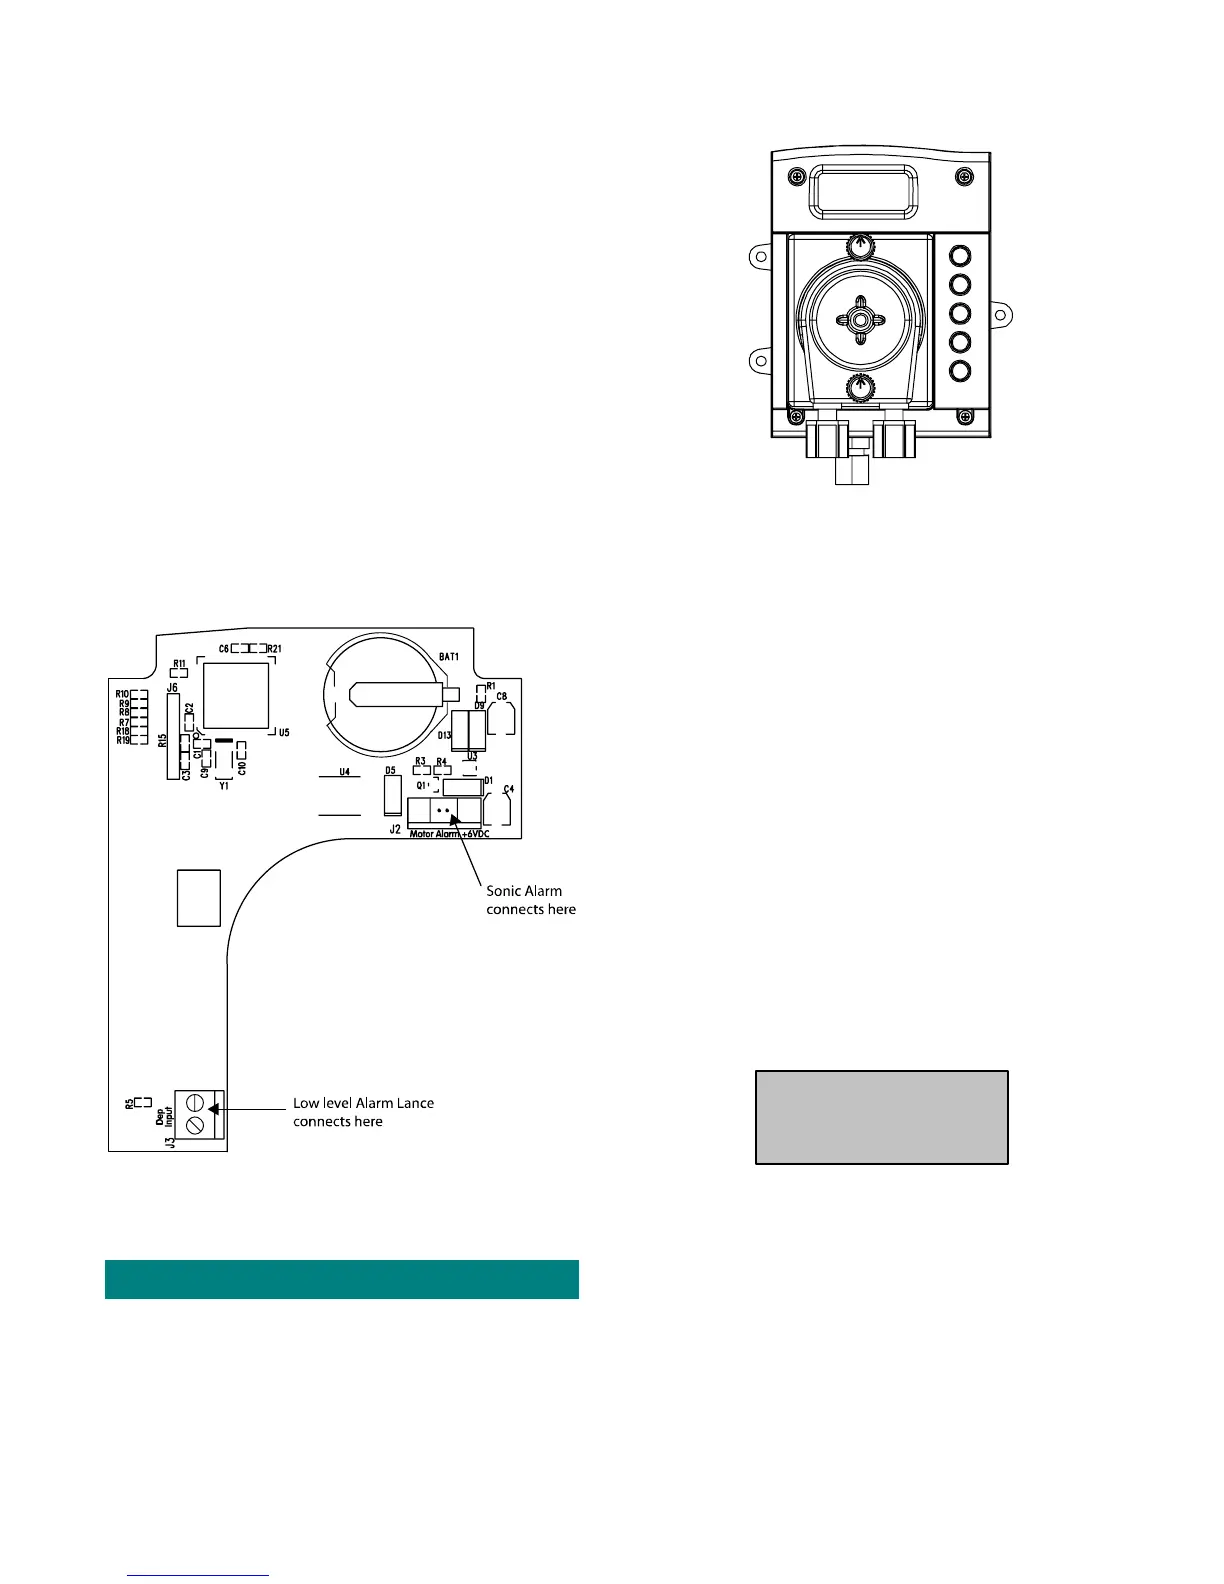
OPTIONAL LOW LEVEL ALARM KIT
An optional low level (sonic) alarm and low level alarm lance
are available (see Spare Parts list).
The low level alarm lance is inserted into the chemical drum and
the sonic alarm is installed on the left side of the pump housing.
Both are wired into the appropriate connectors on the main PCB.
The lance detects when the chemical drum is empty and the
sonic alarm issues an audible alarm.
Figure 7a. Low-Level Alarm Connections
Refer to the installation instructions in the low level alarm kit
for more detailed instructions.
SETUP & PROGRAMMING
During normal operation, the DR-2000 is in Run Mode. In Run
Mode, the screen will display the current time and day of the
week, and the colon will blink once per second.
The DR-2000 is programmed using the 5 buttons and screen in
the front of the unit.
DR2000MF06
PROGRAM
EVENT/PRIME
HOUR
MINUTES
SECONDS/DAY
Figure 8. DR-2000, Front Plate
ENTERING PROGRAM MODE
To begin programming, you must first enter into Program Mode.
To do this, hold down the Program button for 8 seconds. The
colon will blink fast and irregularly while the Program button is
pressed.
The screen will flash and the colon will stop blinking to indicate
that you have successfully entered Program Mode. The screen
display will not change. It will continue to show the current time
and day of the week.
SETTING THE CLOCK
Once you enter Program Mode, your first option is to set the
clock. Use the Hours button and the Minutes button to change
the time of day. The clock will display “P” for PM settings. Use
the day button to change the day of the week. We recommend
that you program Monday as day 1.
PROGRAMMING WHEN AN EVENT
WILL OCCUR
1. Press the Event button once. You will see the following
screen. This screen indicates which event you are entering.
Example:
E:01
DR1000M04
The screen above indicates that you are entering event
number 1.
2. Press the Event button again. This screen shows the day
and time this event will begin.
3. Change the time that the event will occur using the Hours
and Minutes buttons.
4. Change the day of the week that this even will occur using
the day button. When scrolling through the day menus you
will see that you are able to select from the following
options:
4 1210730 DR-2000 (R14735-00, Rev C) February 2010
 Loading...