SnapHead Pump Cartridge 6 mm 1202706
w/Viton Tube
Silicone Squeeze Tube 1/4 inch 058209
Viton Squeeze Tube 1/4 inch 1201109
Silicone Squeeze Tube 6 mm 1202709
Viton Squeeze Tube 6 mm 1202711
Tube Insert 1/4 inch 036969
Tube Insert 6 mm 1202724
Tube Fitting, Nut 1/4 inch 043823
Tube Fitting, Nut 6 mm 1202723
Tube Fitting Nut 1/4 inch, Pack of 5 092213
Mounting Bracket, Stainless Steel for 087235
115 VAC and 230 VAC
Mounting Bracket, Stainless Steel for 069188
D-cell Battery Unit
Bezel Gasket 1202615
Pump Gasket 099705
Low Level Alarm Buzzer Kit 1202595
w/Strain Relief
Low Level Alarm Lance 1201180
115 VAC Power Cord 087658
Install Kit (non-European versions) 1202593
MAINTENANCE
Safety glasses and protective clothing should
be worn while servicing the DR-2000.
Refer installation and service to qualified
personnel only.
PERIODIC MAINTENANCE
Pump & Squeeze Tube Replacement
Schedule
Since every installation is different (chemicals, tube runs,
operating frequency, and so on), an exact tube replacement
schedule cannot be specified. With use, the tube slowly evolves
from round to oval and the amount of chemical pumped
decreases. By regularly checking the amount of chemical
pumped, you can determine general tube life. It is recommended
that you closely monitor the time it takes the original tube to
reach the end of its flex life, and then establish a replacement
schedule. Replacing tubes at regularly scheduled intervals
ensures more accurate product use and reduces service calls. In
general, short feed lines of a large diameter will improve pump
tube life.
REPLACING PUMP CARTRIDGES
To Remove
1. Turn off power to the unit to ensure that the pump does not
run during maintenance.
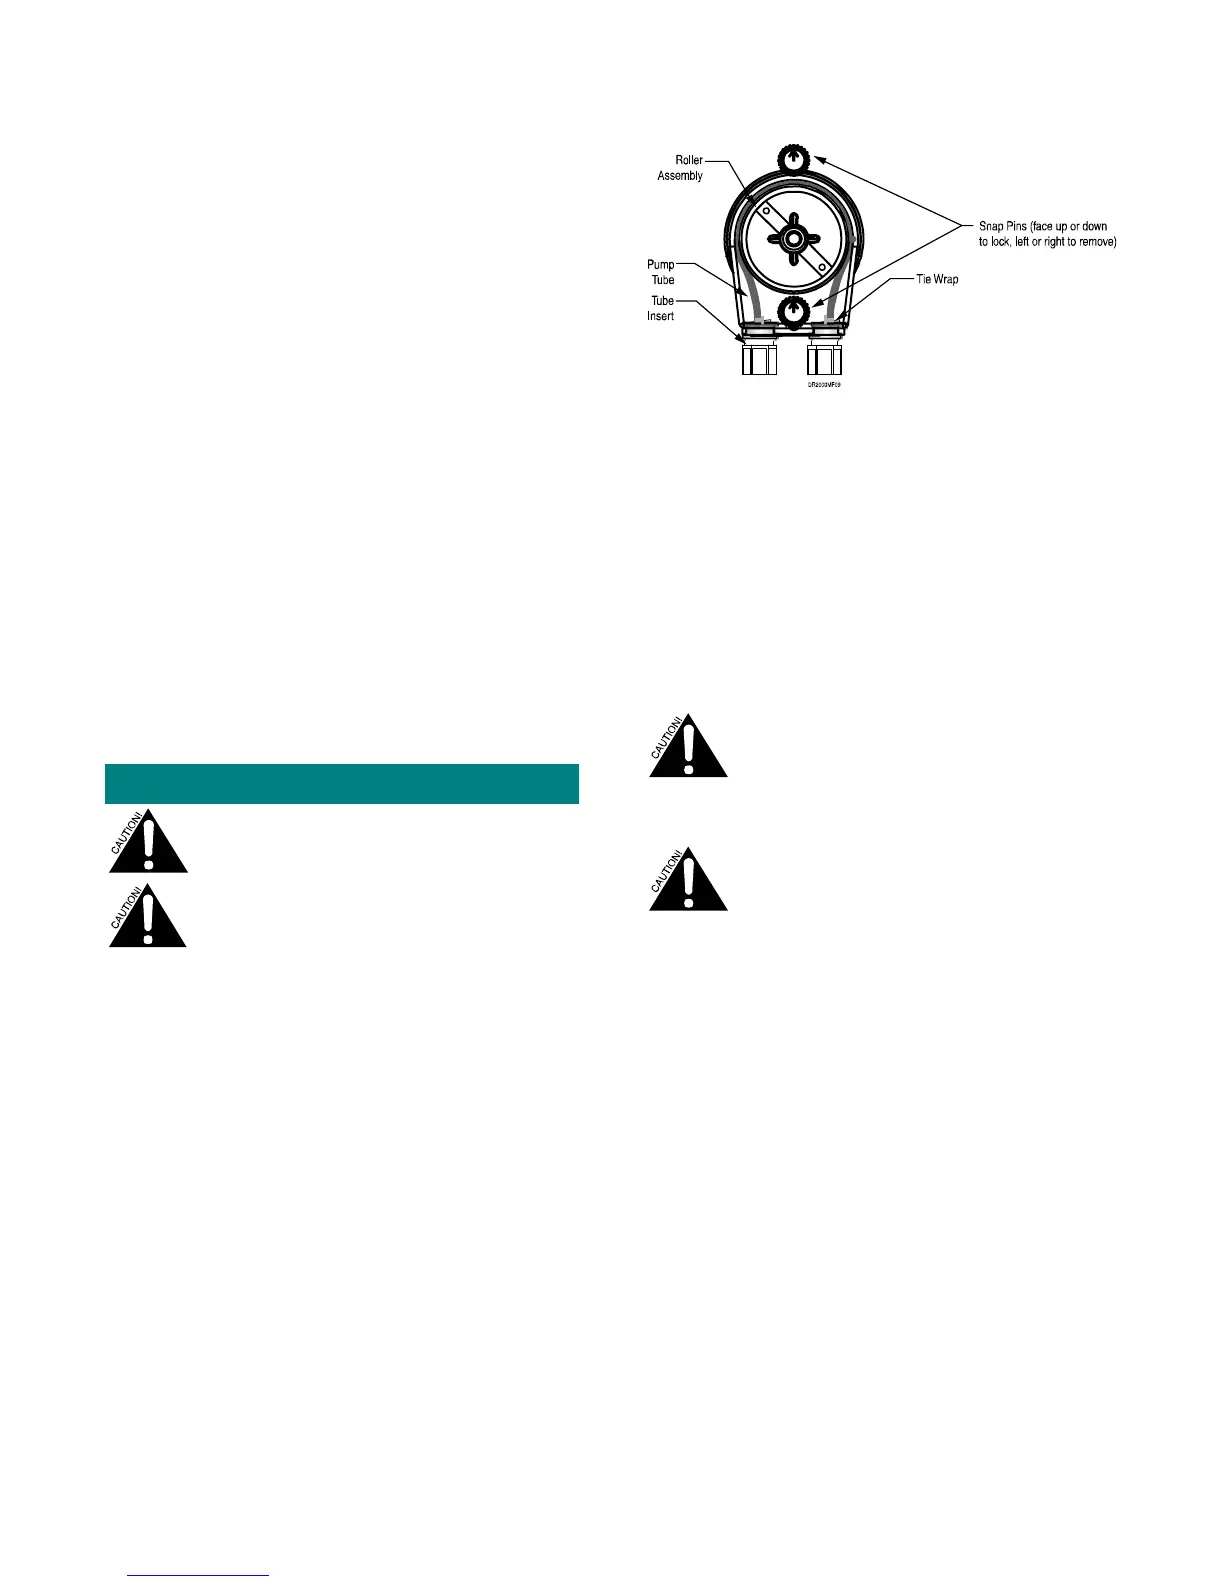
Figure 9. SnapHead Pump Cartridge
2. Turn snap pins to the left or right to remove the pump head.
3. Remove the supply and feed lines from the old pump
squeeze tubing and connect them to the new pump squeeze
tubing.
To Install
1. Align and engage the pump drive spline with the motor
gear by rotating the roller assembly.
2. Turn the snap pins so that the arrow is pointed either
straight up or down. Then push in until you hear a distinct
click.
Replacing Pump Squeeze Tubing
Splash danger! Because the squeeze tube
contains chemical product and is flexible, extra
caution should be taken while changing the
squeeze tube to insure that the chemical does
not splash in the eyes or on the hands or
clothing of the service person.
Always wear protective eyewear, gloves and
protective clothing when changing the squeeze
tube.
1. Remove the cartridge as described above.
2. Loosen but do not remove the small screw at the bottom of
the rear cover and lift the cover from the cartridge.
3. Pull the roller assembly out of the pump cartridge to release
the pump squeeze tubing.
4. Pull the tube inserts out of the pump cartridge.
5. Remove the squeeze tube.
6. Replace it with a new squeeze tube.
7. When using Viton or Silicone, coat the inside of the
cartridge with a liberal amount of Vaseline (petroleum
jelly) lubricant. Never use Dow Corning lubricant with a
Silicone tube, as it will cause it to fail prematurely.
8. Press the two tube inserts into the cartridge so that the tie
wrap "buckles" face toward the center of the pump.
Remember, the tube must not be twisted during the
assembly.
9. Replace the roller assembly.
10. Replace the rear cover and screw.
11. Push the black snap pins back into position, with the arrow
pointing up or down.
6 1210730 DR-2000 (R14735-00, Rev C) February 2010
 Loading...