How To Replace Pump Motor
To Remove
1. Ensure that power is off.
2. Remove the 4 screws holding the front plate (bezel) in
place.
3. Remove the front plate.
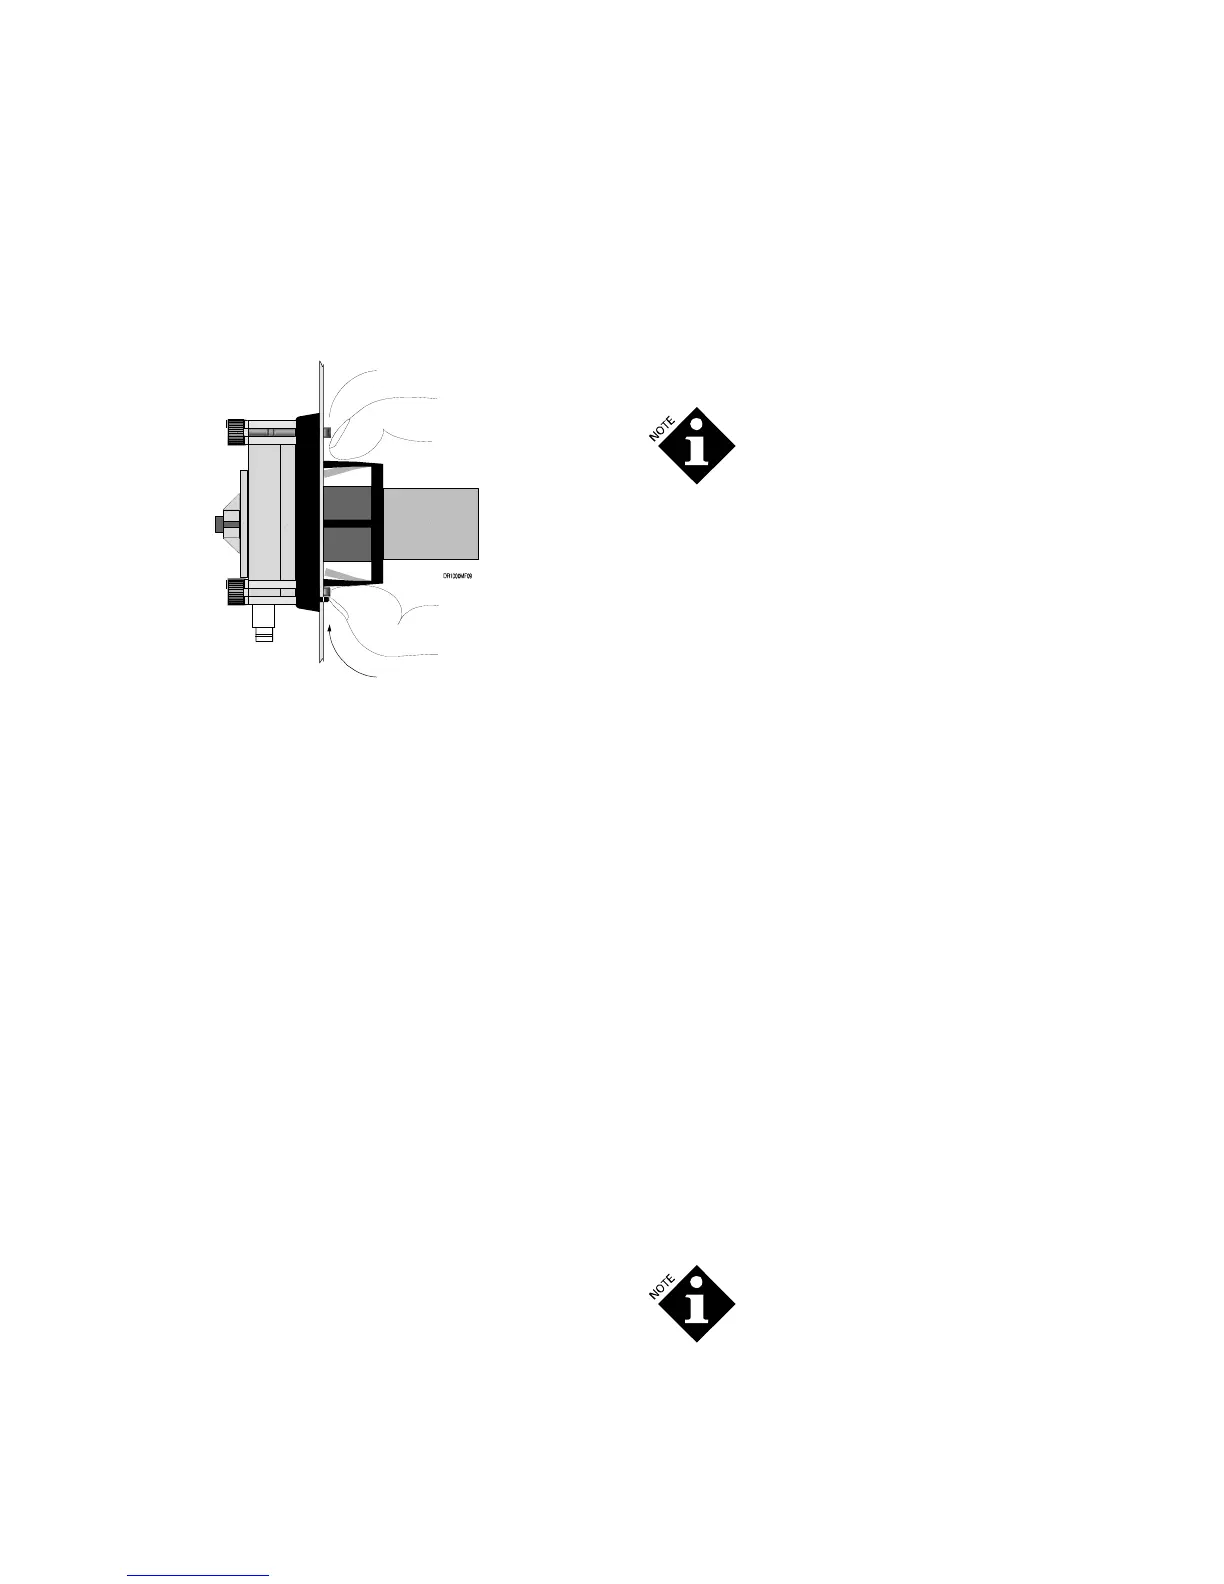
4. Remove the pump cartridge from the motor assembly,
leaving the chemical lines attached.
5. Remove the electrical connections at the back of the motor.
6. Compress the two flex ears on the back of the motor until
the motor slides out through the hole in the front plate.
To Replace
1. Locate the alignment tip of the motor housing so it is in the
down position.
2. Slide the pump motor housing into the front plate hole. The
holding ears will expand to hold the pump motor in place.
Verify that both ears popped out and are locked in place.
3. Reinstall the electrical connections at the back of the motor.
4. Install the pump cartridge.
5. Prime the pump to verify proper pump rotation (clockwise).
If the direction is wrong, switch the motor wires.
How to Replace the Main PCB
1. Disconnect power to the unit.
2. Remove the 4 screws holding the front plate of the
DR-2000 control box in place. Remove the front plate
(bezel), being careful not to damage the gasket.
3. Detach the power wire connection coming from the power
PCB to the main PCB.
4. Detach the motor supply wires from the PCB.
5. Place the bezel face down on the work surface.
6. Remove the 4 screws holding the main PCB to the bezel.
7. Gently lift the main PCB out of the bezel.
8. If the zebra strips and display screen stick to the old PCB,
remove them and place them in the bezel, being careful to
keep their orientation.
9. Align the new PCB over the zebra strips and replace the 4
screws. Be sure to tighten the screws into position. The
pressure these screws exert on the PCB is important for
maintaining water resistance and holding the display in
place.
10. Reattach the motor supply wires to the main PCB at the
terminal marked “motor”.
11. Reattach the power supply to the terminal marked
“+6VDC”.
12. Remount the front plate (bezel) and retighten the screws,
being careful not to damage the gasket.
Between the main PCB and the front plate
(bezel) are the buttons, screen and zebra
strips. It is important that these items are
properly aligned and that the screws holding
the PCB in place be properly tightened. If
these items are not properly aligned and held
in place by pressure from the 4 screws, water
resistance may be lost around the buttons or
the screen may not display properly.
How to Replace the Power PCB
1. Disconnect power to the unit.
2. Remove the 4 screws holding the front plate of the DR-
2000 control box in place. Remove the front plate (bezel),
being careful not to damage the gasket.
3. Detach the power wire connection from the main PCB.
4. Detach the power cord.
5. Remove the screws holding the power PCB in place.
6. Gently lift out the power PCB.
7. Align the new power PCB and replace the screws. Be sure
to tighten the screws into position.
8. Reattach the power cord to the terminal block.
9. Reattach the power wire connection from the main PCB.
10. Remount the front plate (bezel) and retighten the screws,
being careful not to damage the gasket.
How to Replace Coin Battery
1. Ensure that power is off.
2. Remove the 4 screws holding the front plate of the
DR-2000 control box in place. Remove the front plate
(bezel), being careful not to damage the gasket.
3. Locate the coin battery on the PCB.
4. Slip the coin battery out and replace it with a new one
(3 Volt lithium BR2032 or CR2032).
5. Remount the front plate (bezel) and retighten the screws,
being careful not to damage the gasket.
When the lithium backup battery is removed,
all programmed events will be erased and the
clock will revert to its default setting of 12:00
AM, Monday.
Cleaning the Unit
Wipe pump housing clean with a dry rag.
DR-2000 (R14735-00, Rev C) February 2010 1210730 7
 Loading...