9
EN
AVENTHO 300 — Wireless Over-Ear Headphones
Decrease volume
� Swipe downwards on
the touch pad.
Next track
� Swipe forwards on the
touch pad.
Previous track
� Swipe backwards on
the touch pad.
Fa forward
� Swipe forwards on the
touch pad and hold for
at lea 1 second.
Rewind
� Swipe backwards on
the touch pad and hold
for at lea 1 second.
Accept / end call
� Briefly tap the touch
pad twice (
).
Reject call
� Tap and hold the touch
pad once (
).
Switch between two
callers
� Tap and hold the touch
pad once (
).
Activate voice assiant
� Tap and hold the touch
pad once (
).
Activate transparency
mode temporarily
� Place the palm of your
hand on the right touch
pad.
Overview of the LED displays on the
headphone
Action LED display
Low battery warning
� LED flashes red rapidly
Charging via USB 0 – 30 %
� LED flashes red
Charging via USB 31 – 70%
� LED flashes yellow
Charging via USB 71 – 99%
� LED flashes green
Charging via USB 100%
� LED illuminates green
Switch on with battery
atus 5 – 30 %
� LED lights up red once
Switch on with battery
atus 31 – 70 %
� LED lights up yellow
once
Switch on with battery
atus 71 – 100 %
� LED lights up green
once
Bluetooth® pairing
recognisable
� LED flashes blue and
red
Bluetooth® connection
active
� LED flashes blue
slowly with pauses
of 7 seconds
Bluetooth® connection
lo
� LED flashes blue
slowly with pauses
of 3 seconds
Media playback active
� LED flashes slowly
blue with pauses
of 7 seconds
Incoming call
� LED flashes rapidly blue
with pauses of 1 second
Delete pairing li
� LED flashes yellow three
times
Reore factory settings
� LED flashes yellow three
times
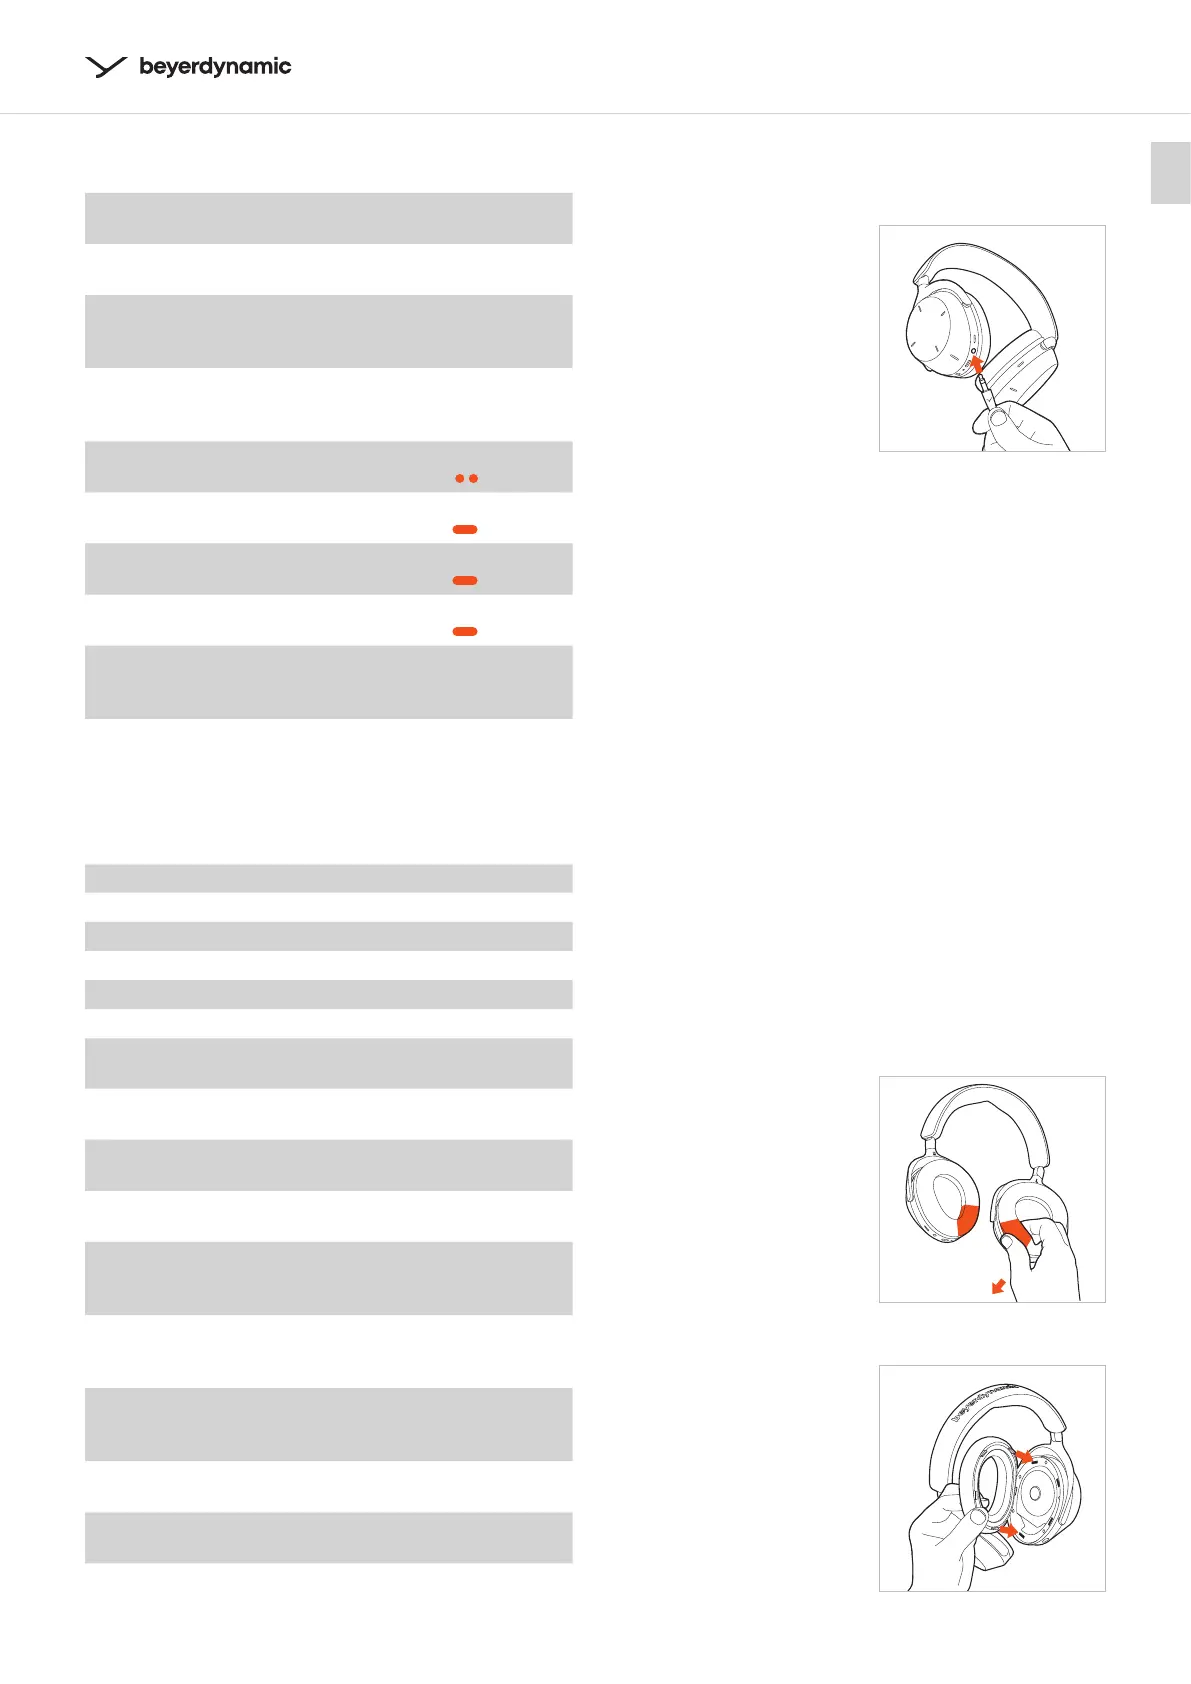
Audio cable connection
The delivery includes an audio cable with a mini jack
plug (3.5 mm) at both ends.
� Connect one end of the
audio cable to the jack
socket of the headphone
housing, if you would like
to use the AVENTHO 300
without Bluetooth®.
� Alternatively, you can use
the USB cable as an audio
cable.
� Switch on the
AVENTHO 300. Please
note that with this type
of application power is
consumed via the battery.
� Control the media playback
and volume via the playback device.
Cleaning
� For reasons of hygiene, you should occasionally clean
the ear and headband pads with a so cloth mois-
tened with water. Make sure that no water gets into
the ear cups or transducers.
� Do not use cleaning agents containing solvents.
� Never use a vacuum cleaner for cleaning the head-
phone, as this may cause irreparable damage.
� As ear and headband pads are subject to natural
wear and tear, it will be necessary to replace them
from time to time. You can easily do this yourself.
� If other components have to be replaced, please
contact your local beyerdynamic representative.
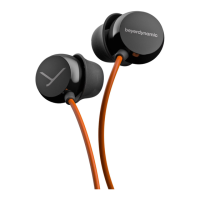
Changing the ear pads
� Remove the ear pad from
the housing by grabbing
it at the lower end from
the inside under the ear
pad and pulling it
downwards from the
faening ring of the
housing.
� Attach the new ear pad
to the housing.
The five faening noses
on the faening ring
of the ear pad mu be
inseed into the recesses
of the housing and click
into place.