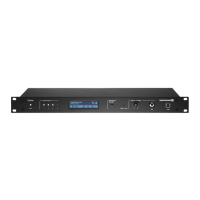
Quick Start Guide Quinta – Control Unit
23
english
• A free line of sight between the Quinta MU microphone units, Quinta TB boundary microphones and
Quinta TH handheld transmitter and the antennae of the Quinta RS control unit is essential for the
operation.
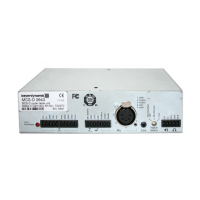
How to connect the antennae
• Connect the antennae to the antenna connections . Please note that for diversity operation both
antennae have to be connected! A weighting circuit is used to make sure that the better antenna
signal is received.
• For stand-alone operation we recommend using the supplied CA Q 11 angled rod antennae.
• The Quinta CU control unit can also be operated with remote antennae. We recommend extremely
low attenuation connecting cables which are 10 m [32.8 ft.] or 20 m [65.6 ft.] long. Please note
that the antennae have to be installed remotely.
Connections
• Connect the Audio Mix , XLR or Cinch master output of the Quinta RS control unit to the
input of your video conferencing system. For a correct connection to your video conference system,
please refer to the manufacturer’s manual of the video conference system regarding the micro-
phone connection.
• Via the 12-pin Phoenix terminal strip you can pick up all four microphone signals separately. This
kind of application requires optional hardware for signal processing, and is, in general, not necessary
for the use of the Quinta RS.
• Connect the Quinta RS control unit to the mains . The internal power supply unit of the control
unit can automatically adjust between 100 and 240 V at 50 - 60 Hz. Verify that the voltage rating
of the unit matches that of the AC mains outlet you are to use. If you connect the unit to the wrong
voltage, you may seriously damage it. Always route cables running to the unit where they will not
be pinched or cut by heavy or sharp objects.
• For using the AVB network connection, please refer to the extensive “Quinta Conference System”
manual.
How to operate the control unit
• Turn on the Quinta RS control unit with the On/Off switch . The Power on LED will illuminate.
The channel LED 1 to 4 will illuminate white to indicate the availability.
• Conference mode: As soon as a microphone is activated, the channel LED will illuminate red
to indicate that the channel is occupied. In the conference mode you can operate a maximum of
20 microphone units with the Quinta RS. Furthermore, please note that the Quinta RS control unit
does not provide any voting function.
• Microphone mode: As soon as there is an active radio connection between the microphone and
control unit (no matter if the microphone is open or muted) the appropriate channel display will
illuminate red to indicate that the channel is occupied. In the microphone mode a maximum of four
microphones can be operated with one control unit. If all four radio channels are occupied and
more microphones are activated, these microphones that are too many will automatically be
deactivated right away.
• When the Quinta RS control unit is turned on for the first time, it is set to the RF band of 2.4 GHz*
which has been selected at the factory. Via the Quinta Software you can select the appropriate
region where you use the control unit and select the antenna configuration so that the RF bands in
the 5.2* or 5.8 GHz* range are available. The devices (Quinta MU, Quinta TB and Quinta TH) will
automatically be adjusted and without any interruption to the frequency of the Quinta RS control
unit. Please refer also to the “Quinta Software” manual.
*Note:
The availability of the RF bands 2.4; 5.2 or 5.8 GHz depends on the selected region.
North America: The RF bands 2.4; 5.2 or 5.8 GHz are preconfigured in Quinta RS at the factory.
 Loading...