Riva Plus Manual
38
15.3 Checking the gas pressure at the burner:
This boiler has been tested to the highest quality control standards.
The maximum and minimum gas pressures are already set during this quality control
process however the checking procedure must be followed to ensure maximum
operating efficiency from the boiler.
• Remove the front panel
of the case.
• Take off the lid of the
sealed chamber.
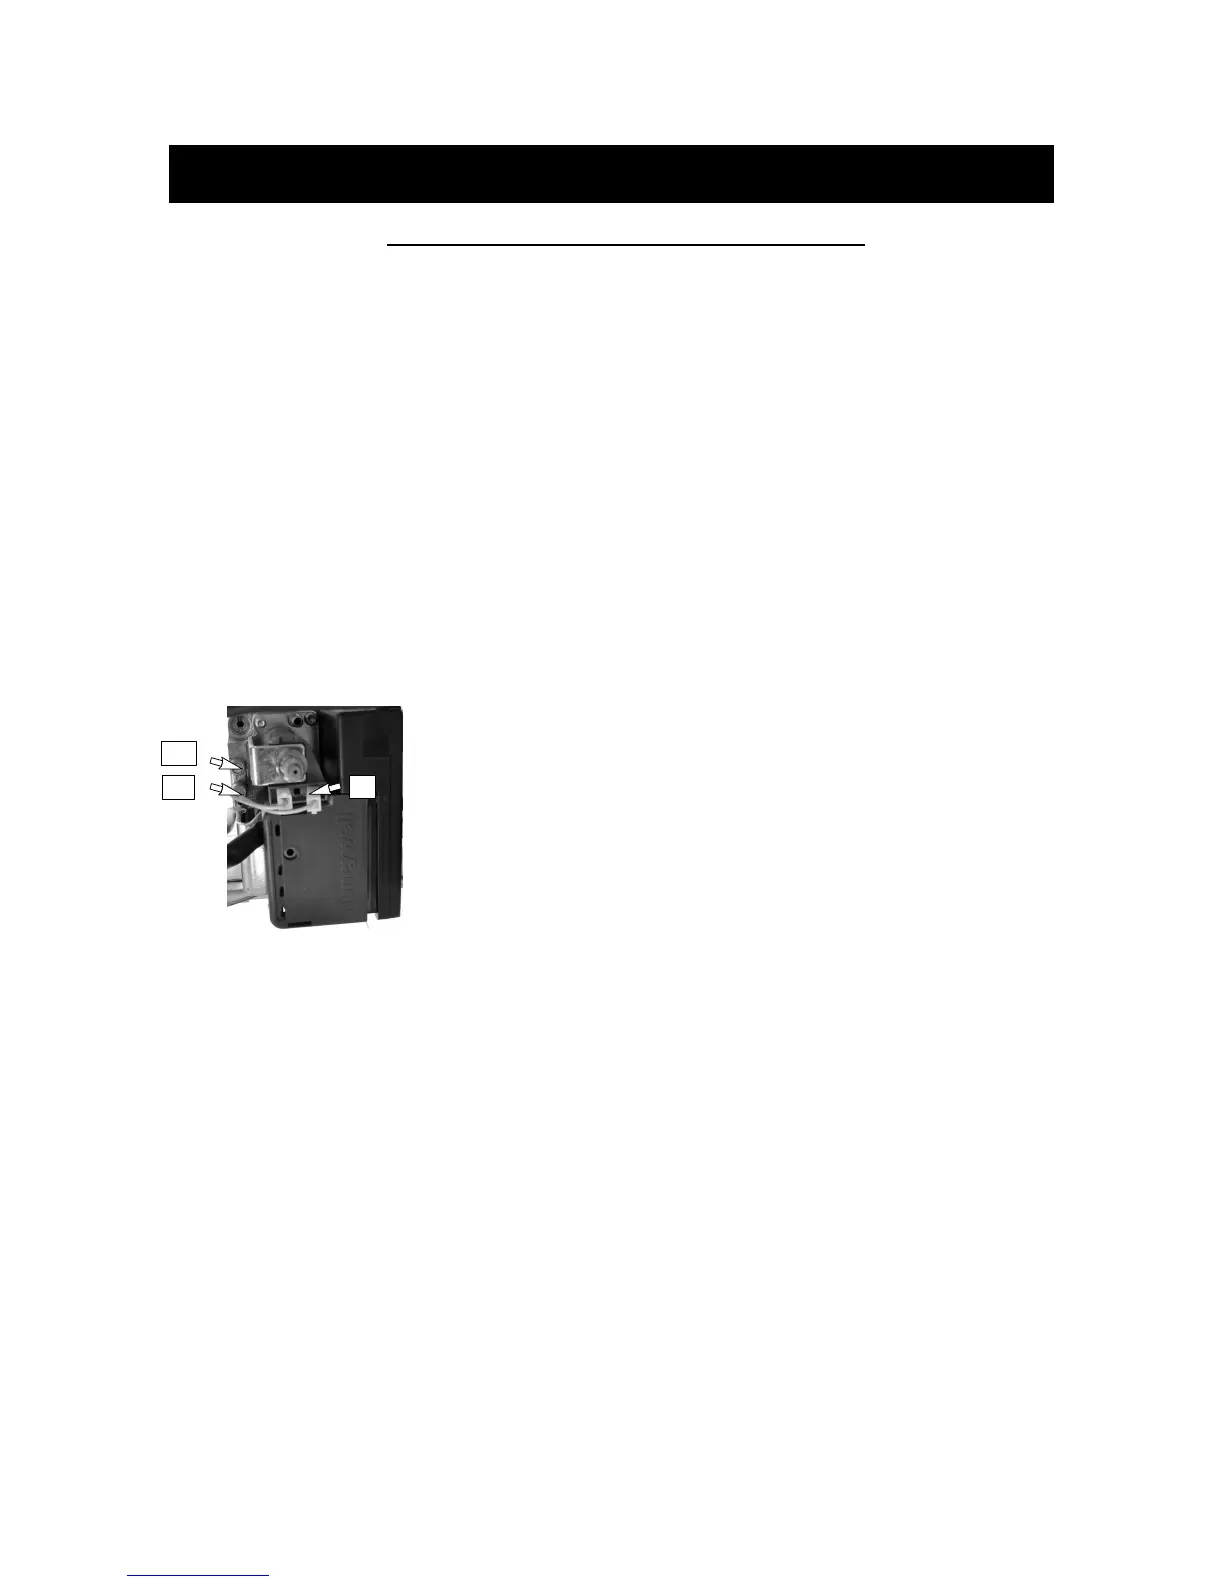
• Loosen the internal
screw 15 (Figure 15.4)
on the Outlet Pressure
Test Point of the Gas
Valve and connect a
pressure gauge using a
suitable hose.
E
15
16
Figure 15.4
• Set the c.h. temperature
control knob to its
maximum position. If
external controls are
fitted (e.g. room
thermostat) ensure they
"call for heat".
• Switch on the boiler.
• Check the maximum gas
pressure and compare
the value on the gauge
with the value indicated
in the Section 2 on page
10 (gas pressures at the
burner).
• Check the maximum gas
flow at the gas meter
and compare the value
indicated in the section 2
on page 10 (gas flow
rate).
• Switch off the boiler.
• Disconnect the gas
modulator coil by
removing the electrical
connector E (Figure
15.4).
• Switch on the boiler.
• Check the minimum gas
pressure and compare
the value on the gauge
with the value indicated
in the Section 2 on page
10 (gas pressures at the
burner).
• Switch off the boiler and
re-connect the electrical
connector E to the
modulator coil.
• Switch on the boiler.
• Check that the boiler
lights up uniformly.
• Switch off the boiler, turn
off the hot water taps
and disconnect the
pressure gauge.
• Close the lid of the
sealed chamber.
Important: after the
checks all of the test
points must be sealed.
15. Commissioning Cont.





 To Next Page