13 Biodex Medical Systems, Inc. © 2018
3. Using a 7/16” wrench, remove the four acorn nuts and flat washers that are used to secure
the Dose Calibrator Tablet Shelf support post to the countertop. The nuts and flat washers
are found on the threaded studs on the counter top (see Figure 2.4).
4. Place the support arm on the threaded studs positioned over the rear, right opening (see
Figure 2.4). The arm should face the front of the cabinet. Place the washers on the studs
and the acorn nuts over the washers. Adjust the arm and tighten the acorn nuts.
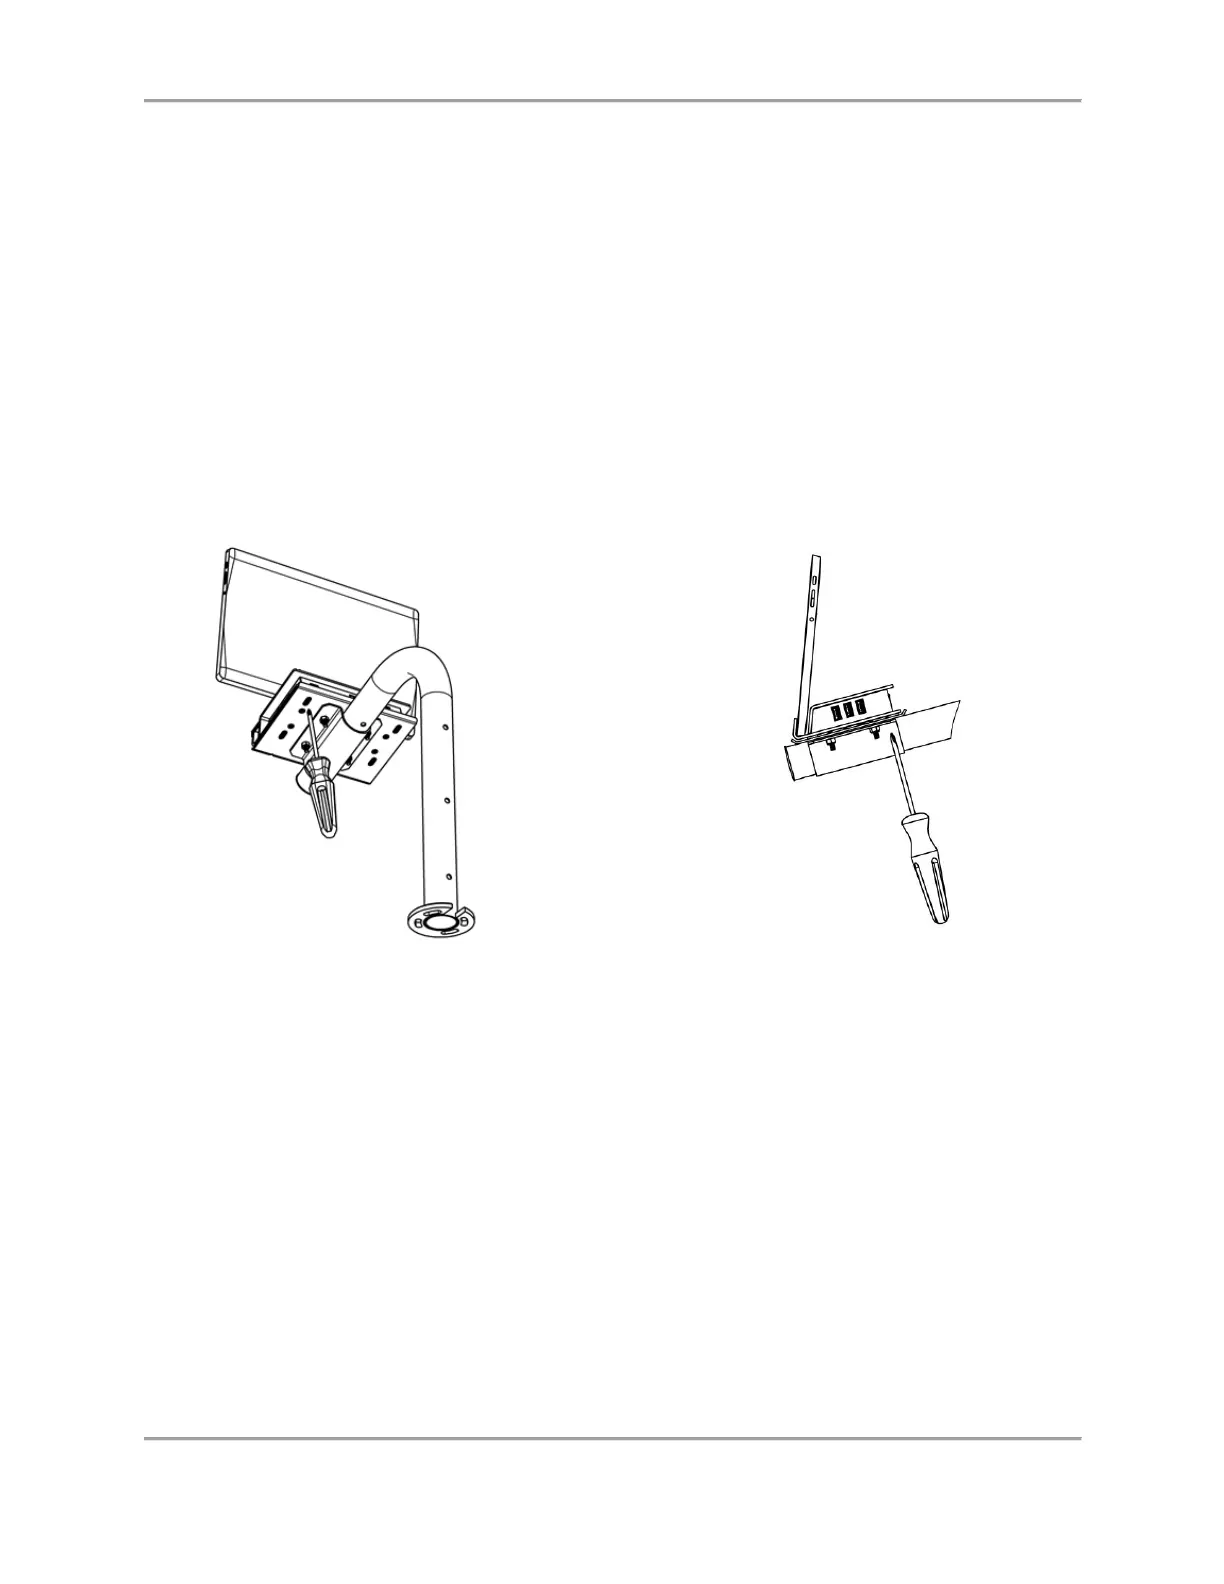
5. Using a Philips head screwdriver, loosen the four 6-32 x .38” SST screws under the Interface
Module shelf, but do not remove them (see Figure 2.7).
6. Insert the tablet into the opening on the front of the Interface Module (refer to the Side View
in Figure 2.7 for proper placement of the tablet).
7. Slide the top plate of the Interface Module forward until the tablet is firmly held in place.
8. Re-tighten the four 6-32 x .38” SST screws using the Philips head screwdriver.
Figure 2.7. Attaching the Tablet to the Interface Module
Note: The Dose Calibrator Tablet Shelf can be repositioned along the support arm at any time.
To change the position, loosen the four acorn nuts on the bracket under the shelf, lift the shelf
slightly to disengage the shelf pin, move the shelf to the desired position, re-engage the pin, and
tighten the four nuts.
Procedure to Change the Shelf When Required
Sometimes the wrong shelf is mounted to the arm for the desired configuration. When this
happens, the user must remove the incorrect shelf from the arm and install the correct shelf.
Once the correct shelf has been attached to the support tube, the assembly process can begin.
The following details the steps to follow when changing to the correct shelf.