5400230 Rev. H
1.5 seconds. SAVED will appear on the screen indicating that your modifications are saved under the
current procedure name. You must ensure that all safety precautions have been followed prior to
entering READY mode. (See Section 2 “Precautions and Warnings”). The system will return to
STANDBY mode when it is inactive for more than three (3) minutes.
SLEEP MODE: The system is placed in a low power state to conserve battery power. All LED's and
the Display panel are turned off in this mode. The system will enter STANDBY mode with the last
settings used when the Selector Switch or Finger Switch is pressed.
4.6 FIRING THE LASER
EMERGENCY
STOP
To immediately stop laser emission, pull the battery from the iLase main
body.
NOTE
Most procedures require tip initiation before using the iLase. For those procedures that require tip
initiation, you must complete the tip initiation steps before using the iLase in a procedure on a patient. If tip
initiation is not required or has already been initiated, press the selector switch to bypass this operation.
1
Make sure the iLase has a tip installed that is appropriate for the planned procedure.
2
Make sure that all personnel in the operatory are wearing laser protective eyewear.
3
After the user enters READY mode, the LED on the iLase will be green. The red aiming beam will
also appear at this time. The laser is now ready to fire.
4
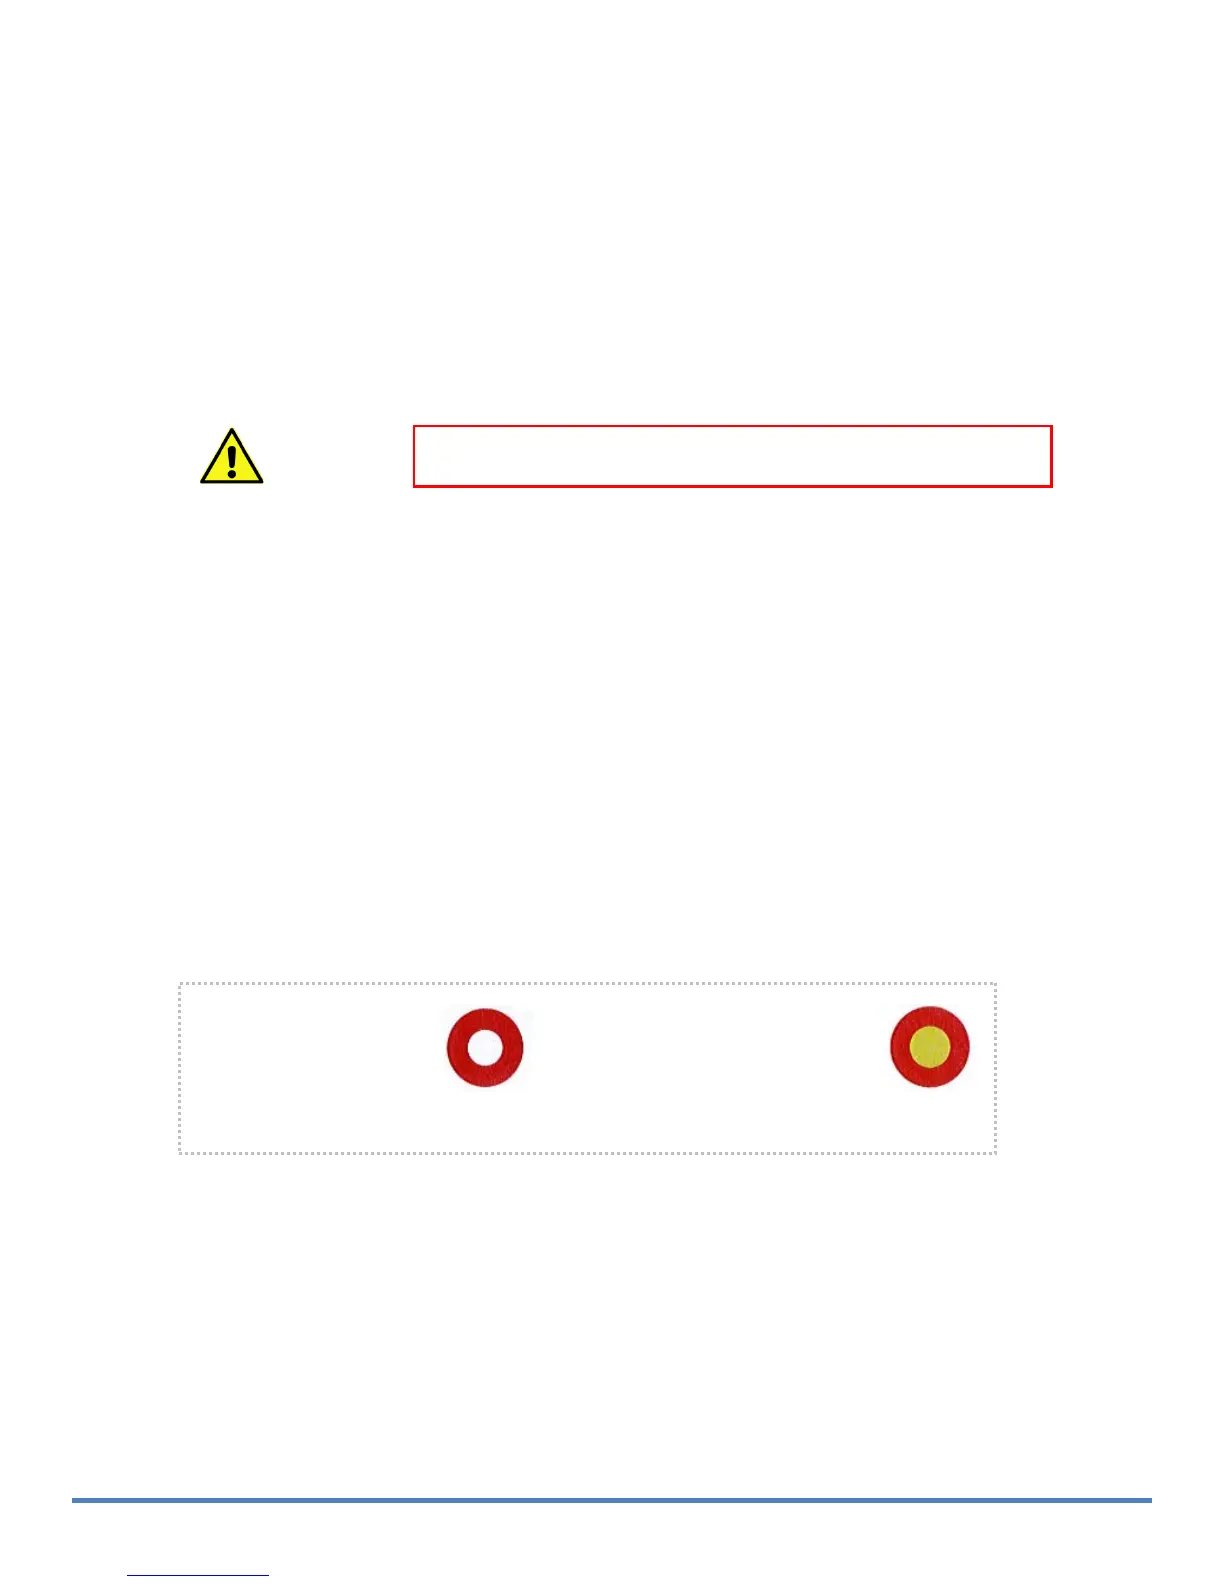
Prior to firing, verify that the tip is installed correctly into the iLase cover by shining the red
aiming beam onto a bright surface, such as a white table top. If using a tip that requires initiation (not
pre-initiated), make sure the aiming beam image appears as in the example below:
WARNING:
When the aiming beam is not present or has a significantly different shape, change the tip
and inspect / clean the protective window until the image appears as shown above.
5
Use the aiming beam to position the tip over the target treatment area. Place the laser tip on the
treatment area and press the finger switch (or gently squeeze the finger grip) on the iLase to fire
the laser. Actuation will occur when the finger grip is pressed over any one of the six ridges anywhere
along the whole length of the switch.
When the tip is straight, the
aiming beam will look like a
circle, outlining the area
where the main laser power
is applied
.
When the tip is bent, the
aiming beam will more like a
spot, and the main laser
power (invisible infrared
radiation) will be applied in the
middle of the spot
.
F
i
g
ur e 4
-3:
Ai ming
b
ea
m
pa
tt
ern
.