Note: You can also select a patient from the database.
3. Enter the patients name, date of birth and gender. Assign a patient identifier number. Press OK to confirm.
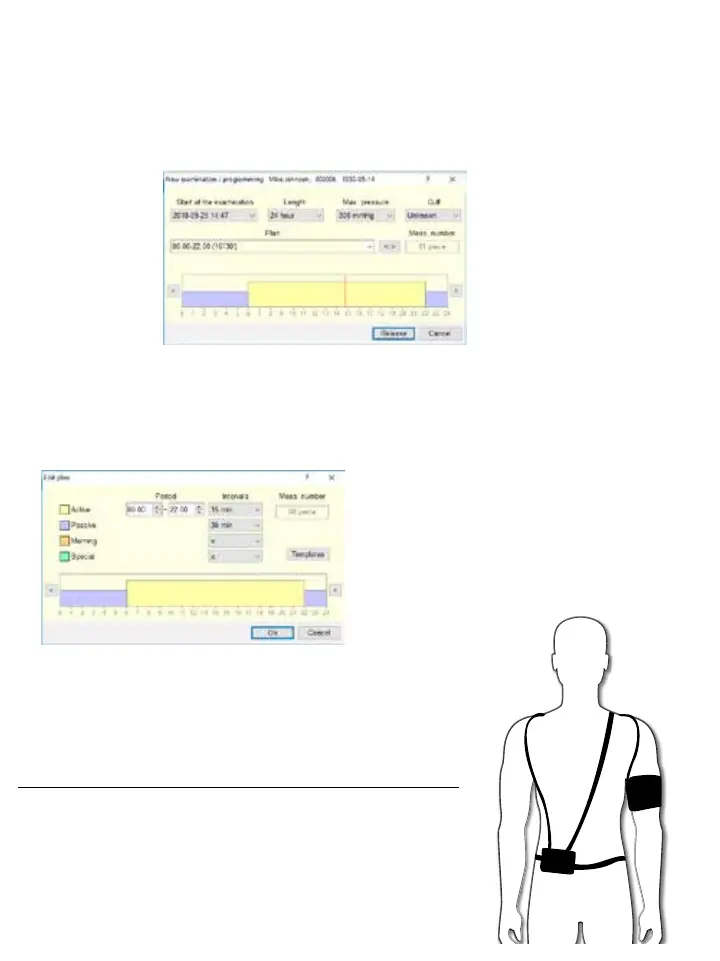
4. Create a monitoring plan based on the requisition form filled out by the patient’s physician.
a. Ensure to select the correct sized cuff the patient will wear.
b. The start time of the examination can be adjusted.
c. Set the length of time to 24 hours or 48 hours.
To edit the interval program, click on the < > button.
a. Adjust the active, passive, morning and special (if applicable) period and interval times.
b. Press OK to confirm.
5. Click on the RELEASE button, the software will speak to the monitor and
set up all the parameters from the software to the ambulatory monitor.
6. Exit out of the software and unplug the monitor from the computer.
4. Fit the Patient with the Monitor
1. Apply a proper size cuff to the patient’s non-dominant arm and be sure
that the artery indicator is over the brachial artery.
2. Connect the hose to the monitor.
3. Place the monitor in the pouch and affix the patient with the belt and straps.
4. Start a manual BP reading to verify if the monitor is working properly and