9
ENGLISH
(Original instructions)
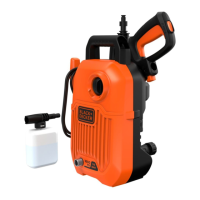
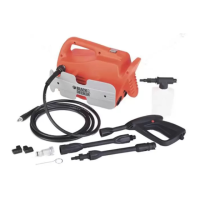
This pressure cleaner must be used with the quick connect
adapters. The garden or suction hose can only be attached
when the transparent lter (3) is installed.
u To connect the transparent lter ( 3 ) with its quick connect
end to the pressure cleaner, place the end of the transpar-
ent lter ( 3 ) onto the water intake ( 15 ) and screw the
transparent lter ( 3 ) onto the water intake ( 15 ).
Note: Avoid cross threading when installing the transparent
lter. Cross threading will cause leaks.
To attach the spray wand (Fig. C)
The spray wand connect to the pressure cleaner. To connect
the spray wand ( 9 ) to the pressure cleaner.
u Insert the end of the attachment into the opening on the
pressure cleaner ( 2 ). Push in and turn the attachment
clockwise until its secured into working position.
u To remove the attachment, push in and turn the at-
tachment counterclockwise and pull from the pressure
cleaner ( 2 ).
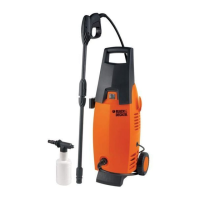
To attach the garden or suction hose
(Fig. D, E, F)
Connecting the garden hose or suction hose will depend on
the job to be performed.
To attach garden hose (Fig. D, E)
This pressure cleaner must be used with the quick connect
adapters.
u To connect the quick connect hose adapter (8) to a garden
hose, thread the quick connect hose adapter onto the end
of the garden hose. Tighten the garden hose by hand.
Note: Avoid cross threading when installing the hose. Cross
threading will cause leaks.
Note: Before connecting the garden hose to the pressure
cleaner, run water through the garden hose for thirty seconds
to clear any debris from the mouth of the garden pressure
hose.
u To connect the quick connect hose adapter (8) to the
transparent lter with quick connect (3) on the pressure
cleaner (2), push the quick connect hose adapter rmly
onto the transparent lter.
Note: Before use, gently tug on the garden hose to ensure
the connection is secured. Make sure the quick connect hose
adapter is ush with the transparent lter as shown in Figure
E.
u Always disconnect the garden hose after usage. To
disconnect, pull back the collar on the quick connect hose
adapter and remove from the transparent lter.
To attach the suction hose (Fig. E, F)
Use the suction hose to pull water from a bucket or other fresh
water source.
Note: Do not use to suction soap, chemicals, dirty or corrosive
liquids, such as window cleaner, plant food, fertilizers or
bleach. Do not use salt water.
u To connect the quick connect hose adapter (13) on the
end of the suction hose to the water intake with lter (3)
on the pressure cleaner (2), push the quick connect hose
adapter rmly onto the water intake with transparent lter.
Note: Before use, gently tug on the garden hose to ensure
the connection is secured. Make sure the quick connect hose
adapter on the end of the suction hose is ush with the quick
connect lter as shown in the Figure E.
u Place other end of suction hose with lter on it into
container of fresh water or a fresh water source. Adjust the
oat on the suction hose so the lter stays covered in the
liquid.
u After the job being performed is complete, place the suc-
tion hose into container of clean water and draw the clean
water through the system to rinse.
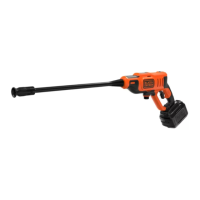
Speed Selector (Fig. I)
This pressure cleaner gives you the choice to operate at a
lower pressure for more delicate jobs, or accelerate the pres-
sure cleaner speed for high-performance cleaning.
To accelerate, pull the speed selector ( 16 ) forward toward
the spray wand ( 1 ) into the "HI" position. This mode is best
for applications that need higher PSI.
For low pressure, push the speed selector back toward the
main handle ( 9 ) into the "LO" position. This mode is best for
larger projects that require more time to complete.
Note: When in "HI" mode, runtime will be decreased as
compared to when pressure cleaner is in "LO" mode
Proper hand position (Fig. H)
Warning! To reduce the risk of serious personal injury,
ALWAYS use proper hand position as shown.
Warning! To reduce the risk of serious personal injury, AL-
WAYS hold securely in anticipation of a sudden reaction.
Proper hand position requires one hand on the main handle
(1) and the other hand on the pressure cleaner's (2) body as
shown.
Pressure cleaning
Preparing surface for cleaning
u Remove objects from the area which could create a
hazard.
u Ensure that all doors and windows are closed tight.
Protect all plants and trees in the adjacent area with a
drop cloth ensuring that they will not be harmed by any
overspray.
u Pre-rinse cleaning area with fresh water.
u Use only detergents formulated for pressure washers.
u Always test detergent in an inconspicuous area before
use.
 Loading...