F
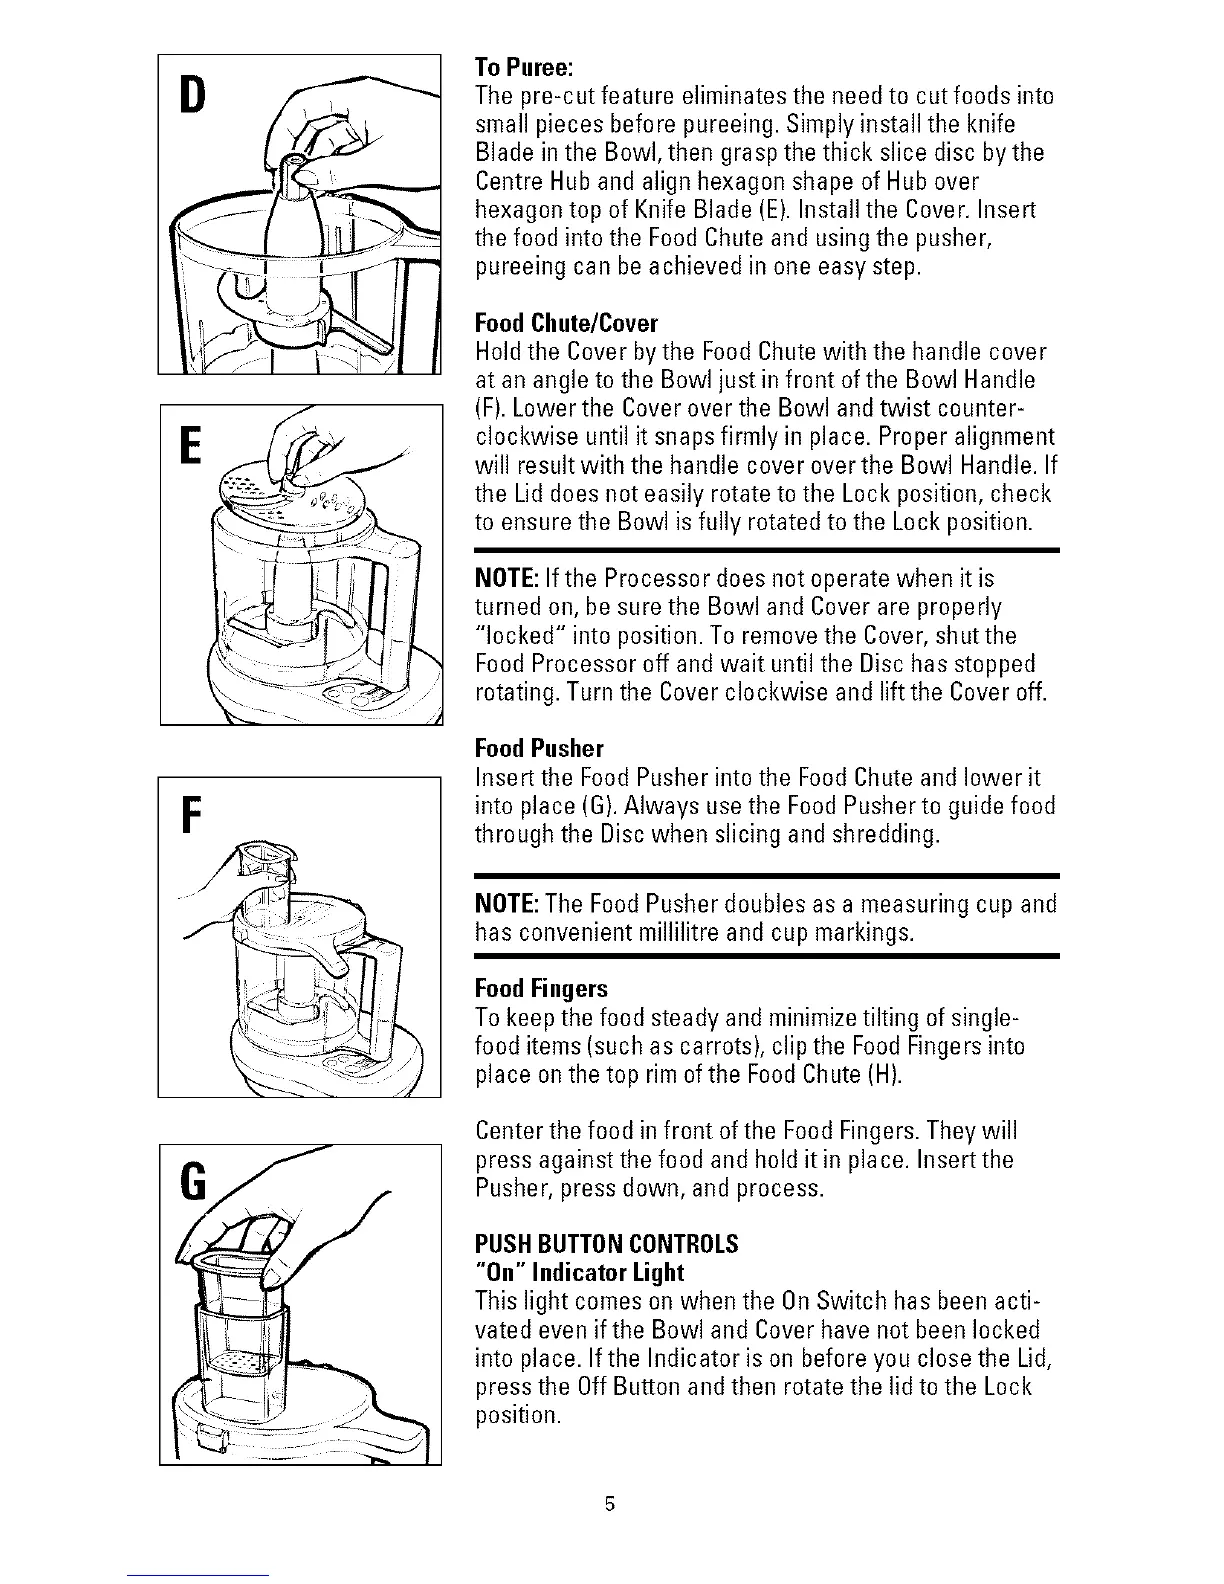
To Puree:
Thepre-cut feature eliminates the need to cut foods into
small pieces before pureeing. Simply install the knife
Blade inthe Bowl, then grasp the thick slice disc by the
Centre Huband align hexagon shape of Hub over
hexagontop of Knife Blade (E).Install the Cover.Insert
the food intothe FoodChuteand using the pusher,
pureeing can be achieved in one easy step.
FoodChute/Cover
Holdthe Coverbythe FoodChutewith the handle cover
at an angle to the Bowl just in front of the Bowl Handle
(F).Lowerthe Coverover the Bowl andtwist counter-
clockwise until it snaps firmly in place. Proper alignment
will result with the handle cover over the Bowl Handle. If
the Lid doesnot easily rotate tothe Lock position, check
to ensurethe Bowl isfully rotated to the Lock position.
NOTE:If the Processor does not operate when it is
turned on, be surethe Bowl and Coverare properly
"locked" into position. Toremove the Cover,shut the
FoodProcessor off and wait until the Disc hasstopped
rotating. Turnthe Cover clockwise and lift the Coveroff.
FoodPusher
Insert the FoodPusher intothe Food Chuteand lower it
into place (G).Always usethe FoodPusherto guide food
through the Discwhen slicing and shredding.
NOTE:The FoodPusherdoubles as a measuring cup and
has convenient millilitre and cup markings.
FoodFingers
Tokeepthe food steady and minimizetilting of single-
food items(such as carrots), clip the Food Fingersinto
place on thetop rim ofthe FoodChute(H).
Centerthe food infront of the FoodFingers.They will
press against the food and hold it in place. Insert the
Pusher, press down, and process.
PUSHBUTTONCONTROLS
"0." IndicatorLight
This light comeson when the OnSwitch has been acti-
vated even if the Bowl and Cover havenot been locked
into place. If the Indicator is on before you close the Lid,
press the OffButton and then rotate the lid to the Lock
position.

 Loading...