ENGLISH
7
also charge a partially used pack whenever you desire
with no adverse effect on the batterypack.
5. Foreign materials of a conductive nature such as, but
not limited to, grinding dust, metal chips, steel wool,
aluminum foil, or any buildup of metallic particles
should be kept away from charger cavities. Always
unplug the charger from the power supply when there
is no battery pack in the cavity. Unplug the charger
before attempting toclean.
6. Do not freeze or immerse the charger in water or any
otherliquid.
Storage Recommendations
1. The best storage place is one that is cool and dry, away
from direct sunlight and excess heat orcold.
2. For long storage, it is recommended to store a fully
charged battery pack in a cool dry place out of the
charger for optimalresults.
NOTE: Battery packs should not be stored completely
depleted of charge. The battery pack will need to be
recharged beforeuse.
SAVE THESE INSTRUCTIONS FOR
FUTURE USE
THIS PRODUCT USES THE BATTERY
AND CHARGER LISTED IN THE CHART
BELOW.
Description Catalog Number
20V Max* Lithium-Ion
Battery:
ʵ LBXR20
ʵ LB20
ʵ LBX20
ʵ LBXR20BT
20V Max* Lithium-Ion
Battery Charger:
ʵ LCS20
ʵ LCS201
ʵ LCS1620
2 Amp Fast Charger: ʵ L2AFC
ʵ L2AFCBST
ʵ LCS200
COMPONENTS Fig. A
WARNING: Never modify the power
tool or any part of it. Damage or personal injury
couldresult.
Refer to Figure A at the beginning of this manual for a
complete list ofcomponents.
Intended Use
This hedge trimmer is designed for residential
trimmingapplications.
DO NOT use under wet conditions or in presence of
flammable liquids orgases.
This hedge trimmer is a residential power tool. DO NOT
let children come into contact with the tool. Supervision is
required when inexperienced operators use thistool.
ASSEMBLY
WARNING: To reduce the risk of
serious personal injury, turn unit off and remove
the battery pack before making any adjustments
or removing/installing attachments or
accessories. An accidental start-up can causeinjury.
Assembly Tools Required (Not Supplied)
• Phillips Screwdriver
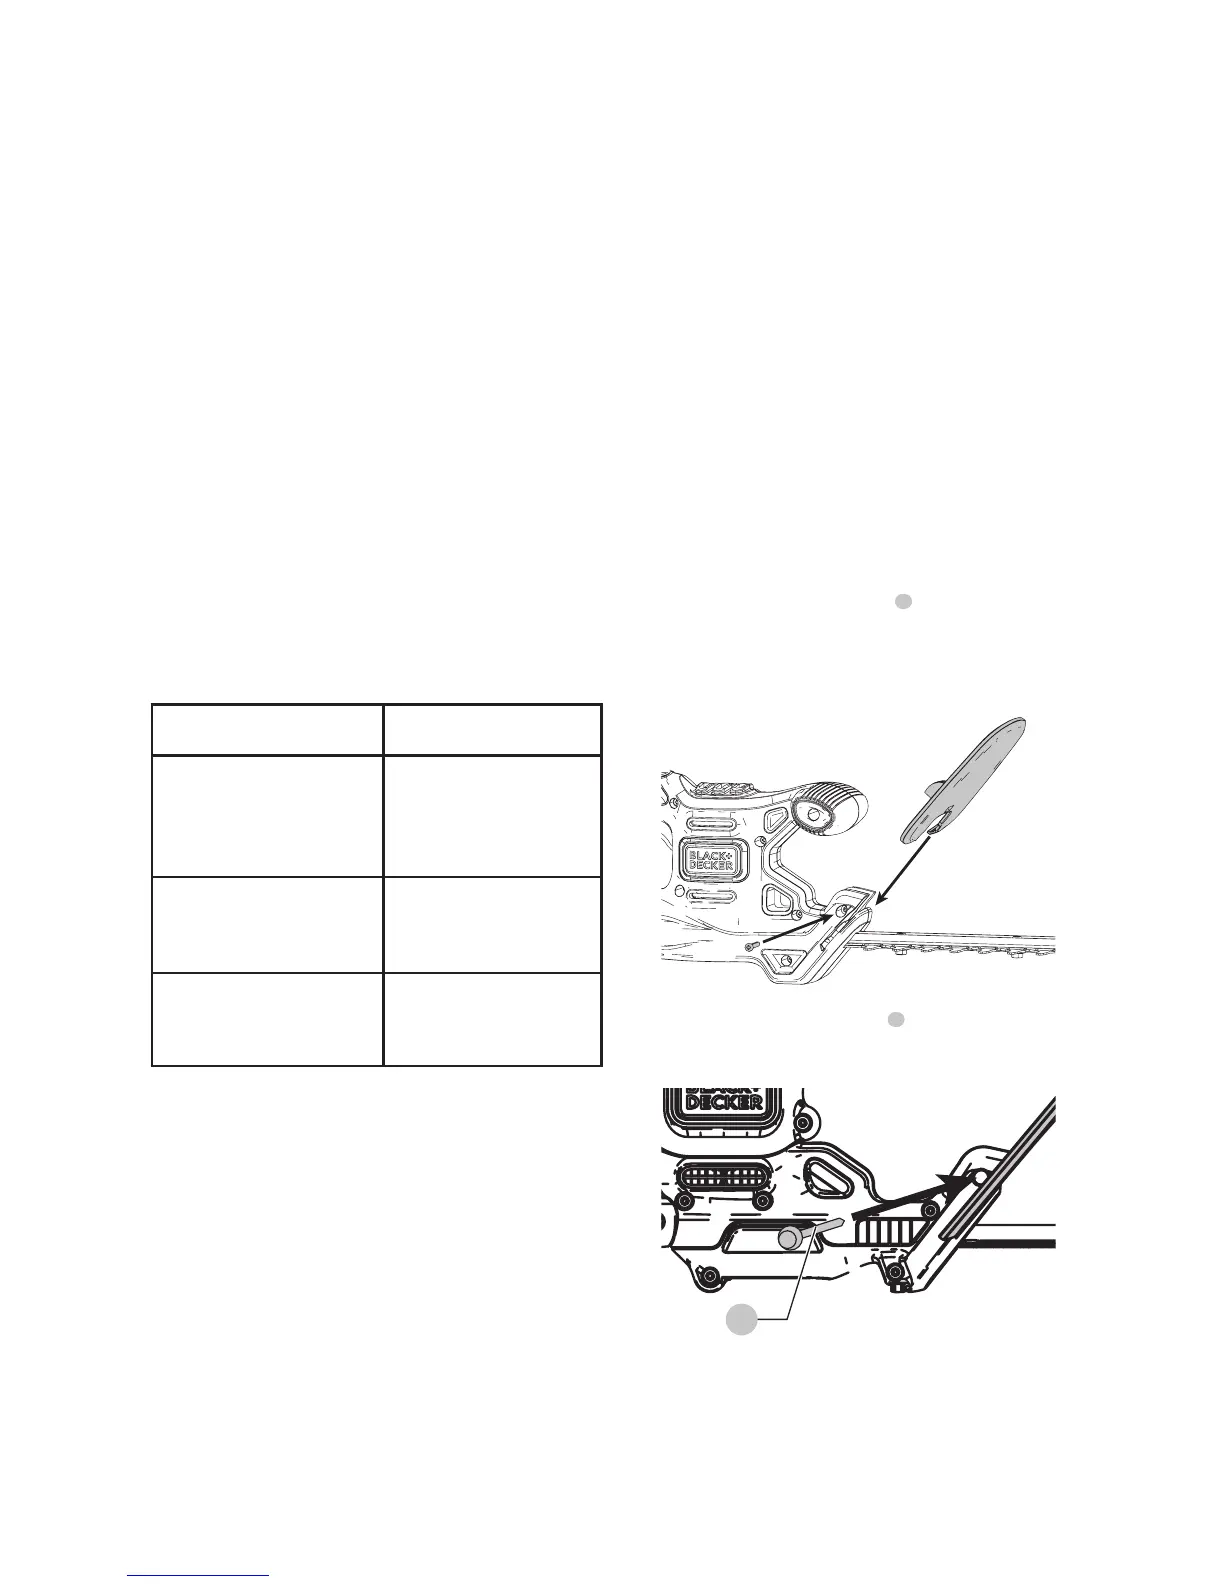
Attaching Guard to Trimmer Fig. B, C
WARNING: Only use with handle and
guard properly assembled to hedge trimmer.
The use of the hedge trimmer without the proper
guard or handle provided may result in serious
personalinjury.
The trimmer is shipped with the guard unattached to the
trimmer. To attach the guard:
• Remove guard retaining screw
8
, with the Phillips
screwdriver (notsupplied).
• Position the guard in place as shown in Fig.B. Ensuring
the guard slots into the grooves on theunit.
Fig. B
• Insert the guard retaining screw
8
,
into the opening on the
side of the guard and tighten securely as shown in FigureC.
Fig. C
8
SAVE THESE INSTRUCTIONS FOR
FUTURE USE