EN
4
Head Assembly (H)
! BEFORE STARTING ASSEMBLY!
Many of the major sub-assemblies of the Blade Fusion 480 kit have been pre-assembled at the factory. These sub-assemblies
were not assembled with thread-locking compound. Prior to beginning assembly of the kit, loosen any pre-assembled
screws which are threaded into metal components and apply thread-locking compound. Use only enough thread-locking
compound to moisten the threads. Check all pre-assembled components to ensure all fasteners are tight.
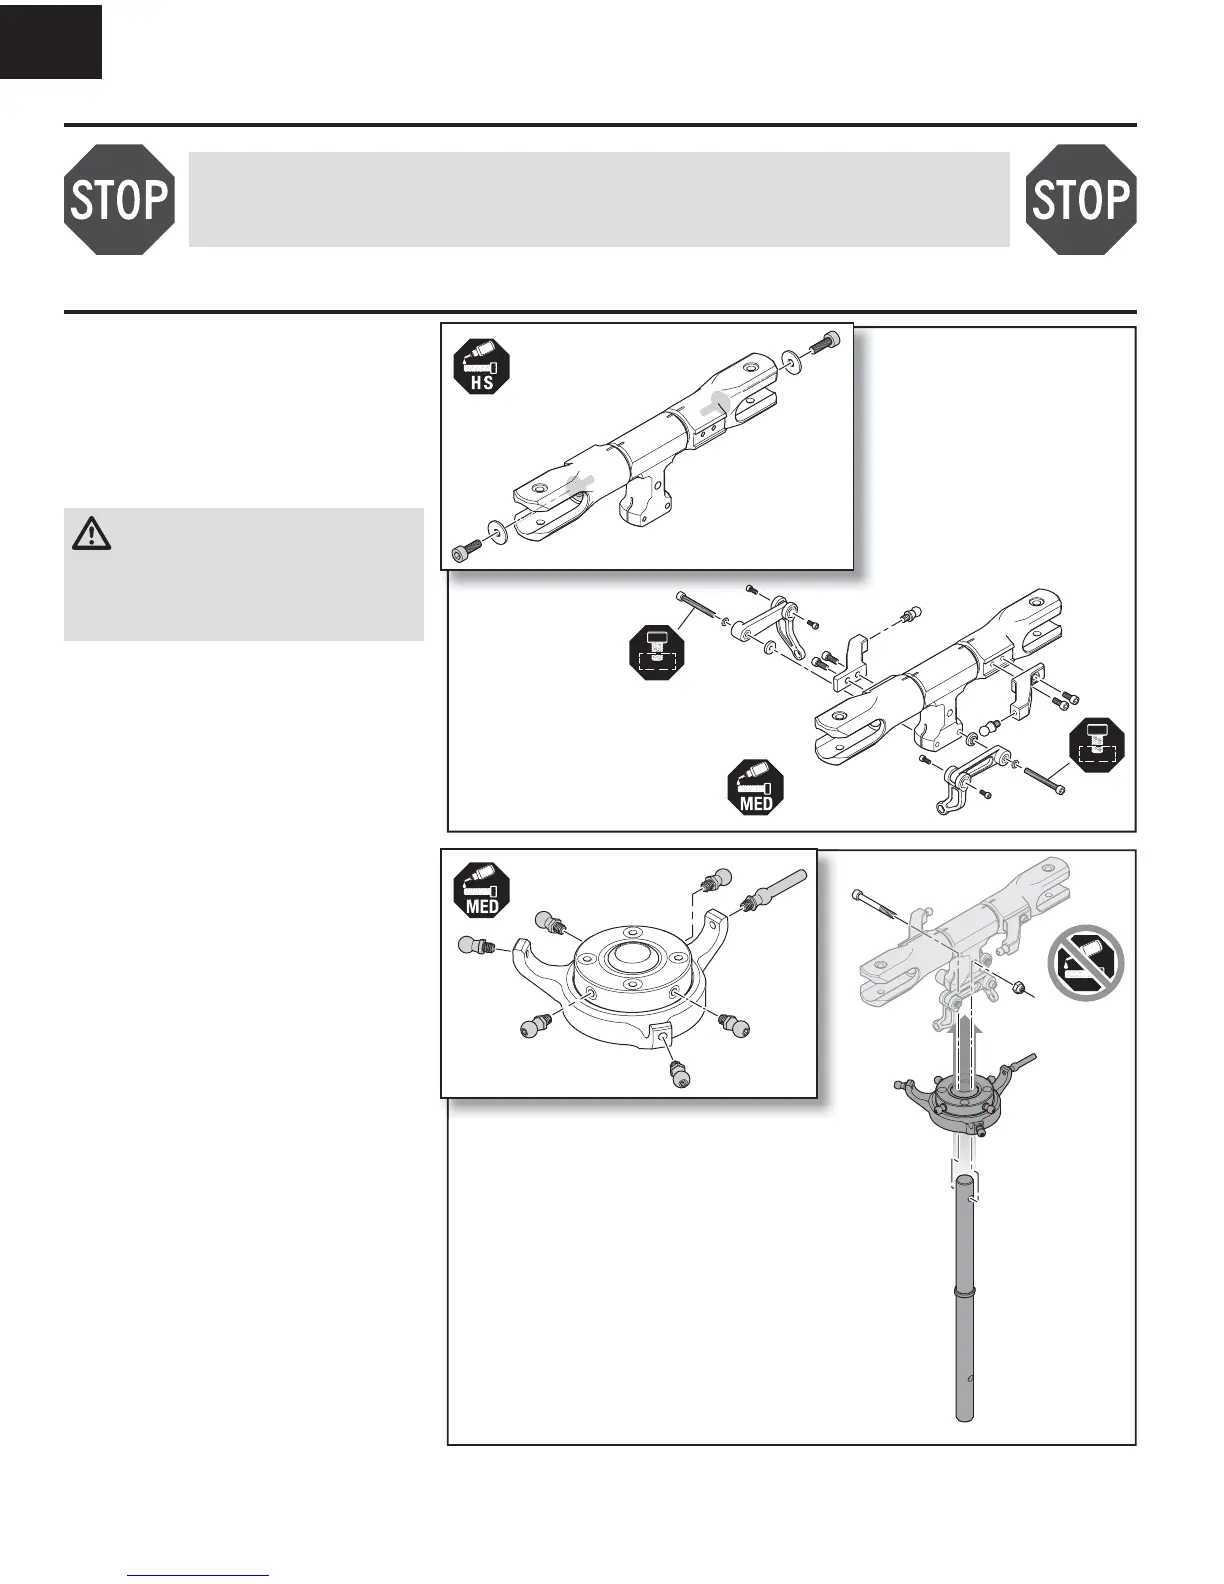
1. Remove the spindle bolts from the blade grips.
2. Clean the spindle threads and the threads of the
4x12mm spindle bolts with isopropyl alcohol.
3. Apply high strength thread-locking compound and
re-install the spindle bolts. Ensure the thread-locking
compound does not contact the blade grip bearings.
WARNING: Failure to apply high strength
thread-locking compound to the spindle bolts
may allow the spindle bolts to work free during
operation, which could cause the rotor blades to fl y
off. Projectile rotor blades pose a serious risk of
property damage and may cause severe bodily injury.
4. Remove the linkage balls from the main grip arms
and re-install them using medium thread-locking
compound.
5. Install the main grip arms to the blade grips using
two 3x10mm socket head caps crews per arm and
medium thread-locking compound.
6. Remove the 2x5mm socket head cap screws one
at a time from the follower arms and re-install with
medium thread-locking compound.
7. Install the follower arms to the head block using one
3x20mm socket head cap screw and two washers
per arm and medium thread-locking compound.
Ensure the thread-locking compound does not
contact the bearings of the follower arms. Do not
fully tighten at this time.
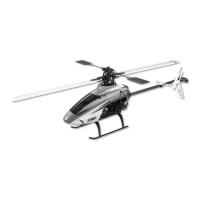
1. Remove the seven linkage balls from the swashplate
assembly one at a time and re-install them with
medium thread-locking compound.
2. Fit the swashplate over the main shaft.
3. Insert the main shaft into the head block and secure
it with a 4x20mm bolt and locknut. Before tightening
the bolt pull on the head block to verify the bolt
passes through the hole in the main shaft. Do not
use thread-locking compound on the head bolt
and locknut.
4. Fully tighten the two follower arm 3x20 socket head
cap screws installed in step 7 above.
Step H2
Step H1