Do you have a question about the Blaupunkt CDC-RF6 and is the answer not in the manual?
Details regulatory compliance and potential interference issues for the device.
Confirms the product meets safety standards and FCC requirements.
Highlights compatibility with any FM car stereo.
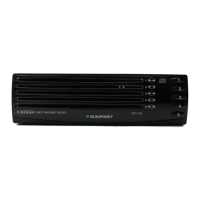
Lists the components included with the CD changer system.
Details core functionalities like disc selection and track management.
Explains the basic playback control functions.
Notes the selectable FM frequencies for modulation.
Mentions the built-in system to prevent skips.
Specifies the power source needed for operation.
Provides the physical size and installation flexibility.
Warns about the laser beam's potential eye hazard and advises against disassembly.
Specifies the required DC voltage and ground system.
Advises on operating temperatures and self-protection circuit.
Caution against unauthorized modifications voiding warranty.
Instruction to contact dealer for unresolved issues.
Provides advice for proper installation and testing procedures.
Instructions for removing screws securing the mechanism during shipping.
Details the purpose and circumstances for using the reset button.
Explains how to set the switch for multiple changers.
Guides on selecting the FM frequency for the modulator.
Warning to disconnect battery to prevent short circuits during wiring.
Procedure for connecting power to prevent damage and ensure proper operation.
Visual guide for connecting the unit's components and power.
Advice on choosing a mounting location and avoiding adverse conditions.
Instructions for setting switches based on installation orientation.
Lists and illustrates the hardware provided for installation.
Setting switches to 'H' and attaching brackets with bolts.
Attaching the unit to the floor using double-sided tape and bolts.
Removing nuts to detach the changer temporarily.
Cutting carpet to allow bolts to pass through.
Re-attaching the changer to the carpet with nuts.
Setting switches to 'V' and attaching brackets with bolts.
Attaching the unit to the floor using double-sided tape and bolts.
Removing nuts to detach the changer temporarily.
Cutting carpet to allow bolts to pass through.
Re-attaching the changer to the carpet with nuts.
Setting switches to '45°' and attaching brackets with bolts.
Attaching the unit to the floor using double-sided tape and bolts.
Removing nuts to detach the changer temporarily.
Cutting carpet to allow bolts to pass through.
Re-attaching the changer to the carpet with nuts.
Ensuring unit doesn't hinder trunk lid movement and setting switches.
Determining location and drilling four mounting holes.
Securing the changer using tapping screws.
Guidance on mounting the remote control unit.
Instructions for installing the FM modulator unit.
Tips for handling and caring for discs and the magazine.
Procedure for cleaning discs to ensure optimal playback.
Step-by-step guide on how to load a disc into the magazine tray.
Instructions for correctly inserting the disc magazine into the changer.
Procedure for safely removing the disc magazine.
Explanation of the function of each button on the commander unit.
Steps to turn on the unit and start CD playback.
How to pause and resume CD playback.
Procedure for powering down the unit.
Behavior when the last track of a disc or the magazine finishes.
Instructions for navigating between tracks.
Using controls to preview parts of a track.
How to select different discs in the changer.
Enabling track or disc repeat playback modes.
Activating random playback for tracks or discs.
Previewing the beginning of each track.
Previewing the beginning of tracks across all discs.
Using the changer select button with multiple units.
Instructions for switching from CD playback to radio or tape.
Troubleshooting steps for when the unit does not power on.
Diagnosing and resolving sound issues.
Steps to fix problems with magazine insertion.
Resolving issues when a disc fails to play.
Troubleshooting audio skips and intermittent sound.
Guidance on safely replacing blown fuses.
Addressing operational issues due to moisture buildup.
Information on error codes related to disc changing issues.
Troubleshooting disc loading and cleanliness errors.
Addressing errors caused by high internal temperatures.
Resolving errors when the magazine is missing.
Troubleshooting when the magazine is empty.
Fixing errors related to an empty disc slot.