9
EN
INSTAllATIoN INSTrUcTIoN | roboT & cHArGING STATIoN
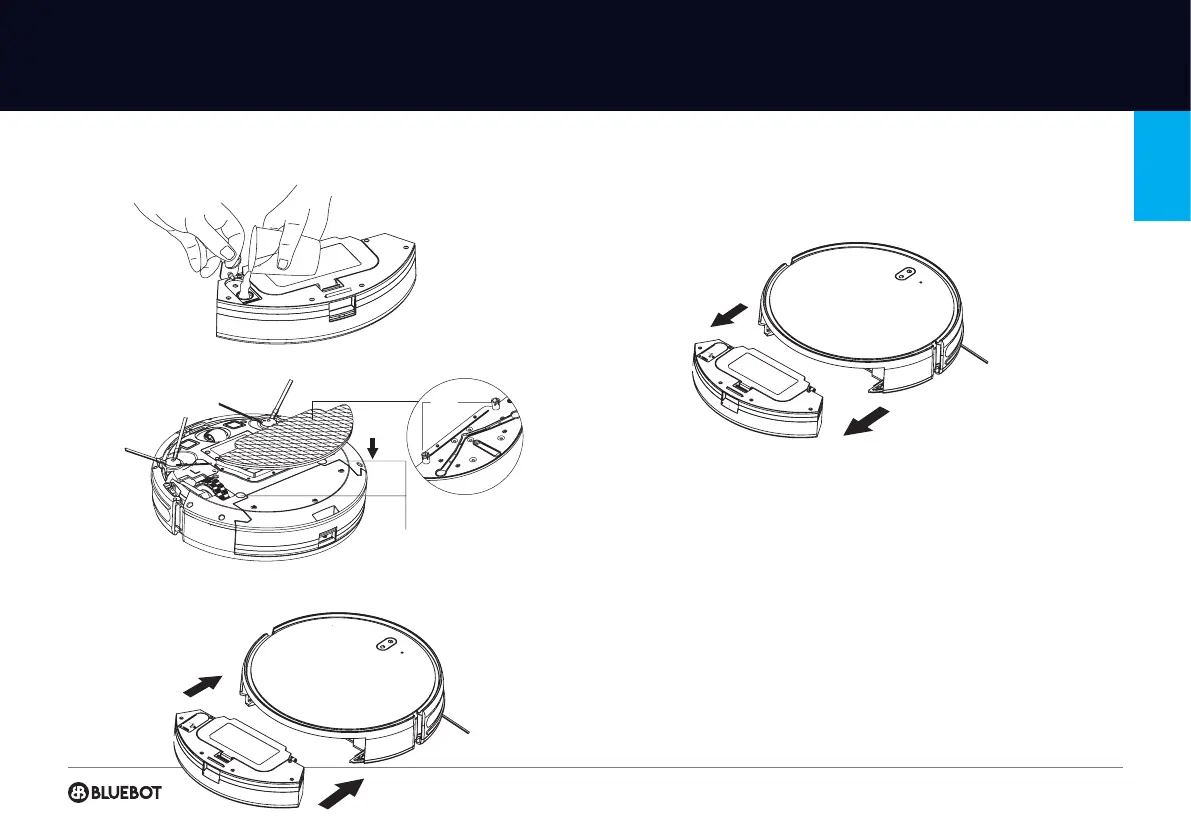
INSTALLATION OF MOPPING MODULE
1 Fill the water tank: uncap the cover and ll with water.
2 Paste the mopping cloth at onto the bottom of the water tank.
3 Press and hold the button in the middle of the tank and push it horizontally along
the rear of the robot. The module is correctly in place correctly if you hear the
sound of a “click".
4 Remove the mopping module:
When the robot is nished working, press the button in the middle of water tank
to remove the mopping module backwards, empty the water tank and clean the
mopping cloth (do not move or turn the robot over during cleaning).
NOTES FOR MOPPING MODULE
• Please do not use the mopping module after it has been left unused.
• For safety reasons, please be sure to remove the mopping module when it is
being charged or left unused.
• Please do not mop the carpet. Set a forbidden area with a magnetic strip to
prevent the machine from going onto the carpet.
• To achieve a better mopping effect, the mopping module should be installed after
take out and reassemble the mopping module according to step 3. Please do not
move or turn the robot over, otherwise, it could fail in its positioning.
• The mopping function of the machine is intended for wiping and is not condu-
cive to deep cleaning. It cannot remove stubborn stains effectively and replace the
labour force.
• Please don't use any detergent in the watertank to prevent clogging.
• The robot cannot be used to remove liquids.
Back
fixation
Hole position of the mop module