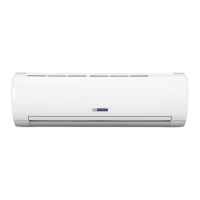
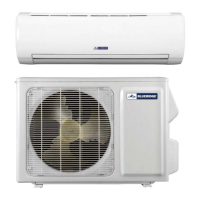
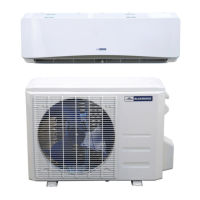
This document is an Owner's Manual for a Blueridge Split Air Conditioner with INVERTER technology. It provides original instructions for operation and installation of models BMKH09MCNS, BMKH12MCNS, and BMKH18MCNS.
The manual is divided into two main sections: "OPERATION INSTRUCTIONS" and "INSTALLATION INSTRUCTIONS."
Function Description:
The Blueridge Split Air Conditioner is designed to provide comfort through cooling and heating (for heat pump models) by absorbing heat from the room and transferring it outdoors, or vice versa. It utilizes INVERTER technology for efficient operation. The unit offers various modes including AUTO, COOL, DRY, FAN, and HEAT. It also includes special functions such as anti-freezing, defrosting, anti-cool wind, healthy and scavenging functions, Sleep mode (with customizable sleep curves), Turbo function for rapid temperature changes, and X-FAN for drying the indoor unit.
Important Technical Specifications:
- Models: BMKH09MCNS, BMKH12MCNS, BMKH18MCNS
- Fuse Link: T250 V; 3.15 A
- External Static Pressure Tested: 0 Pa
- Power Supply: Requires an all-pole disconnection switch with a contact separation of at least 3mm in all poles, connected in fixed wiring.
- Refrigerant Piping:
- Suggested shortest pipe length: 98 inches (to avoid noise and vibration).
- Standard connection pipe lengths: 16ft, 25ft, 26ft.
- Minimum connection pipe length: No limitation for 16ft standard pipe; 10ft for 25ft and 26ft standard pipes.
- Maximum connection pipe length varies by capacity:
- 5000 Btu/h (1465 W): 49 ft
- 7000 Btu/h (2051 W): 49 ft
- 9000 Btu/h (2637 W): 49 ft
- 12000 Btu/h (3516 W): 65 ft
- 18000 Btu/h (5274 W): 82 ft
- 24000 Btu/h (7032 W): 82 ft
- 28000 Btu/h (8204 W): 98 ft
- 36000 Btu/h (10548 W): 98 ft
- 42000 Btu/h (12306 W): 98 ft
- 48000 Btu/h (14064 W): 98 ft
- Additional Refrigerant Charging: For prolonged connection pipes beyond 32ft (from standard length), add 5ml of refrigerant oil for each additional 16ft of pipe. Additional refrigerant charging amount (g/m) varies by liquid pipe and gas pipe diameter, and whether it's an indoor or outdoor unit throttle, and cooling-only or cooling and heating models. For example, a 1/4" liquid pipe with 3/8" or 1/2" gas pipe requires 20g/m for indoor unit throttle (cooling and heating) and 15g/m for outdoor unit throttle (cooling only).
- Drain Pipe: Outer diameter 0.70in at connecting end, 8.66in long. Commercial rigid polyvinyl chloride pipe (general VP 20 pipe, outer diameter 1in, inner diameter 0.78in) is recommended for the drain pipe.
- Insulation Material: Polyethylene foam for refrigerant pipes, with a heat transfer rate of 0.041 to 0.052W/mK. Must withstand surface temperatures up to 110°C.
- Wiring: Wire ends should be stripped 0.6in. For wire lengths exceeding 10m, use 2.0mm diameter wires.
Usage Features:
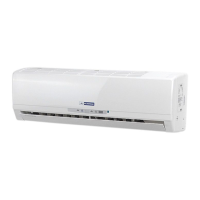
- Remote Control: A universal remote control with buttons for ON/OFF, temperature adjustment (+/-), MODE (AUTO, COOL, DRY, FAN, HEAT), FAN speed (AUTO, Low, Low-Medium, Medium, Medium-High, High), SWING (up & down), I FEEL (automatic temperature adjustment based on sensed temperature), Healthy/Scavenging functions, SLEEP (multiple modes including customizable DIY sleep curves), TEMP (display indoor setting or ambient temperature), QUIET (Auto Quiet, Quiet, Quiet OFF), CLOCK, T-ON/T-OFF (auto-ON/OFF timer), TURBO (rapid cooling/heating), LIGHT (display light ON/OFF), and X-FAN (indoor unit drying).
- Display: Features icons for fan speed, Turbo mode, signal transmission, healthy mode, scavenging functions, 8°C heating function, set temperature, X-FAN function, time, TIMER ON/OFF, child lock, up & down swing, left & right swing, and light.
- Temperature Display: Can show set temperature, indoor ambient temperature, or outdoor ambient temperature.
- Special Functions:
- Energy-saving Function: Activated by pressing "TEMP" and "CLOCK" simultaneously in COOL mode.
- 8°C Heating Function: Activated by pressing "TEMP" and "CLOCK" simultaneously in HEAT mode, maintaining 8°C (46°F) to prevent freezing.
- Back-lighting Function: Unit lights for 4s on first energization, 3s for subsequent presses.
- Child Lock: Activated by pressing "+" and "-" buttons simultaneously on the remote control.
- Indoor Unit ON/OFF Switch: A manual switch on the indoor unit for basic operation if the remote controller is missing. It cycles through AUTO (Cooling Only) at 77°F and AUTO (Heat Pump) at 77°F.
- Air Outlet Selection Switch: Allows selection of upper outlet only or automatic blow pattern.
- Energy Saving Tips: Set temperature not too low, adjust airflow for even distribution, close windows and doors, draw curtains to reduce heat load, and ventilate rooms periodically without excessive heat loss.
Maintenance Features:
- General Cleaning: Wipe indoor unit, outdoor unit, and remote controller with a dry soft cloth.
- Front Panel Cleaning:
- Open the front panel by sliding two stoppers inward.
- Remove the front panel by detaching the string and allowing it to fall forward.
- Clean with a soft cloth soaked in water and neutral detergent. Dry in the shade.
- Reattach by inserting into grooves and securing the string.
- Air Filter Cleaning:
- Open the front panel.
- Remove the air filter by pressing claws and pulling upward.
- Wash with water or vacuum. For heavy dirt, use neutral detergent in lukewarm water. Dry in the shade.
- Clean weekly for higher efficiency.
- Air-Purifying Filter Maintenance:
- Can be renewed by washing with water every 6 months. Replacement recommended every 3 years.
- Vacuum dusts. Soak in warm water for 10-15 minutes if heavily soiled.
- Do not remove filter from frame when washing. Shake off water and dry in the shade. Do not wring out.
- Replace by removing tabs on the filter frame. Dispose of old filter as flammable waste.
- Long Idle Period Preparation:
- Operate in "FAN only" mode for several hours to dry the inside.
- Turn off the breaker.
- Clean and re-install air filters.
- Remove batteries from the remote controller.
- Pre-Service Checks: The manual includes a troubleshooting guide for common issues like no operation, insufficient cooling, vapor/mist fume, and inoperative remote control, with possible causes and solutions.
- Installation Checks: After installation, a routine check ensures proper functioning, including verifying firm fixation, refrigerant leakage test, heat insulation, drain functionality, correct voltage, secure wiring, earth connection, specified power cord, and covered inlet/outlet.