The provided document outlines the installation instructions for a BMW Traffic Pro navigation radio retrofit kit, designed for BMW 5 Series Saloon (E39) and Touring (E39/2) models with a production date after September 2000. It is not compatible with cars equipped with SA358 (climate comfort windscreen). The kit is specifically for vehicles without an on-board monitor and either without SA663 (BMW Professional radio) with a production date after September 2000, or with SA663 (BMW Professional radio) with a production date after February 2001.
Function Description
The BMW Traffic Pro is a navigation radio system that provides navigation capabilities within the vehicle. It integrates with the car's existing electrical system to offer guidance and potentially other radio functions. The installation involves connecting various components, including an adapter cable, an aerial adapter, and a GPS aerial, to enable the navigation and radio functionalities. The system relies on a GPS aerial for location tracking and a tacho A signal for speed information, crucial for accurate navigation.
Important Technical Specifications
The retrofit kit includes several key components:
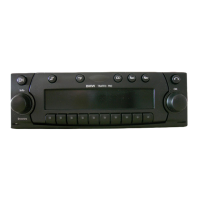
- Navigation Radio (1): The central unit for navigation and radio functions.
- Adapter Cable (A): A wiring harness that connects the navigation radio to the vehicle's existing electrical system. It features a black 16-pin plug casing (A1), a black 16-pin socket casing (A2), a red 20-pin socket casing (A3), an open cable end (A4), and blade terminal contacts (A5, A6) for specific signal connections.
- Aerial Adapter (B): Consists of a coaxial plug casing (B1) and a Fakra coaxial plug casing (B2) to connect the navigation radio to the car's aerial system.
- GPS Aerial (5): A magnetic aerial that receives GPS signals for navigation. It comes with a holder (6) and hexagonal screws (7) for secure mounting.
- Radio Retaining Pin (2): Used to secure the navigation radio in its slot.
- Double Insulation-Piercing Connectors (3): Two connectors for tapping into existing wiring without cutting.
- Cable Ties (4): Eight cable ties for securing wiring.
- Rattle Guards (8): Two guards to prevent rattling of connections.
- Radio Installation Trim (9): A trim piece for a neat finish around the radio.
- Installation Clips (10): Two clips for installation.
- Shrink Hose (11): For insulating connections.
- Owner's Manual (12): Provides operating instructions for the BMW Traffic Pro.
Connection Details:
- Adapter Cable (A):
- A1 (Black 16-pin plug casing) connects to the black 16-pin plug casing (X18126) in the centre console.
- A2 (Black 16-pin socket casing) connects to the navigation radio.
- A3 (Red 20-pin socket casing) connects to the navigation radio.
- A4 (Open cable end, BL/GE wire) connects to the reversing light terminal on the standard wiring harness at the right A pillar, using a double insulation-piercing connector.
- A5 (Blade terminal contact, SW/WS wire) connects to PIN3 of the white 18-pin socket casing (X10113) on the instrument cluster (for high instrument cluster, SA 555).
- A6 (Blade terminal contact, WS wire) connects to PIN14 of the white 26-pin socket casing (X11175) on the instrument cluster (for low instrument cluster).
- Aerial Adapter (B):
- B1 (Coaxial plug casing) connects to the navigation radio.
- B2 (Fakra coaxial plug casing) connects to the coaxial Fakra aerial plug in the centre console.
Navigation Radio Chamber Connections:
- Chamber A: Speed signal (TAA), signal from reversing light, telephone mute, continuous positive (terminal 30), control output for automatic aerial/amplifier, light (terminal 58G), switched positive (terminal 15), earth (terminal 31).
- Chamber B: Speaker connections (rear right+, rear right-, front right+, front right-, front left+, front left-, rear left+, rear left-).
- Chamber C1: Line Out connections (rear left, rear right, low frequency earth, front left, front right, subwoofer LineOut).
- Chamber C2: Specific connection for CD changer.
- Chamber C3: Low frequency telephone input, earth telephone input, specific connection for CD changer, CD low frequency earth (AUX), CD low frequency left (AUX), CD low frequency right (AUX).
- Jack D: Radio aerial jack.
- Jack E: GPS aerial jack.
Usage Features
Once installed, the BMW Traffic Pro provides navigation functionality. The system is designed to be user-friendly, with an owner's manual provided for detailed operating instructions. The installation process ensures that the navigation radio integrates seamlessly into the vehicle's dashboard, maintaining the aesthetic and functional integrity of the car. The system is not diagnostics-capable and does not require coding, simplifying its setup after physical installation. Language selection and commissioning are guided by the enclosed operating instructions.
Maintenance Features
The document primarily focuses on installation rather than ongoing maintenance. However, it emphasizes the importance of proper installation to ensure longevity and correct functioning:
- Professional Installation: The navigation radio must be installed by a specialist workshop with the required special tools and manuals. This ensures that all connections are made correctly and safely.
- Cable Management: Cables and lines must not be kinked or damaged during installation and must be secured with cable ties to prevent wear and tear or interference.
- Rattle Prevention: Rattle guards are included to prevent noise from connections, contributing to a quieter cabin and protecting components from vibration-induced damage.
- Component Protection: Specific instructions, such as removing the flap and pins on the radio module holder and carefully sliding the radio into the shaft, are designed to prevent damage to the instrument panel and cables during installation.
- Post-Installation Check: The concluding work includes connecting the battery, completing the commissioning process, reassembling the car, and printing out the error memory, which serves as a final check for any issues.
The system's design, which does not require coding, simplifies troubleshooting related to software configuration, as any issues would likely stem from physical connections or component failures. The detailed wiring diagrams and connection overviews are crucial for accurate installation, which is the primary "maintenance" aspect covered in this document, aiming to prevent future problems.