3.3 Unpack and inspect
1. Place the carton in a convenient position with a fork-lift truck or a pallet truck.
2. Remove all packing materials.
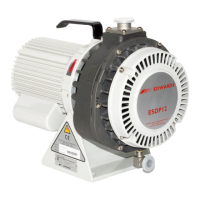
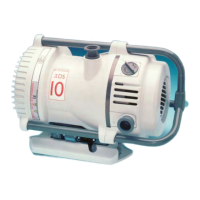
3. If the pump is an ESDP12, use the lifting-handle (Figure 1, item 4) to lift the pump from its
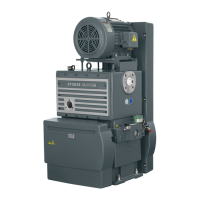
carton. If the pump is an ESDP30, attach suitable lifting-gear to the lifting eye (Figure 2,
item 4) and remove the pump from its carton; do not try to lift the pump by hand.
4. Remove all protective covers and inspect the pump. If the pump is damaged, notify your
supplier and the carrier in writing within three days; state the Item Number of the pump
together with your order number and your supplier’s invoice number. Retain all packing
materials for inspection. Do not use the pump if it is damaged.
5. If the pump is not to be used immediately, replace the protective covers. Store the pump in
suitable conditions as described in Section 6.1.
3.4 Reconfigure the ESDP30 pump (optional)
The ESDP30 pump is supplied with the inlet and outlet-flanges at the side of the pump (as shown
in Figure 2) to prevent blockage of the pump-inlet or outlet by the process gases pumped. If you
will only use the pump on a clean and dry process, you can move the inlet and outlet-flanges to
the top of the pump; refer to Figure 2 and use the following procedure:
1. Lift the pump into a vertical position so that it rests on the motor end-cover (15).
2. Undo and remove the four bolts which secure the fan cover (1) to the body of the pump.
Remove the fan cover.
3. Undo and remove the six bolts (9) which secure the body of the pump to the motor.
4. Lift the body of the pump clear of the motor. If you cannot lift the body of the pump off of
the motor, place two of the bolts removed in Step 3 in the jacking holes (11), then tighten the
bolts to push the body of the pump away from the motor.
5. Turn the body of the pump through 90
o
, so that the inlet and outlet-flanges are at the top of
the pump (that is, opposite the base-plate).
6. Ensure that the flexible coupling and the two locating dowels (8) are correctly aligned, then
lower the body of the pump back onto the motor shaft.
7. Turn the cooling-fan and check that the pump mechanism rotates smoothly. If you cannot
turn the fan easily, the body of the pump is not correctly aligned on the motor.
8. Use the six bolts removed in Step 3 to secure the body of the pump to the motor.
9. Use the four bolts removed in Step 2 to secure the fan cover to the body of the pump.
10. Turn the pump over so that it rests on the base-plate (13).
ESDP12 and ESDP30 Scroll Pumps 13