7
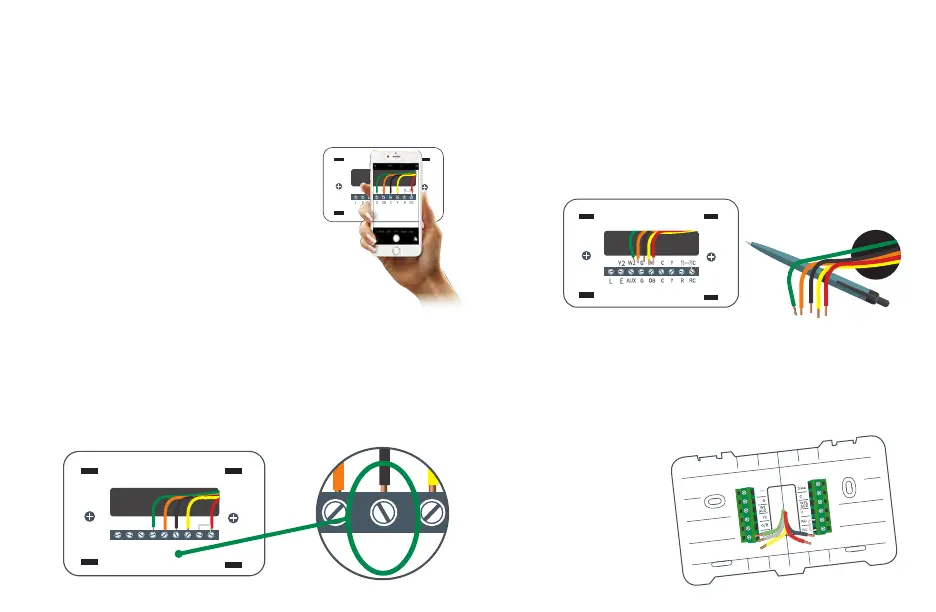
Take a picture of the existing wiring
Make sure that you can clearly read the terminal labels and see
which wires are connected to which terminals from your photo.
You will need to reference this photo
later during the initial setup.
Note: You can also use the wire labels
we have provided you to correctly
label each wire based on the terminal
where it is connected.
Step 4
Y2 W2 G W C Y R RC
EL AUX G OB C Y R RC
Confirm you have a C-wire connected
to your old thermostat wall plate
If you do not have a C-wire connected to your old thermostat,
please contact a professional or our support line for further
assistance to determine if the BCC110 Thermostat is compatible
with your system.
Step 5
Y2 W2 G W C Y R RC
EL AUX G OB C Y R RC
Y2 W2 G W C Y R RC
EL AUX G OB C Y R RC
Disconnect the wires from the old thermostat and
remove the wall plate using a screwdriver
Some thermostats will also require you to use a screwdriver to
disconnect the wires. After the wires are disconnected and the
wall plate removed, we recommend wrapping a pen or pencil
around the wires to prevent them from falling back into the wall.
Step 6
Step 7
Pull thermostat wires through the hole in the center
of the BCC110 wall plate and mark the location of
the mounting screws
It is recommended to use the BCC110 Wall Plate as a reference guide
to mark the mounting holes and ensure that all holes and
unpainted surfaces are
covered.