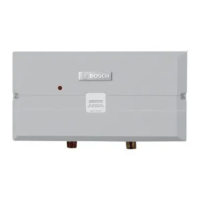
Installation instructions
C 950/C 1050 (Pro TL 175 C/199 C) – 6 720 805 440 (2019/10)
28
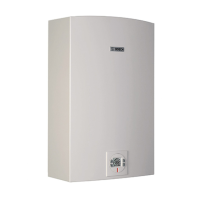
▶ Attach the combustion air inlet accessory to the top of the
unit fig. 19 (position 2) using the 3 screws and gasket
provided, and install 3" air intake pipe over the accessory.
Fig. 19 Inlet connection
NOTE: The combustion air accessory can be installed on the top
right or on the top left side of the heater. The combustion air
inlet that is not used must be kept sealed.
4.3.5 Connecting the condensate water drain
NOTICE:
Risk of appliance freezing!
▶ Failure to properly install condensate drain can damage the
appliance and will void the warranty.
NOTICE:
Risk of appliance freezing!
▶ Do not install condensate drain tubing in areas where it may
freeze.
The condensate must be disposed of in accordance with local
codes.
See chapter 4.11 “Filling the condensate trap”.
Use materials approved by the authority having jurisdiction. In
the absence of other authority, PVC, and CPVC pipe must
comply with ASTM D1785, F441 orD2665. Cement and
primer must comply with ASTM D2564 or F493. For Canada,
use CSA or ULC certified PVC or CPVC pipe, fittings and
cement, see table 5.
PP pipe must be certified under ULC S636.
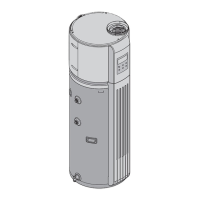
Appliance condensate drain installation
The appliance comes equipped with an internal condensate
drain and siphon. This drains condensation formed in the
secondary heat exchanger. Piping must be installed under the
condensate drain outlet on the water heater and piped for
disposal in accordance with local codes.
Fig. 20 Appliance drain installation
[1] Leave minimum ¼" air gap
[2] Trap required
[3] 1 ½" x ½" PVC reducer