Do you have a question about the Bosch DINION 5000 IP and is the answer not in the manual?
Explains safety symbols (DANGER, WARNING, CAUTION, NOTICE) and their associated risk levels.
Provides critical safety guidelines for cleaning, heat sources, object entry, lightning, controls, overloading, and power cables.
Highlights important operational and environmental notices, including accessory usage and photobiological safety.
Details regulatory compliance information for FCC and ICES, including device class and interference guidelines.
Contains copyright, trademark information, and general notices from Bosch Security Systems regarding product updates.
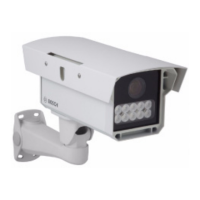
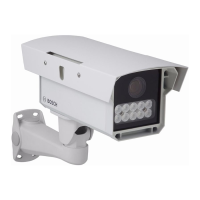
Lists all components included in the package for the DINION capture 5000 IP.
Specifies optimal capture distances and fields of view for accurate license plate recognition.
Guides on setting the camera's mounting angle for optimal recognition at various vehicle speeds.
Provides instructions for securely mounting the camera unit using appropriate hardware.
Details how to prepare the power input lead and Ethernet cable connections for the camera.
Step-by-step guide for connecting Ethernet, power, and ensuring watertight connections.
Instructions for temporarily connecting a monitor via coax for setup and testing purposes.
Explains how to insert and use a microSD card for storage and recording.
Guide on how to restore factory default IP address or firmware versions.
Details the feature that automatically adjusts camera settings for bright conditions.
Explains the function of the five keys used for navigating the camera's menu system.
Overview of the Install menu, including mode selection, lens wizard, and network setup.
Lists the necessary hardware and software requirements for connecting via a web browser.
Steps to connect to the camera via a web browser using its IP address.
Details how to set up and use password protection with different authorization levels.
Configuration for Radius server authentication for network access control.
Instructions for connecting the camera to a compatible H.264 hardware decoder.
Overview of the interface displayed after a successful connection, including LIVEPAGE, RECORDINGS, SETTINGS.
Displays live video and various status information from the camera.
Shows camera processor load and network information next to the Bosch logo.
How to view images, switch streams, and understand display stamping overlays.
Information on alarm input status and the operation of the relay output.
Accessing system and event logs for troubleshooting and status monitoring.
How to save individual images from the live video sequence in JPEG format.
Instructions for recording and saving video sequences from the live stream.
Indicates when a recording is in progress via a moving graphic on the Livepage.
Information regarding audio connectivity, noting that provisions are not available.
Accessing and playing back saved video sequences from storage media.
Features for controlling video playback, navigation, and setting bookmarks.
Overview of the basic configuration menu structure and how to save changes.
Settings for camera naming and password protection with service, user, and live authorization levels.
Configuring date, time, and time zone settings for accurate recording and synchronization.
Integrating the device into a network by setting IP address, subnet mask, and gateway.
Selecting profiles for encoding video signals based on different parameters.
Instructions for recording images from the camera to a storage medium.
Displays hardware and firmware information for troubleshooting purposes.
Overview of the advanced configuration menu containing all camera parameters.
General settings including identification, password, date/time, and display stamping.
Setting camera ID, name, and initiator extension for device identification.
Configuring passwords for service, user, and live authorization levels for access control.
Detailed settings for date format, device date/time, and time zone configuration.
Configuring overlays like camera name, time, and alarm messages on video images.
Customizing the web interface appearance, language, and logo settings.
Adapting web interface, changing company/device logos, and setting JPEG interval.
Customizing functions and information displayed on the Livepage.
Configuring the saving of event and system messages to a text file.
Main section for camera settings including modes, ALC, shutter, and image enhancement.
Selecting predefined operating modes for the camera, optimized for different conditions.
Adjusting Automatic Level Control (ALC) for video output levels.
Configuring shutter speed (Fixed/AES) and Automatic Gain Control (AGC) for image optimization.
Settings for image enhancement features like dynamic engine, sharpness, and noise reduction.
Defining profiles for video data transmission and compression settings.
Configuring H.264 and JPEG streams for data transmission and preview.
Defining areas on the video image to mask for privacy.
Settings related to audio input, output, and recording format (note: audio not available).
Settings for installer-specific features like test patterns and restoring defaults.
Managing and configuring recording settings, profiles, and storage media.
Activating and configuring storage media like iSCSI and local drives.
Defining and assigning recording profiles for different scenarios and streams.
Setting how long recordings are stored before being overwritten based on memory capacity.
Scheduling recording profiles for specific days and times, including holidays.
Displays current recording status and activity for information.
Configuring alarm triggers, connections, and responses.
Setting up camera responses to alarms and destination IP addresses.
Configuring integrated video content analysis features like motion detection.
Saving, loading, and managing VCA configuration profiles for testing.
Scheduling VCA analysis activation for specific weekdays and holidays.
Activating VCA based on external physical or virtual alarm triggers.
Configuring alarms based on audio signals (note: feature not available).
Setting up email notifications, including JPEG attachments, for alarm events.
Using scripts to define custom alarm functions and actions.
Configuring alarm inputs and relay outputs for triggering actions.
Setting up alarm triggers for camera inputs (NC, NO, None).
Configuring relay output behavior (Idle state, Select, Relay name).
Main section for network integration and settings, including access and advanced options.
Setting up IP addresses, DHCP, and network access for the device.
Advanced network settings including SNMP, authentication, and RTSP.
Configuring multicast streaming for simultaneous reception by multiple receivers.
Saving JPEG images to an FTP server at specified intervals.
Accessing encryption parameters for secure communication if a license is installed.
Maintenance and service operations, including firmware updates.
Procedures for updating firmware and performing general device maintenance.
| Lens Mount | CS-mount |
|---|---|
| Focal Length | 2.8 - 12 mm |
| Ingress Protection | IP66 |
| Lens | Varifocal |
| Lens Type | Motorized varifocal |
| Aperture | F1.4 |
| Minimum Illumination | 0.05 lux (color) |
| Day/Night | Yes |
| WDR | 120 dB |
| Video Compression | H.264, M-JPEG |
| Frame Rate | 30 fps |
| Network Interface | 10/100 Mbps Ethernet |
| Power Supply | PoE (IEEE 802.3af), 12 VDC |
| Operating Temperature | -30°C to +60°C (-22°F to +140°F) |