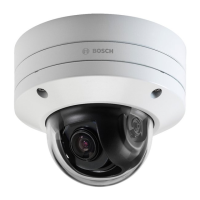
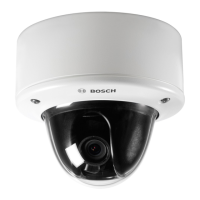
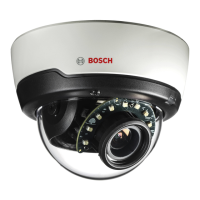
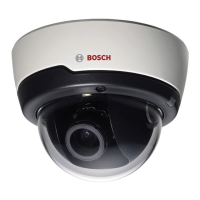
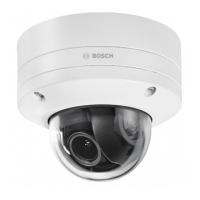
The FLEXIDOME IP starlight 6000 VR (NIN-63013 | NIN-63023) is a high-performance IP dome camera designed for clear image capture in various lighting conditions, including very low light. It offers exceptional starlight sensitivity, extended dynamic range, and vandal-resistant housing, making it suitable for both indoor and outdoor installations.
Function Description:
The FLEXIDOME IP starlight 6000 VR camera is designed to provide clear video images 24/7, even at night or in low-light conditions. Its exceptional starlight sensitivity allows it to capture detailed images with a minimum of ambient light. The extended dynamic range mode provides detailed images in scenes with challenging lighting. The camera is available in 1080p or 720p resolution versions and supports up to 60 images per second. The aesthetic vandal-resistant housing makes the camera suitable for indoor or outdoor installation.
The camera features and settings can be accessed and managed via a web browser, which offers a user-friendly interface for live viewing of multiple cameras, playback, forensic search, and export. The web browser is the primary method for using the camera, and Bosch download store provides several other free applications for viewing and controlling the camera. These include:
- Video Security Client: A free, easy-to-use video-surveillance application for local and remote monitoring of IP cameras and appliances. It supports up to 16 cameras.
- Bosch Video Client: A free Windows application to view, operate, control, and administer surveillance cameras and installations at remote locations. It offers a user-friendly interface for easy live viewing of multiple cameras, playback, forensic search, and export.
- IP Helper: A free PC application that helps detect Bosch cameras and devices on your network.
- Video security app: A mobile app that enables access to HD surveillance images, allowing users to view live images from any location. The app is designed to provide complete control of all camera functions, including panning, tilting, and zooming, and focus controls. It also supports dynamic transcoding features for playing back images over low-bandwidth connections.
The camera offers different application variants:
- Starlight mode (default): To continue viewing in color at very low light levels.
- Extended Dynamic mode: Simultaneously see details in very bright and very dark objects in the same scene.
Important Technical Specifications:
Power:
- Input voltage: Power-over-Ethernet (48 VDC nominal) and/or +12 VDC ±10% (auxiliary).
- PoE IEEE standard: 802.3af (802.3at Type 1).
- Power level: Class 3.
- Power Consumption: 7.2 W max.
- Current draw (PoE): 200 mA max.
- Current draw (12 VDC): 600 mA max.
Mechanical:
- Dimensions (D x H): 158 x 124 mm (6.22 x 4.89 in).
- Weight: 0.85 kg (1.87 lb).
- Weight with SMB: 1.28 kg (2.82 lb).
- Mounting: Flush mount or surface mount.
- Color: White (RAL9010) trim ring with black inner liner.
- Adjustment range: 360° pan, 90° tilt, ±90° twist.
- Dome bubble: Polycarbonate, clear with UV blocking anti-scratch coating.
- Trim ring: Aluminum.
Environmental:
- Operating temperature: -30 °C to +55 °C (-22 °F to +131 °F) for continuous operation; -34 °C to +74 °C (-30 °F to +165 °F) according to NEMA TS 2-2003 (R2008), para 2.1.5.1 using fig. 2.1 test profile.
- Cold start temperature: -20 °C (-4 °F).
- Storage temperature: -50 °C to +70 °C (-58 °F to +158 °F).
- Operating humidity: 5% to 93% relative humidity.
- Storage humidity: Up to 98% relative humidity.
- Impact protection: IK10.
- Water/dust protection: IP 66 and NEMA Type 4X (with appropriate installation standards).
Wiring (Cable tree):
- Red (26 AWC): +12 VDC.
- Brown (26 AWC): -12 VDC.
- Yellow / Green (24 AWC): Earth.
- Black / Brown (28 AWC): Alarm Out A.
- White / Orange (28 AWC): Alarm Out B.
- White / Violet (28 AWC): Ground (Alarm In).
- Orange / Violet (28 AWC): Alarm In 1.
- Violet (28 AWC): Alarm In 2.
- White (28 AWC): Audio In.
- (Shield) (28 AWC): Ground (Audio).
- Black (28 AWC): Audio Out.
- BNC connector: CVBS analog.
Usage Features:
Installation:
The installation process involves several steps:
- Preparation: Remove the outer dome, inner dome, and camera module. Store the domes in a safe place to prevent scratching. Remove the desiccant sachet from its storage slot in the camera and dispose of it environmentally.
- Local storage: The camera supports local storage on memory cards for alarm recording. Slide the memory card into the slot and press it firmly until it latches.
- Wiring: Connect the necessary wires for power (PoE or auxiliary 12 VDC), alarm inputs/outputs, audio input/output, and CVBS analog video. Ensure proper surge suppression on network/video/power/audio/data/alarm cables.
- Mounting:
- Flush mount: Mark the recess hole and three mounting holes. Drill an 8 mm (0.31 in) bit to drill the three mounting holes and insert supplied mounting plugs. Secure the camera module to the ceiling using the supplied screws.
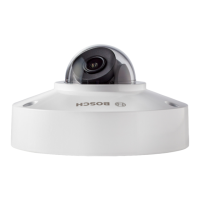
- Ceiling with SMB-IP: Attach the camera to a Surface Mount Box (SMB). Use the SMB to mark the cable hole and mounting holes. Drill an 8 mm (0.31 in) bit for the three mounting holes and insert supplied mounting plugs. Secure the SMB to the surface. Feed the Ethernet RJ45 cable through the ceiling into the SMB. Remove the cover from the SMB cable conduit and slide out the rubber seals. Thread the Ethernet cables from the camera and source through the seals. Slot the seals into either end of the conduit. Connect the Ethernet cables inside the conduit using the supplied RJ45 shielded coupler. Close the cover on the conduit and position it inside the SMB. Feed the other camera cabling through the cable hole in the SMB. If IP66 water ingress protection is required, connect the camera cabling inside an IP66 approved box. Mount the camera to the SMB using the 3 supplied screws (M5x16mm torx).
- Camera positioning and field-of-view: Connect a monitor to the 2.5 mm jack using an optional monitor cable (S1460) or a CVBS signal. Apply power to the camera. After power-up, wait about 20 seconds. Press the Menu button to stop the IP video stream and enable the service video analog output.
- Pan: Rotate the camera module in the base to adjust horizontal view.
- Tilt: Loosen the two thumbwheels and swing the camera module between the wings to adjust vertical view. Tighten the thumbwheels to secure.
- Twist: Twist the camera module to align the picture shown on the monitor for tilted ceilings or sidewall mounting.
- Local set-up: Use the Menu button on the control panel to access the camera install wizard. Choose application variant, change image orientation, activate automatic back focus, and choose analog output. The zoom and focus are adjusted later via the dome bubble in the web browser.
- Mount inner and outer dome: Place the desiccant sachet inside the inner dome to prevent damp. Align the inner dome fin with the slot in the camera frame and gently click the inner dome into place. Check that the lens can move freely in the dome opening. Mount the outer dome by screwing in the 3 attachment bolts.
Connection via web browser:
To view the camera in a web browser:
- Start the Web browser.
- Enter the IP address of the unit as the URL.
- During initial installation, confirm any security questions that appear.
The default DHCP server IP address is 192.168.0.1.
Configuration:
The camera normally provides an optimal picture without further adjustments. However, settings can be configured via the web browser to access a menu to change camera settings such as user modes, passwords, picture settings, and network settings.
- Open the camera in the web browser.
- Click Configuration in the title bar.
- Select Camera >> Installer Menu from the side bar.
- Select the application variant before any other changes are made, as the camera reboots automatically and resets the factory defaults when the application variant is changed.
- Configure the parameters in other menus to suit the working environment (e.g., ID, passwords, date and time).
Maintenance Features:
Cleaning:
- Clean only with a dry cloth. Do not use liquid cleaners or aerosol cleaners.
- Do not install the device near any heat sources such as radiators, heaters, stoves, or other equipment (including amplifiers) that produce heat.
- Never spill liquid of any kind on the device.
- Take precautions to protect the device from power and lightning surges.
Lens cleaning:
It is important to keep the lens clean to ensure optimum performance. Dust, grease, or fingerprints should be removed from the lens surface.
- Remove dust with a blower-brush or grease-free soft brush.
- Wipe water drops off the lens with a clean soft lint-free cloth and dry the lens surface.
- Use special lens cleaning paper or cloth treated with lens cleaning fluid to gently wipe off any remaining dirt (wipe spirally from the lens center towards the edge).
Repair:
The unit does not contain any user-serviceable parts. Refer all repairs to suitable qualified specialists. Never open the casing of the unit.
Decommissioning:
- Transfer: The unit should only be passed on together with this installation guide.
- Disposal: Bosch products are developed and manufactured with high-quality material and components that can be recycled and reused. This symbol means that electronic and electrical appliances, which have reached the end of their working life, must be collected and disposed of separately from household waste material. Separate collecting systems are usually in place for disused electronic and electrical products. Dispose of these units at an environmentally compatible recycling facility, per European Directive 2012/19/EU.