Inspection and maintenance
55
Worcester 2000 – 6 721 814 551 (2019/09)
▶ Clean both baffles.
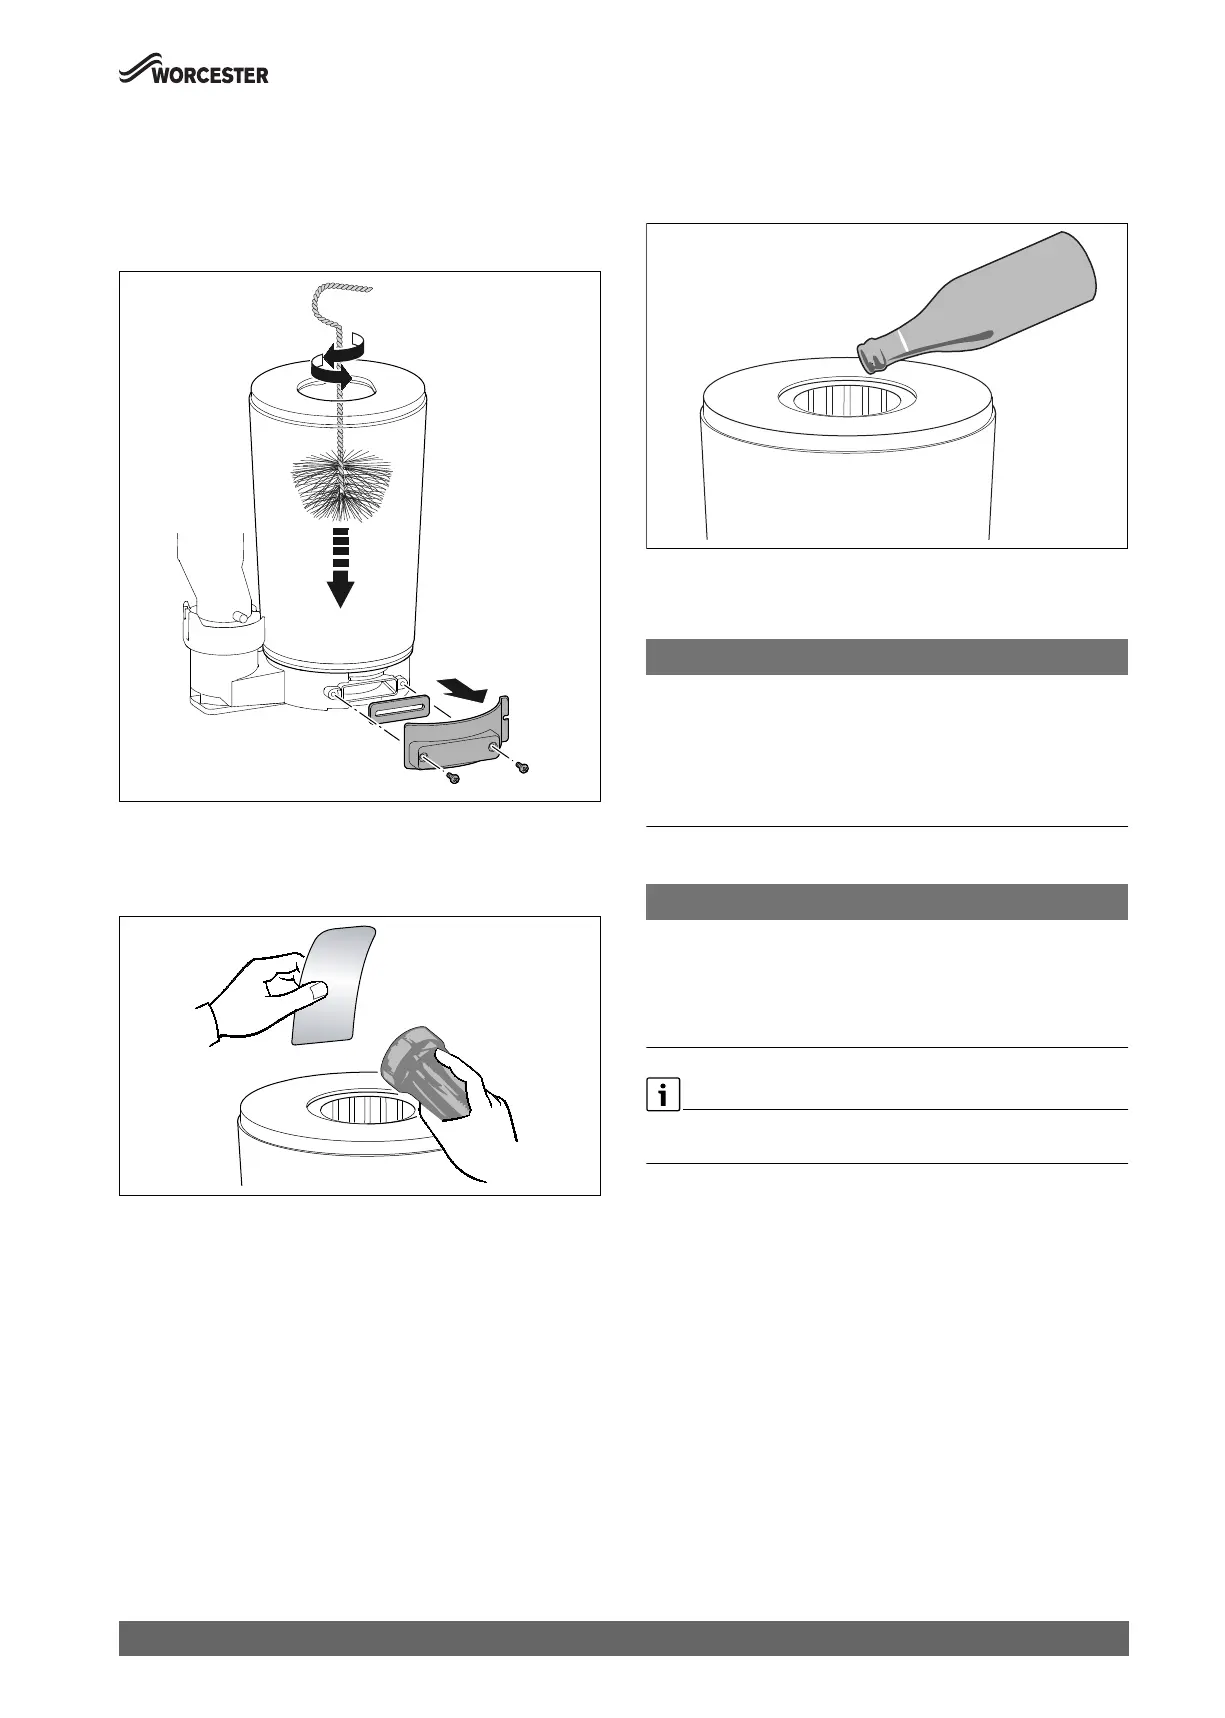
▶ Clean the heating block with the brush:
– by rotating in both directions
– from top to bottom up to the catch
▶ Remove the screws from the cover of the inspection aperture and
remove the cover.
Fig. 68 Cleaning the heat exchanger
▶ Vacuum out residue and close the inspection aperture again.
▶ The heat exchanger can be inspected for residue with the aid of a
torch and mirror.
Fig. 69 Checking the heat exchanger for residue
▶ Refit the baffles.
▶ Remove the condensate trap and place a suitable container
underneath.
▶ Rinse the heat exchanger with water from the top.
Fig. 70 Purge the heat exchanger with water
▶ Reopen inspection aperture and clean the condensation catch pan
and condensate connection.
NOTICE:
Material damage due to hot flue gas!
Hot flue gas can leak through defective gaskets, damage the devices and
endanger safe operation.
▶ Each time the burner is opened, replace the burner gasket
( Fig. 65, item [1]) and all other gaskets affected by the measure.
▶ Ensure that the gaskets are seated exactly.
▶ Check and adjust if required the gas/air ratio.
NOTICE:
Material damage due to chemicals!
Using chemicals during purging, cleaning the drain or carrying out
maintenance can damage the EPDM rubber materials. This can cause
exhaust gas to escape during operation.
▶ Do not use chemicals to purge the heating block.
On completion of the heat exchanger cleaning and reassembly, perform
the fan pressure test.
0010015928-002
0010002838-002
O
H
2
0010002797-002
 Loading...