Installation
pro.Bose.com
Installation Guide - 23
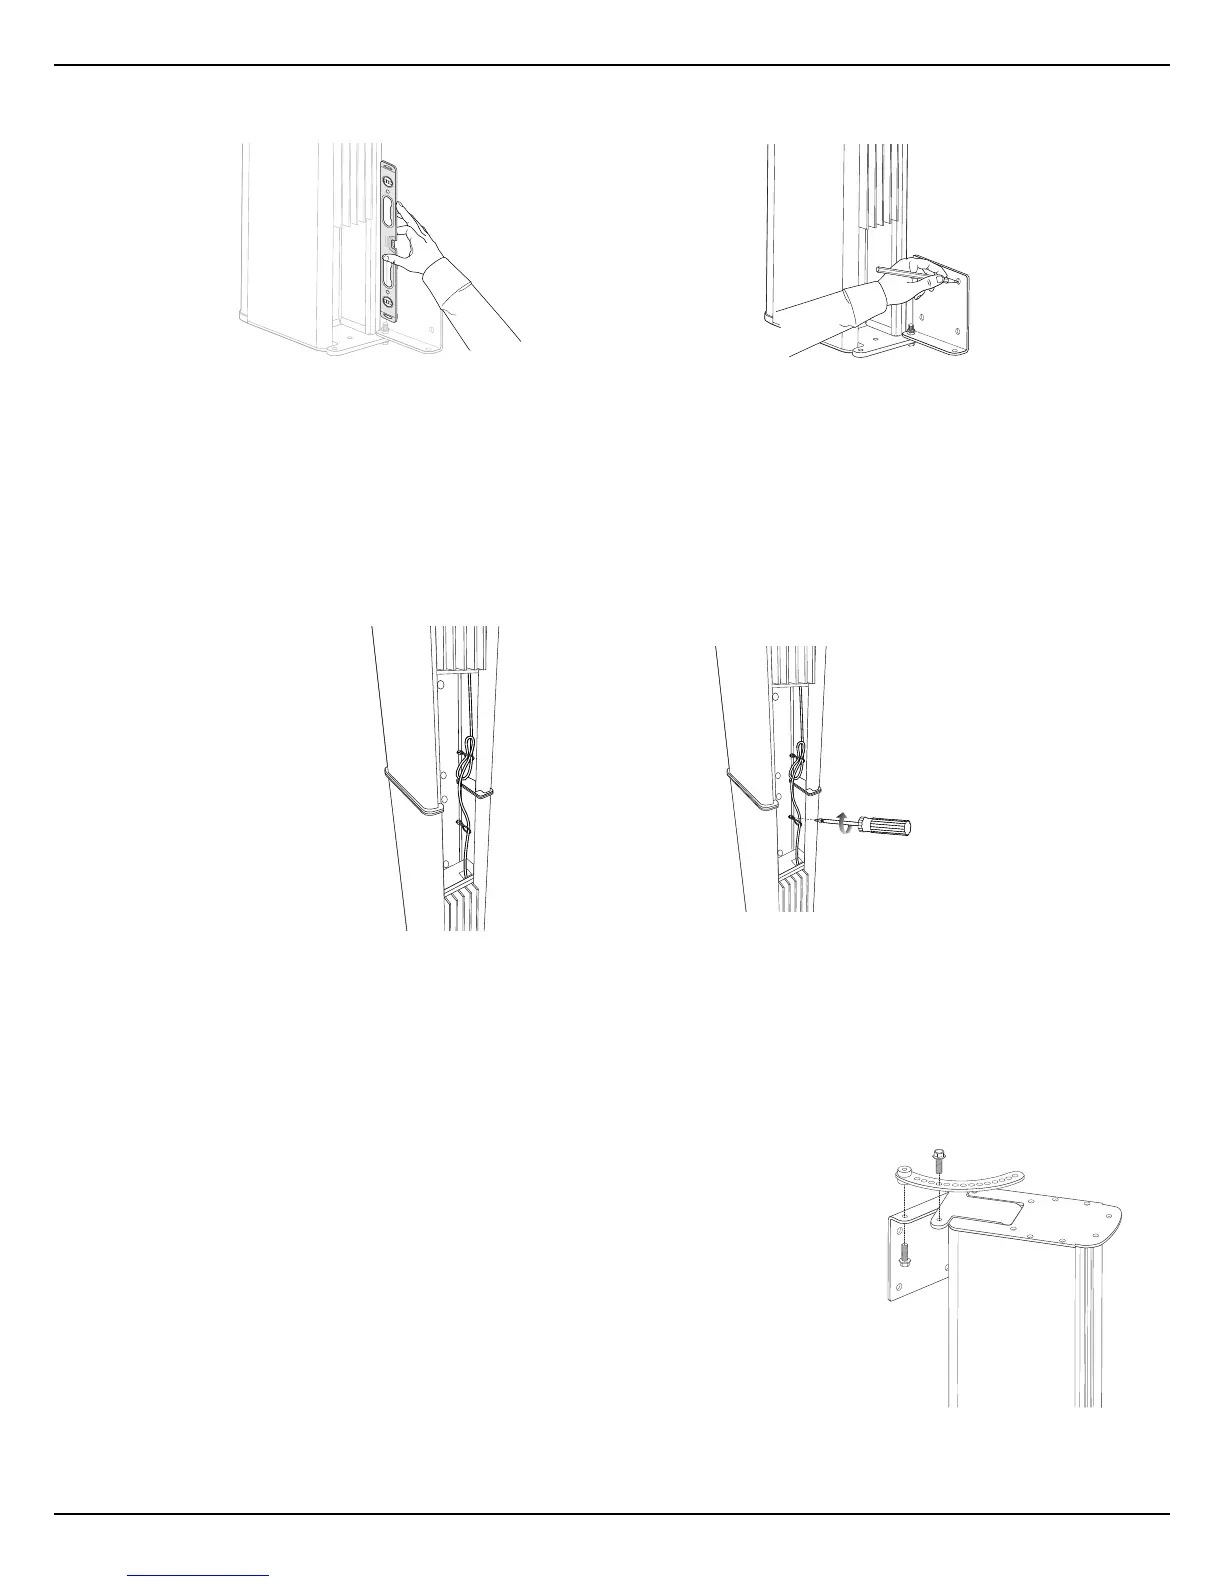
7. Use a level on the loudspeaker array to position the bottom wall bracket on the wall. Mark as needed for wall
mounting screws (not included).
8. Mount the wall bracket to the wall, using hardware appropriate for your application.
CAUTION: Ensure the mounting surface and the method of attaching the loudspeaker system to the surface
is capable of supporting the total weight of the system. Bose recommends a safety factor of 10:1.
Reattach MSA12X to wall brackets, including bottom screw and flanged nut.
9. For two- and three-loudspeaker assemblies, connect interconnect power and audio cables between units. For
more information, see Connector Panels on page 15.
10. Secure cables with the included zip ties and fasten with self-tapping screw into extrusion slot near the
interconnect bracket. It is recommended to screw the zip ties close to the power cable connection to ensure
that the power cable remains secure.
11. Connect field wiring and test loudspeaker operation. It is recommended to keep the loudspeaker assembly in
the 90 degree orientation until loudspeaker operation has been tested, to allow easier access the connection
panel and indicator lights.
12. Rotate the loudspeaker assembly into the desired position.
13. If installing the loudspeaker perpendicular to the wall, insert flanged head bolts into both holes on the
bottom wall bracket, to secure the loudspeaker bracket to the wall bracket. Place washers between the
loudspeaker bracket and the wall bracket.
If installing the loudspeaker at an angle that is not perpendicular to the
wall, attach the yaw bracket to the loudspeaker and wall bracket to lock
the speaker into position. The yaw bracket secures the loudspeaker array
into position, in 6° increments (from 12° to 90°).
a. Attach the yaw bracket to the wall bracket, using a flanged head bolt.
b. Attach the yaw bracket to the loudspeaker bracket, using a flanged
hex bolt.
14. Tighten the flanged head bolts and flanged nuts connected to the
loudspeaker brackets at the top and bottom of the array, using a torque
not to exceed 6.78 N-m (5 ft-lbs).
 Loading...