25
DISASSEMBLY PROCEDURE
4. Keypad PCB Removal
Note: The keypad assembly is held in place
by Pressure Sensitive Adhesive (PSA) strips
located under the keypad assembly.
4.1 Complete step 1.
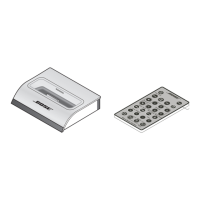
4.2 Figure 12. At the location shown, insert
the tip of a plastic tool, such as a spudger, be-
tween the keypad assembly and the cabinet.
4.3 Grasp the corner of the button pad, lift the
pad up.
Important Note: To avoid damage to the
cabinet, do not use the cabinet as a pry point
to remove the rubber pad.
4.4 Figure 13. Once a portion of the rubber
pad is released, grasp the rubber pad and pull
it across the unit lengthwise to release the
PSA.
4.5 Figure 14. Once the rubber pad is re-
moved. The Keypad PCB will be revealed.
Note: A replacement rubber pad must be
used due to the PSA no longer being sticky.
The rubber pad/keypad assembly part is
734172-0010/0020.
4.6 Figure 15. Remove the 2 screws securing
the keypad PCB.
4.7 Figure 16. Detach the FFC from the key-
pad assembly.
Figure 12. Keypad, Button Pad
Figure 13. Button Pad, Removal
Figure 14. Button Pad, PSA
Figure 15. Keypad, Screws
Figure 16. Keypad, FFC

 Loading...