118
1. Unplug the AC Adapter from the wall outlet and machine.
2. Using a #2 Phillips screwdriver, remove the 5 indicated screws (by
ovals) from each of the Rear Middle Pulley Shrouds and place them
outside the work area.
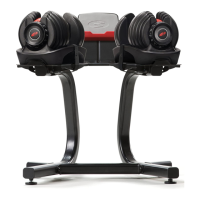
3. Using a #2 Phillips screwdriver, remove the two indicated screws from
the Upper Rear Shroud.
4. Remove the Upper Rear Shroud and place out of the work area.
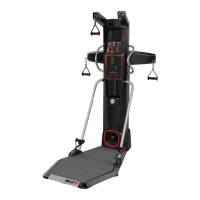
5. Using a #2 Phillips screwdriver, remove the six indicated screws (by
white ovals) from the Console Assembly.
Note: Be prepared to support the Console Assembly.
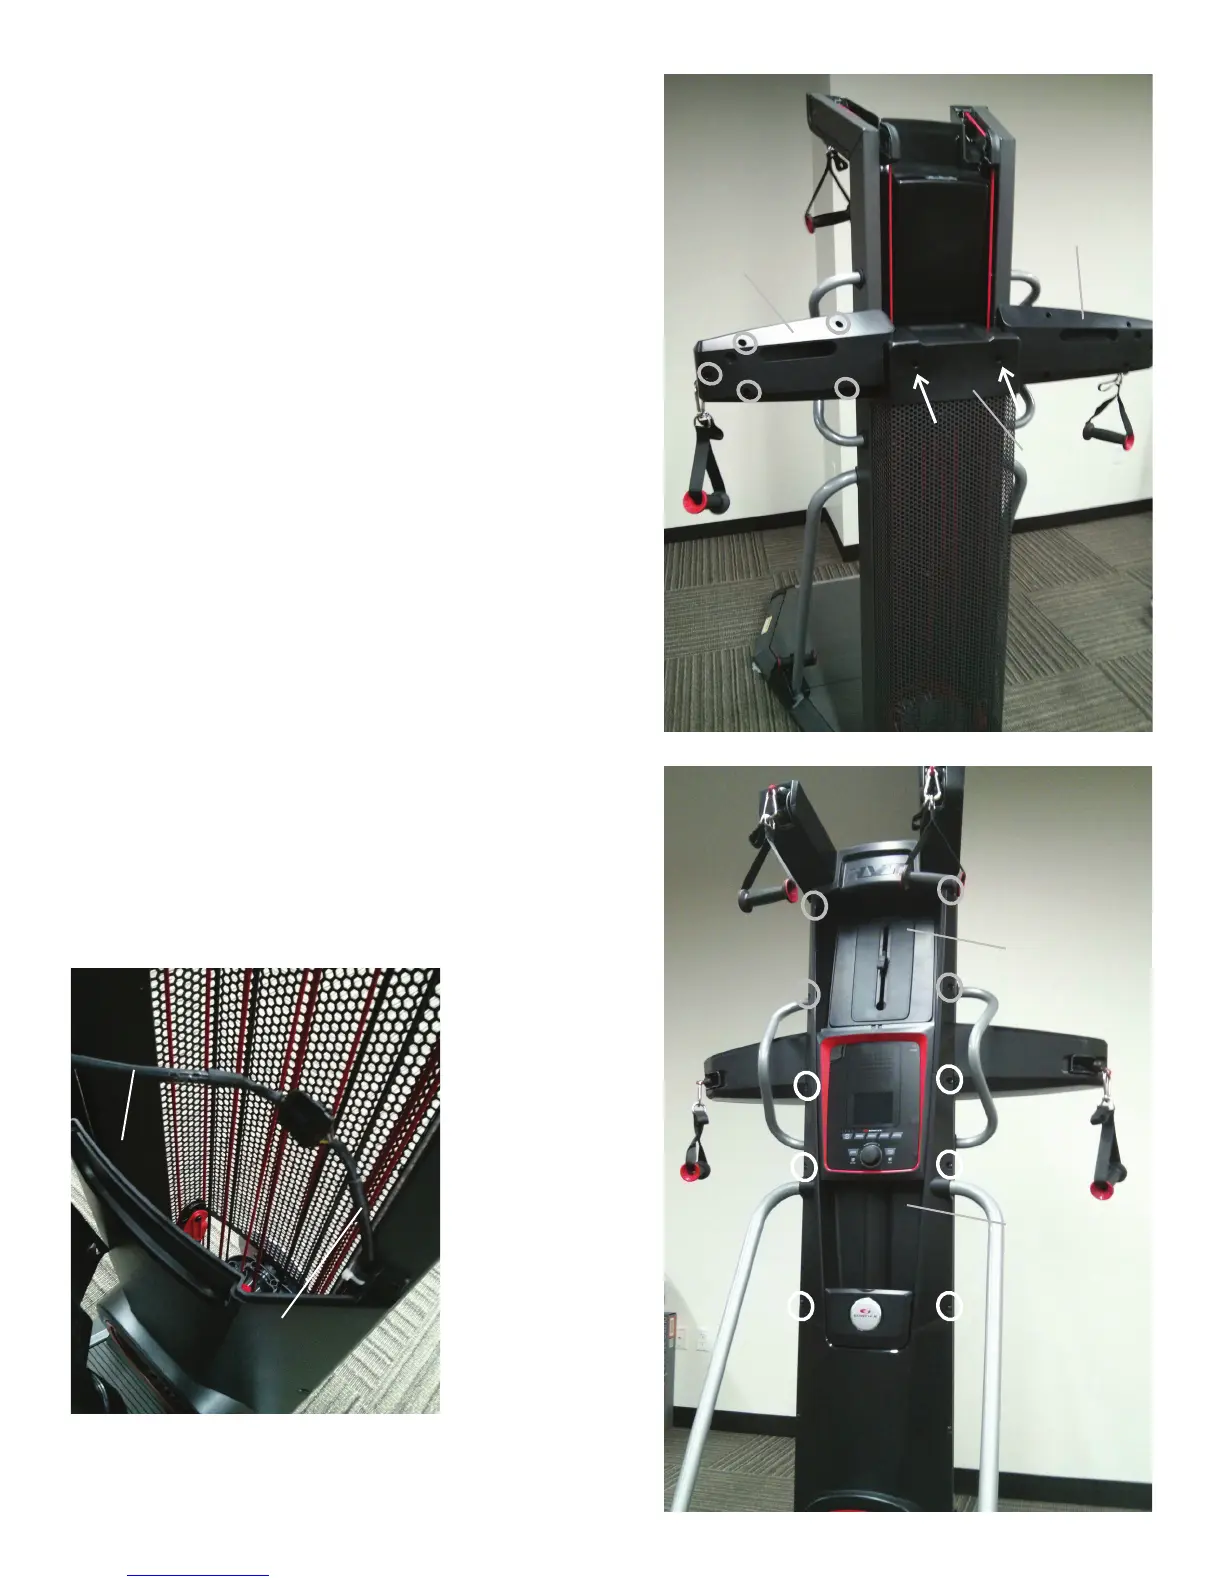
6. Slightly pivot the top of the Console Assembly out to expose the Con-
sole Cable.
Note: Be sure not to crimp the cable by supporting the Console Assem-
bly.
7. Disconnect the Console Cable from the Lower Cable and safely place
the Console Assembly out of the work area.
Console Cable
Lower Cable
Console Assembly
Upper Shroud
8. Using a #2 Phillips screwdriver, remove the four screws (by grey ovals)
from the Upper Shroud.
Note: Be prepared to support the Upper Shroud.
Upper Rear Shroud
Right Rear Middle
Pulley Shroud
Left Rear Middle
Pulley Shroud