135
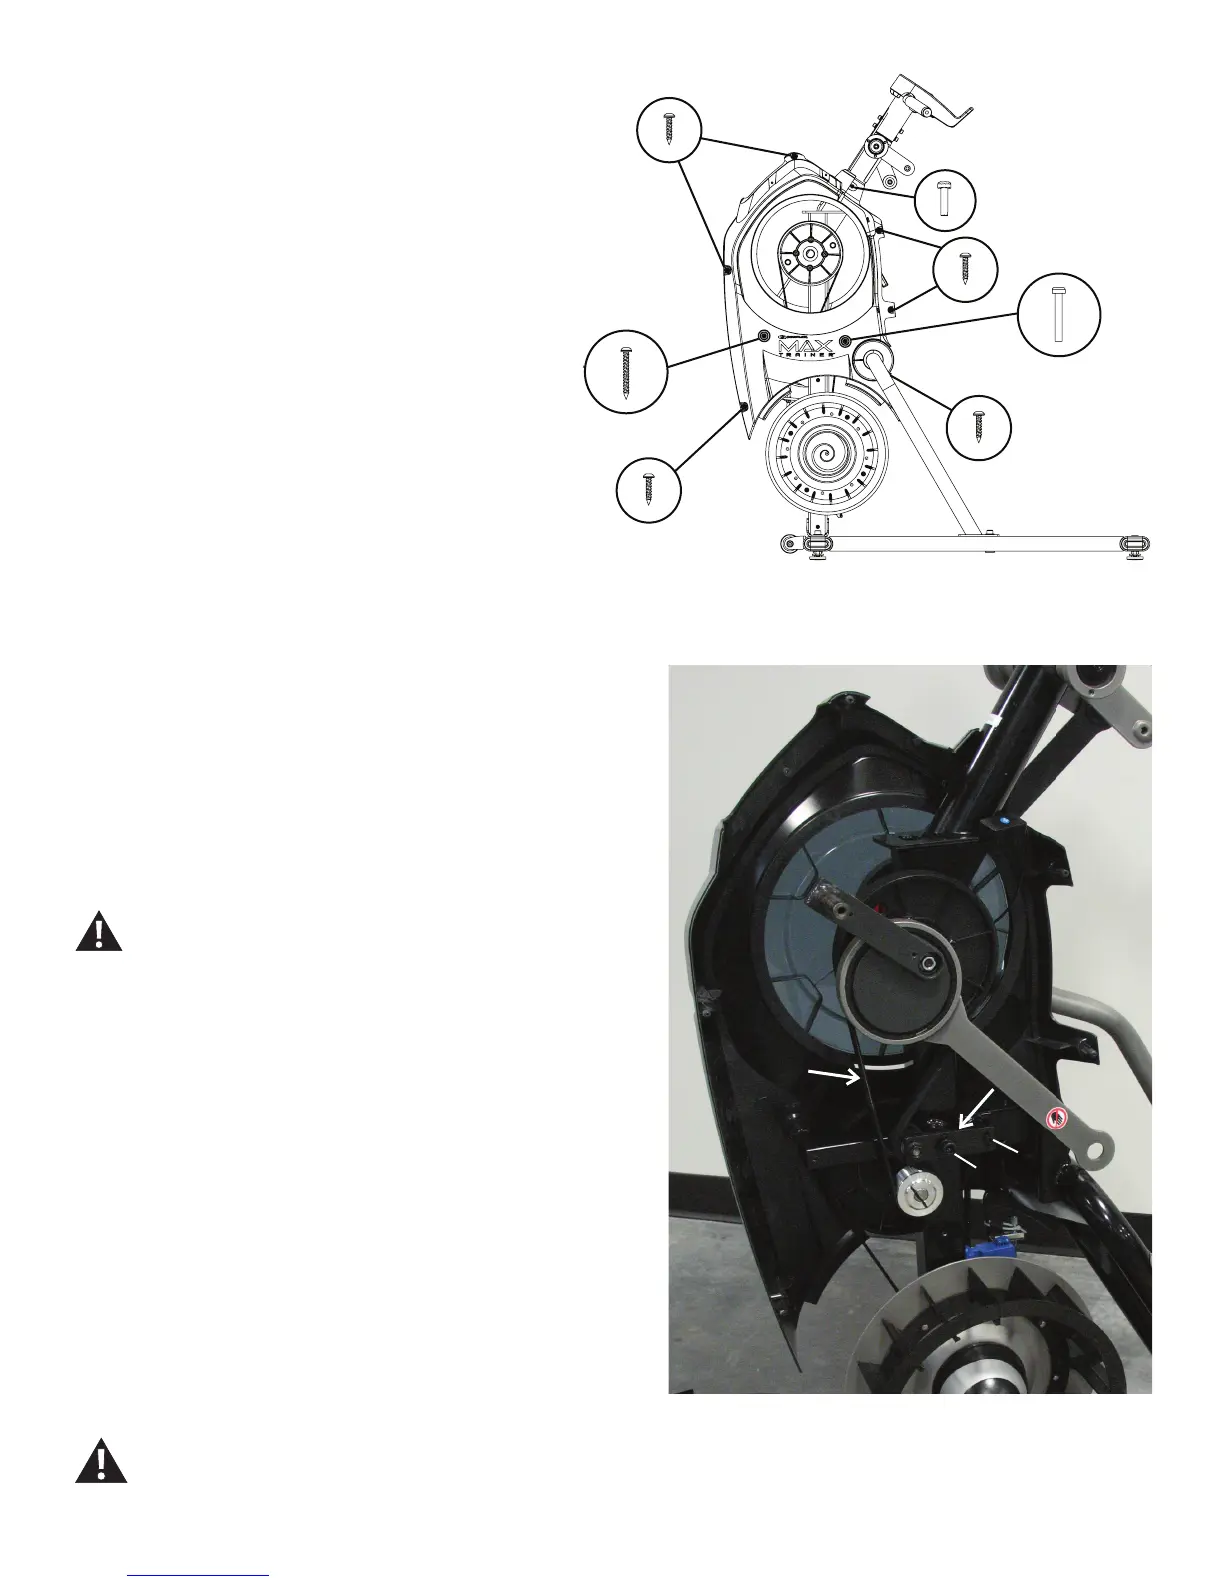
20. Using a #2 Phillips screwdriver, remove the screws from the Left
Shroud. ( 9 screws on the Left Shroud) Remove the upper screws
labeled ‘ * ’ last.
21. Observe the location of the “A” screw in the opening of the Tensioner.
This will help with re-assembly.
22. Using a 4mm hex wrench, remove the screw indicated by “A” from the
Tensioner.
23. Using a 8mm hex wrench, remove the screw indicated by “B” from the
Tensioner.
Keep ngers out of any pinch opportunities caused by the
Drive Belt.
24. Replace the old Tensioner with the new one by installing the “B” screw.
25. Adjust the new Tensioner so that the “A” screw can be tightened to
be in the same location from Step 22. This will correctly tension the Drive
Belt.
26. Re-assemble the machine in the reverse order of when the parts were
removed.
27. Final Inspection
Inspect your machine to ensure that all hardware is tight and components
are properly assembled.
Do not use until the machine has been fully assembled and
inspected for correct performance in accordance with the
Owner’s Manual.
*
Tensioner
Drive Belt
A
B