also be connected across the detector’s relay contacts so that these components actuate
simultaneously with the exhaust fans. However, do not exceed the maximum ratings of the
relays, (see page 6).
Please give special attention to the note on each wiring diagram. Jumpers JP5 and JP10 must
be in the proper configuration before power is applied or the ventilation system will not function
correctly. The factory default position for JP5 and JP10 is the “50/100” position. Therefore,
unless a two-speed motor starter is used, or a low-speed fan is to be off if a high-speed fan is
on, the ventilation wiring can be connected without opening the detector front panel cover.
JP5 and JP10 are located on the bottom, left edge of the control board (see figure 9 on page
43). To change the setting to “2-SPEED”, lift the shunt off JP5 and/or JP10 and move it one
pin towards the bottom. Then slide it back on the pins.
Connecting the External Alarm
The Brasch Gas Detector comes standard with an internally mounted alarm. If the target gas
concentration exceeds the High Alert level and remains there for more than 15 minutes, this
alarm will sound. There is also a set of external Alarm contacts that close at the same time.
These external contacts, “ALR COM” and “ALR NC”, can be used to trigger an alarm element
mounted at a remote location.
Figures 2, 3, 4, and 5 on pages 21 and 22 show typical alarm wiring.
Connecting the Voltage or Current Proportional Output
The Brasch GSE Generation 2 Gas Detectors include circuits that provide either a current loop
or voltage proportional output for each gas sensor. Each output produces a linear response
over the full scale range of the sensor. A detailed description of these outputs can be found
starting on page 27.
Applying Power For the First Time
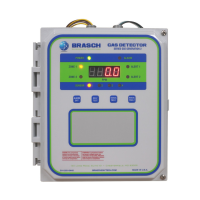
Once all the wiring connections are complete, the detector is ready for power to be applied.
The first 2.5 minutes after the power is turned on serves as a warm-up period. During this
time, the display will count down and the indicator LEDs will cycle in a circular pattern. At the
end of this warm-up period, the detector will begin to display the target gas concentration and
the appropriate LEDs will glow to indicate the active sensor and zone. In most cases, the gas
concentration will be “0.0”. However, if the target gas is present in the monitored area, the
display will indicate the actual concentration. After this warm-up period, the self-test feature
can be activated by pressing the “SELF TEST” button for approximately one second. The
detector will then enter the test mode.
IOM01
Rev 1.0 – December 22, 2020 18