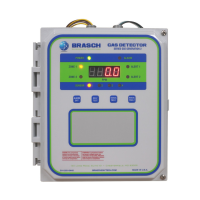
Adjusting the Settings
Sensor Number
The sensor number is set by SW1 on the right side of each sensor board using a binary
counting system. Digit 0 is at the top of the board and 1 is at the bottom. See figure 12 on
page 44 for proper settings. Each sensor comes preset from the factory with the correct
number assigned, so these switches should not be touched except for in very specific cases.
Please consult with the factory before reassigning sensor numbers.
Active Sensors
Each sensor can be made active or inactive by SW3 on the top, left of the control board.
Flipping the corresponding switch to the “ON” position will make that sensor active while
flipping the switch to the “OFF” position will make that sensor inactive. By default, all included
sensors will be set as active while any that are not in use will be inactive. These switches
should not need to be touched but may be used to disable a sensor if being repaired or
recalibrated.
Active Zones
Each sensor can be assigned to a zone on the control board by moving the corresponding
switch on SW4. Sensors with the switch in the bottom position will be assigned to Zone 1
while those with switches in the upper position will be assigned to Zone 2. To make a zone
inactive, move all switches to the opposite zone.
Zone Delay
The Low Alert delay time can be adjusted individually for each zone by the rotary switches
SW2 and SW9 on the bottom of the control board. Each of the eight positions has a number
corresponding to the number of minutes for the delay. Setting the switch to position 0 will
disable the delay timer for the associated zone.
Zone Alert
The Low Alert setpoint can be adjusted individually for each zone by the rotary switches SW1
and SW10 on the bottom of the control board. Each of the eight positions has a number
IOM01
Rev 1.0 – December 22, 2020 26
Note
Power to the detector must be turned off in order for any changes made to take effect.