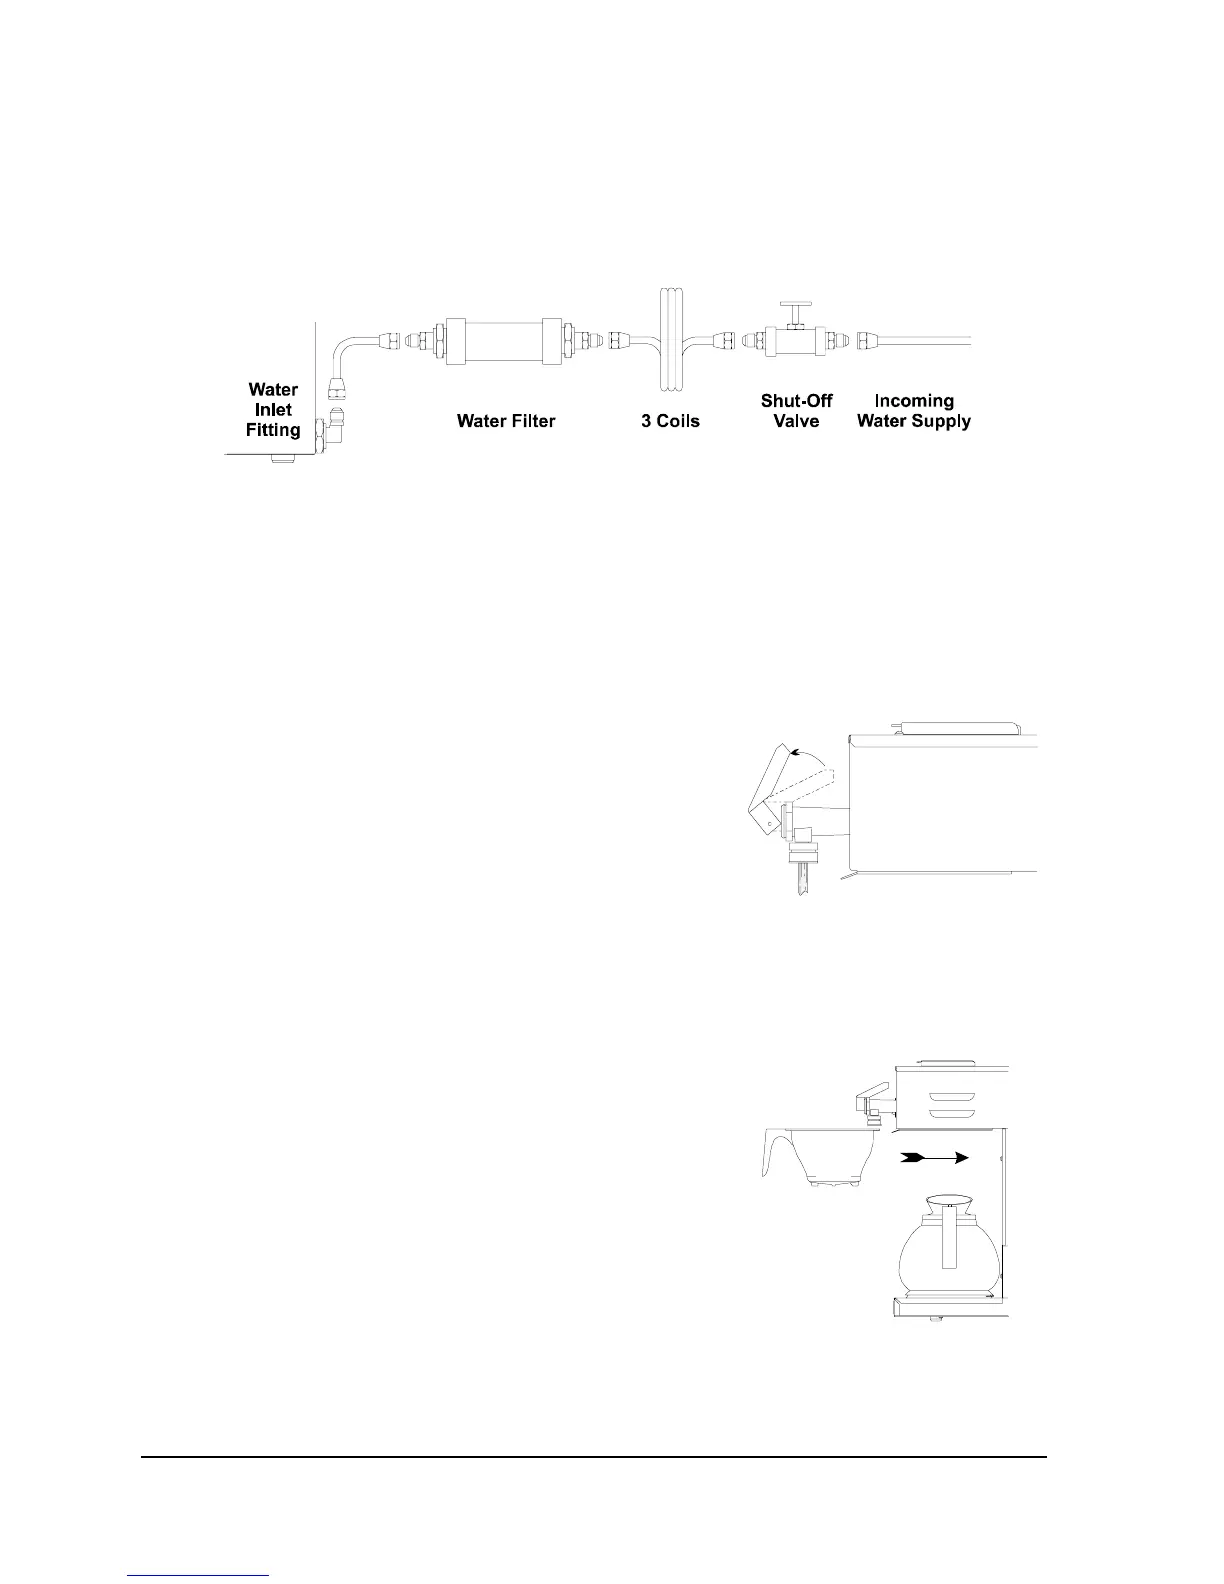
4. Form three coils of 1/4" OD copper tubing (not supplied). The coils will allow the coffee
brewer to be moved easily for cleaning or servicing.
Fig. 3. Typical water line connection.
5. After installing the desired components onto the incoming water line, flush the water line to
remove any impurities which may be present in the line, and to flush an inline water filter, if
installed. (If installed, read the in-line water filters manufacturers recommendations for
correct procedures for flushing the water filter.)
6. Connect the assembled water line onto the water inlet
fitting (Fig. 1, item 1) located on the rear of the coffee
brewer, and tighten the water line. To prevent damage
to the coffee brewers water inlet fitting, hold the inlet
fitting with a wrench when tightening the water line.
Fig. 4.
Opening the hot water faucet.
7. Turn on the water supply.
8. Pull out the hot water faucet handle (Fig. 4) to open the
faucet and flush the air from the faucet water line.
After the water flow has stabilized, check the faucet
flow. The flow rate should provide approximately five
ounces of water in 15-20 seconds. If the flow is
incorrect, adjust the flow as necessary. (See the
“Adjustment” section for adjusting the faucet.)
Fig. 5. Slide the brew cone in and put an
empty decanter on the warmer.
9. Check for water leaks at the water inlet fitting. Tighten
the fitting if necessary.
Filling The Water Tank:
10. Place the brew cone (Fig. 5) in the cone rails (Fig. 1,
item 5) and push the cone all the way in.
11. Place an empty decanter on the warmer under the brew
cone (Fig. 5).
Page 6
COMK211