Operating Instructions
Caution: Read these instructions completely before operating this coffee brewer.
Caution: Make sure the installation instructions have been followed before attempting to operate
this coffee brewer. Incorrect installation or operating procedures will void the warranty and may
cause damage to this coffee brewer.
Note: Before using glass decanters, please read the warnings that are supplied with the decanter and
the warnings that are printed on the side of the decanter.
Turning The Coffee Brewer On:
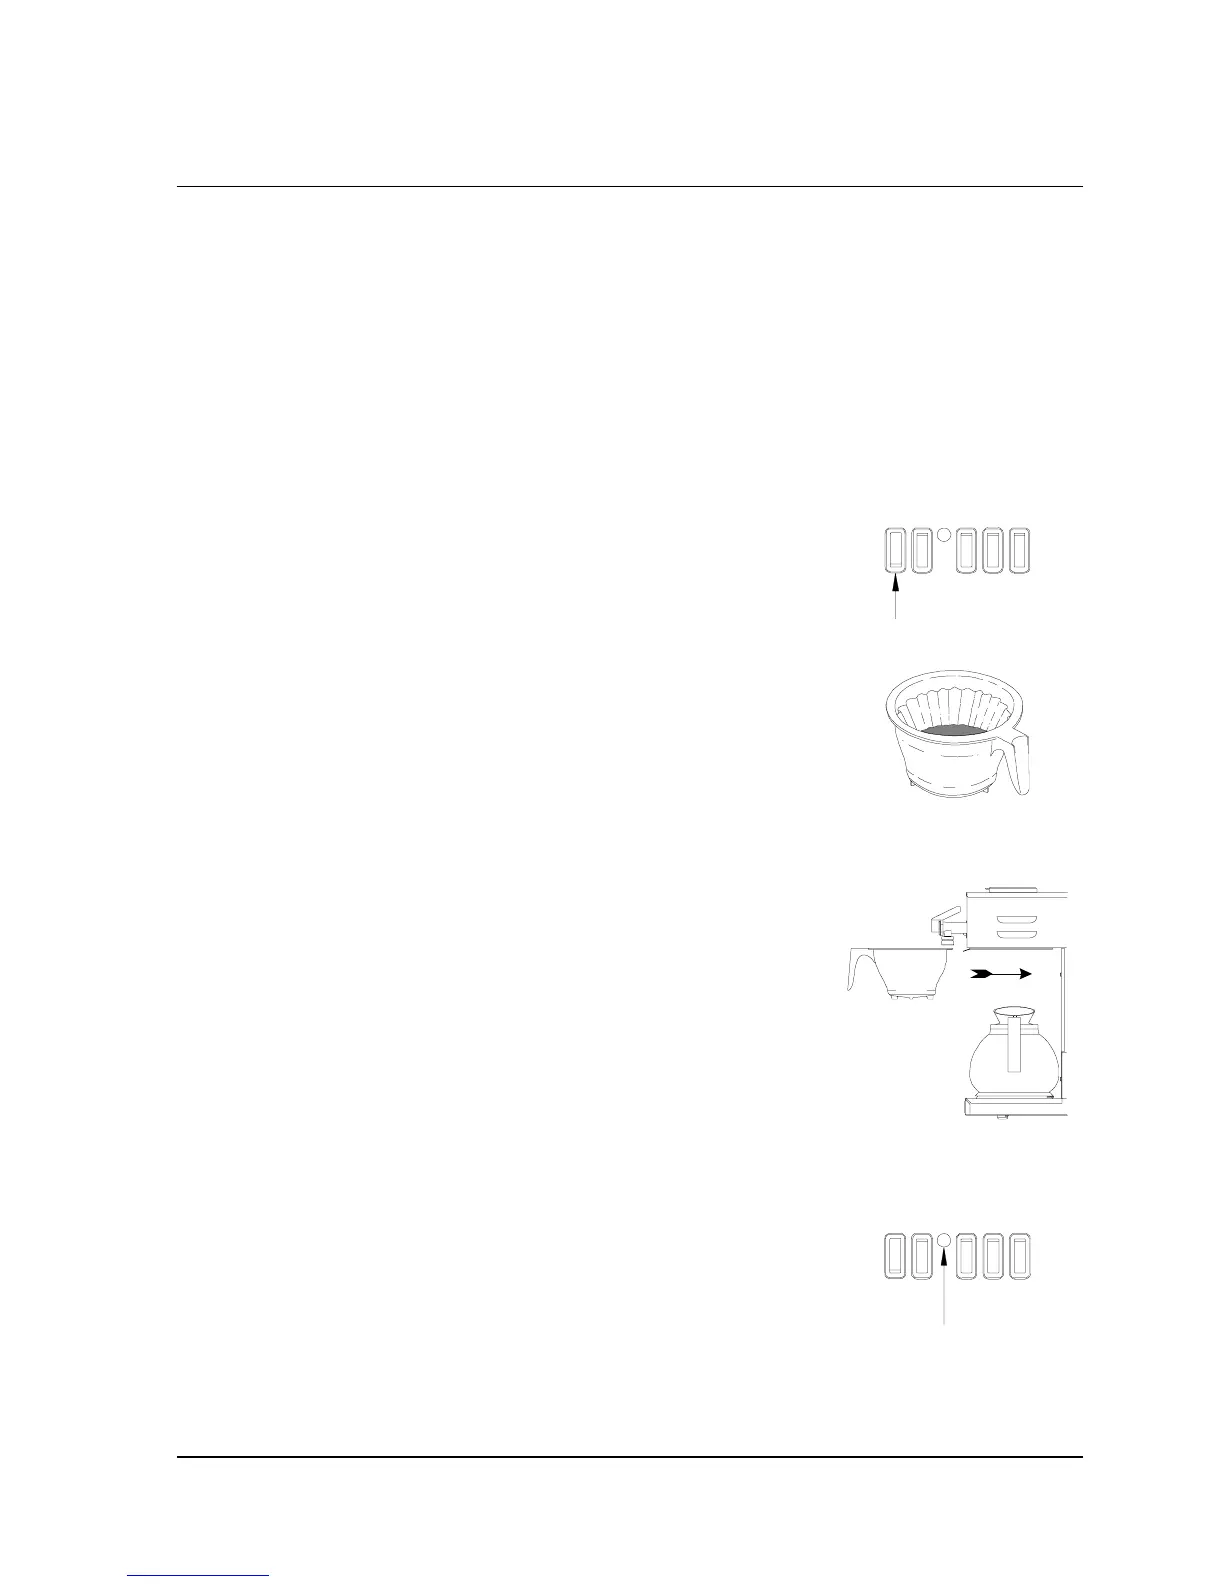
Fi
. 14. Power switch.
1. Turn the power on by pushing the "Power" Switch (Fig. 14) to
the on (up) position. The switch will light when it is on.
Preparing To Make Coffee:
Fig. 15. Brew cone with coffee
and paper filter.
2. Place a paper coffee filter into the brew cone. Add the desired
amount of fresh ground coffee into the paper filter(Fig. 15).
Note: To provide better extraction, gently tap the side of the
brew cone to level the bed of coffee in the brew cone.
Note: Individual coffee tastes vary greatly. If you are not
sure how much ground coffee you should be using, start with
approximately 2.5 ounces and then increase or decrease this
amount to suite your own coffee tastes.
Fig. 16. Slide the brew cone in
and place an empty decanter on
the warmer below it.
3. Place the brew cone, with coffee and filter, into the cone rails
(Fig. 16) and gently push the brew cone all the way in until it
stops.
4. Place an empty decanter on the warmer under the brew cone.
(Fig. 16)
5. Wait for the “Ready” light (Fig. 17) to come on.
Note: This will usually take approximately 20 minutes after
the power switch is turned on in the morning. At other times
during the day, normal recovery time will usually be less than
5 minutes.
Fig. 17. Ready light.
Note: For proper extraction and flavor, brew only when the
"Ready" light is on.
Page 9
COMK211