7
Assembly
Read entire operator’s manual before you attempt to
assemble or operate your new electric pressure
washer.
Your electric pressure washer requires some assembly but
is quickly ready for use. If you have any problems with the
assembly of your electric pressure washer, please call the
electric pressure washer helpline at (800) 743-4115. If calling for
assistance, please have the model, revision, and serial number
from the identification label available.
Tools Needed
• Philips screwdriver #2
Unpack Electric Pressure Washer
1. Remove everything from carton.
2. Ensure you have all included items prior to assembly.
Items Included in the Carton
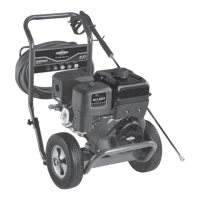
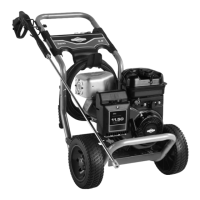
• Main unit with hose reel
• Handle with accessory tray
• Spray gun
• High pressure hose (on hose reel)
• Nozzle extension
• 7-in-1 nozzle
• Hose reel handle
• Parts bag (which includes the following):
• Screw
• Handle bolts (2)
• Plastic knobs (2)
• O-ring kit
• Nozzle cleaning tool
• Operator’s manual
• Owner’s registration card
Check all contents. If any parts are missing or damaged, call the
electric pressure washer helpline at (800) 743-4115.
Become familiar with each component before assembling the
electric pressure washer. Identify contents with the illustration
shown in Features and Controls.
Prior to Operation
1. Please fill out and send in the registration card.
2. Read and perform the following instructions while paying
close attention to all warnings and notices.
NOTICE For best performance, connect ONLY to water source
capable of supplying greater than 5 gpm (18.9 l) and no less
than 25 psi (1.72 bars) at the electric pressure washer end of
garden hose. Inspect all equipment, hoses and accessories
thoroughly before each use, DO NOT use if damaged.
• ONLY use branded accessories intended for use with this
product.
• For optimum performance, DO NOT use a garden hose that
exceeds 50 feet in length.
• Replace only with original equipment parts. To order, call
(800) 743-4115 or visit BRIGGSandSTRATTON.COM.
Assemble Handle to Hose Reel
1. Attach handle (A) to hose reel with screw (B). Tighten with a
#2 philips screwdriver.
Assemble Handle to Main Unit
1. Place handle (C) onto handle supports connected to main
unit. Make sure holes in handle align with holes on handle
supports.
2. Insert handle bolts (D) through holes from inside of unit
and attach a plastic knob (E) from outside of unit. Tighten
by hand.
Lubricate O-Rings
Lubrication of o-rings is extremely important for installation and
operation. The use of a lubricant (petroleum or synthetic grease)
during assembly helps seat o-rings properly and provides an
improved seal. It also helps protect the o-ring from damage by
abrasion, pinching or cutting and extends the life of the o-ring.
NOTICE ALWAYS apply a small amount of lubricant on o-rings
prior to assembling the garden hose to the pump (A), high pressure
hose (gun end) (B), nozzle extension (C) and spray gun(D).
Lubricate all connections shown below, following these instructions:
1. Inspect and clean connecting surfaces prior to lubrication and
assembly.
C
D
E
B
A
A
B
C
D